Imagine scrolling through real estate listings and stopping dead in your tracks because one property’s images pop with lifelike detail, bright windows revealing lush outdoor views without blowing out the sky, while cozy interiors glow with balanced shadows that feel warm and welcoming. That’s the power of natural HDR photography in action. High Dynamic Range (HDR) techniques merge multiple exposures to capture a scene’s full light range, making high-contrast areas like sunlit rooms or twilight exteriors look exactly as they do to the human eye. In this guide, we’ll dive into how to create natural HDR effects for real estate photos, from setup to final edits, ensuring your shots avoid that over-processed vibe and instead deliver authentic, inviting visuals that draw buyers in.
As a photographer who’s shot hundreds of properties over the years, I’ve seen firsthand how subtle HDR can transform listings. It tackles tricky lighting without artifacts, boosting appeal in ways single shots can’t match. Listings with professional HDR images attract more serious buyers and move faster off the market. In fact, high-quality photos like these can increase online views by 118% compared to standard images.
Whether you’re handling interiors with mixed lighting or exteriors under harsh sun, natural HDR keeps things realistic. By 2025, with AI tools streamlining workflows, anyone can achieve pro results. Let’s break it down step by step.
Why Choose Natural HDR for Real Estate?
Natural HDR stands out because it captures the full dynamic range of a property without introducing fake-looking elements. Unlike aggressive edits that amp up colors to cartoonish levels, this approach maintains subtlety, making spaces feel true-to-life and approachable. For real estate, where buyers want to envision themselves in the home, this realism is key.
Properties shot with HDR see massive boosts in engagement—homes with high-quality photography get 61% more views and sell 32% faster. It’s perfect for interiors where windows create stark contrasts, exteriors battling midday glare, twilight shots blending artificial and natural light, or even mixed setups like kitchens with overhead lamps and sunlight.
Compared to single exposures, HDR excels in challenging conditions by recovering details in highlights and shadows. Yet, it outperforms without the unnatural glow some methods add. Agents report faster sales by up to 50% when listings feature these balanced images. If you’re aiming to make properties irresistible, natural HDR is your go-to for authentic appeal.
Essential Gear and Preparation
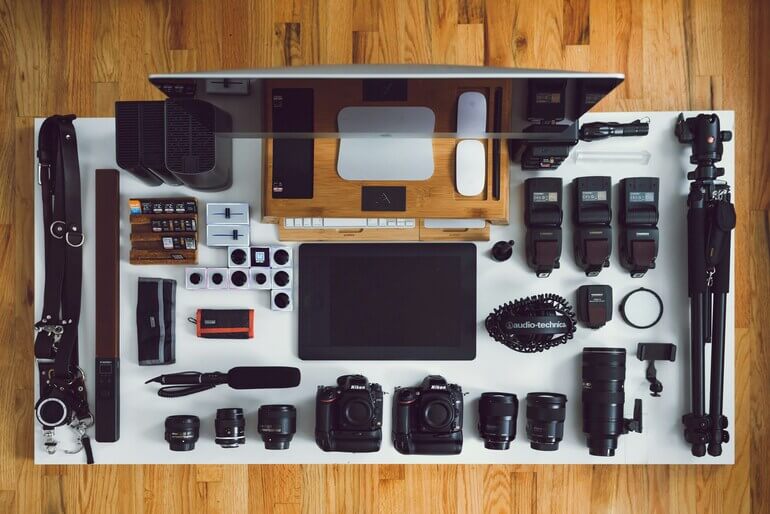

Start with the right tools to set yourself up for success in HDR real estate photography. A mirrorless or DSLR camera with Auto Exposure Bracketing (AEB) is essential—models like the Sony A7 series offer full-frame sensors for minimal noise in low light.
Pair it with a wide-angle lens, such as 16-35mm, to capture spacious views without distortion. Add ND filters for bright outdoor scenes to control exposure. A sturdy tripod and remote shutter release prevent shake and ensure perfect alignment during bracketing.
Prep your settings: Shoot in RAW format at ISO 100-200 for maximum detail, use Aperture Priority mode at f/8-11 for sharp depth, and set Auto White Balance as a starting point.
Plan ahead by scouting the property during golden hour for optimal light. Identify high-contrast spots like window-heavy rooms. This preparation cuts down on-site time and helps you nail natural results.
Here’s a quick gear checklist:
- Camera: Full-frame mirrorless (e.g., Sony A7 IV)
- Lens: Wide-angle zoom (16-35mm f/2.8)
- Tripod: Carbon fiber for stability
- Remote: Wireless to avoid camera movement
- Filters: ND for exteriors
Step-by-Step Shooting Bracketed Exposures
Capturing bracketed exposures forms the foundation of HDR real estate photography editing. Begin by setting up AEB on your camera—configure 3-5 shots at ±2 EV intervals, like -2, 0, +2 EV, to cover shadows, midtones, and highlights.
Compose your shot and stabilize everything on a tripod. Lock focus manually to keep it consistent across frames, and enable mirror lock-up or electronic shutter to minimize vibration.
Fire off the sequence in burst mode for efficiency. Check histograms on your camera’s LCD to ensure no clipping in extremes—this quick review saves editing headaches later.
For on-site efficiency, a bracket handheld for quick exteriors if you’re steady enough. In large spaces, burst mode speeds things up without sacrificing quality. Always shoot during soft light hours to enhance naturalism.
- Enable AEB and select intervals.
- Mount on a tripod and compose.
- Capture bursts and verify histograms.
- Adjust for movement if needed.
This method ensures your raw files are primed for seamless merging.
Post-Processing for Natural HDR Results
Once you’ve got your brackets, head to editing software for HDR real estate editing. Top choices in 2025 include Adobe Lightroom and Photoshop for precise control, Luminar Neo with AI assistance, or Photomatix for dedicated HDR merging.
Import your files and merge them—use auto-align to fix minor shifts and deghosting for elements like swaying curtains.
Apply tone mapping with natural presets to avoid halos; dial back local contrast for subtlety. Correct exposures by recovering shadows and highlights gently, then tweak white balance manually for neutral tones.
Make local edits: Dodge and burn on windows or furniture, masking edges for blends. Finish with light sharpening on textures and noise reduction in shadows, but don’t over-smooth.
Export as JPEG or TIFF after calibrating your monitor. For Photoshop users, layer masking adds finesse in HDR real estate photography editing in Photoshop workflows.
Tips to Avoid Common Pitfalls and Ensure Naturalism
Over-processing ranks as a top mistake in editing HDR real estate photos—limit saturation and vibrance to steer clear of unnatural colors; always reference the original scene for guidance.
Watch for artifacts like halos around edges; soften them manually or use AI tools such as Adobe Neural Filters for quick fixes.
Blend hybrid methods: Combine HDR with flambient (flash plus ambient) for tricky interiors, or opt for single-shot AI HDR for faster shoots.
In 2025, try advanced tricks like drone bracketing or apps such as PhotoPills for exposure predictions. Practice on test properties, and consider outsourcing to services like PhotoUp for high-volume work.
Common issues and fixes:
| Pitfall | Solution |
| Harsh halos | Reduce contrast in tone mapping |
| Color shifts | Manual white balance adjustment |
| Overexposure in windows | Selective dodging |
| Noise in shadows | Targeted reduction tools |
| Distorted lines | Shoot at chest height on a tripod |
These steps keep your HDR real estate photography tutorial outcomes looking pro and natural.
FAQs – Create Natural HDR Effects for Real Estate Photos
What is HDR real estate photography?
HDR real estate photography merges bracketed shots to balance light in high-contrast scenes, creating images that show details in both bright and dark areas naturally. It enhances listings by making properties appear more inviting.
How to do HDR real estate photography?
Set your camera to AEB for 3-5 exposures, shoot on a tripod, then merge in software like Lightroom. Focus on natural tone mapping to avoid artifacts.
How to edit HDR real estate photos in Photoshop?
Import brackets, use Merge to HDR Pro, apply natural presets, then layer mask for local adjustments like exposure and color corrections.
What software is best for HDR real estate photography editing?
Adobe Lightroom for batch processing, Photoshop for detailed edits, or Photomatix for specialized HDR tools in 2025.
Can I use Lightroom for HDR real estate?
Yes, Lightroom’s HDR Merge tool auto-aligns brackets and offers natural tone mapping, ideal for real estate workflows.
How to avoid over-processing in real estate HDR editing?
Stick to subtle adjustments, reference originals, and use presets sparingly to maintain a true-to-life look.
Final Thoughts – Create Natural HDR Effects for Real Estate Photos
Creating natural HDR effects for real estate photos boils down to smart shooting, careful editing, and avoiding common traps to deliver authentic images that captivate buyers. From bracketing exposures to fine-tuning in software, these steps elevate your listings with balanced, inviting visuals that speed up sales and boost views.
Ready to level up your real estate photography? Download free checklists from sites like Pixcretouch, or explore our real Estate Photo editing services for professional editing. Sign up for our newsletter today to get more tips and stay ahead in 2025 workflows—your next listing could sell faster than ever!
We offer up to 3 free image editing samples so that you can decide whether to take our services or not.