

Newborn retouching isn’t about perfection—it’s about subtlety, preserving the delicate textures and tones that tell a real story. Newborn pictures are among the most treasured possessions for a new mother. So mistakes should be the least.
In this guide, we’ll dive into the top mistakes in newborn photo retouching and share practical tips to sidestep them. From over-smoothing skin to mishandling colors, these errors can turn cherished images into something artificial. Drawing from years in the field, I’ve seen how gentle edits keep photos timeless. We’ll cover newborn editing mistakes, baby photo editing strategies, and newborn retouching tips to help you create galleries parents adore.
Newborns come with natural redness, flakes, and blemishes that fade quickly. Prioritize a light touch to avoid that “porcelain doll” effect. This approach keeps every image authentic and emotionally resonant.
Mistake #1 — Over-Retouching the Skin and Losing Natural Texture
Why over-retouching is a problem
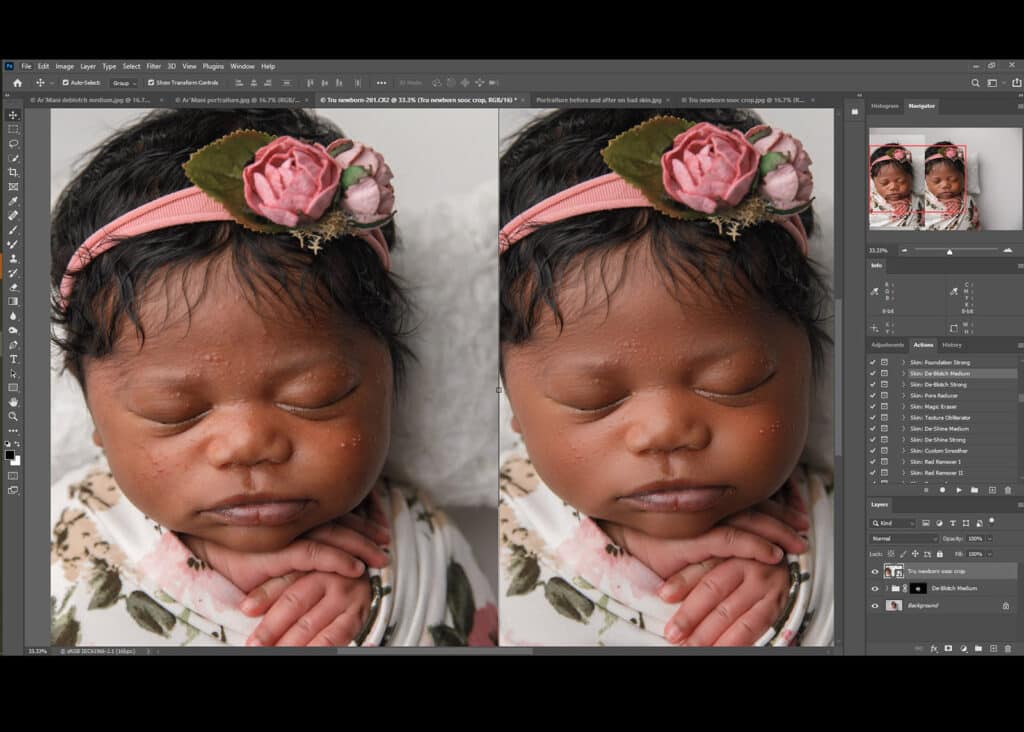
Over-Retouched vs. Natural Newborn Skin Texture
Newborn skin often shows temporary redness, dry flakes, or mild acne—these are normal and add to their authentic charm. But aggressive smoothing wipes out these details, resulting in a flat, unrealistic “porcelain doll” appearance. This over-editing disconnects the photo from the real baby, making images feel staged rather than heartfelt. Parents treasure those genuine traits, and erasing them entirely can diminish the emotional pull of the shot.
How to avoid it
Focus on removing only major distractions, like deep scratches or prominent blemishes. Use tools like Lightroom’s healing brush or Photoshop’s frequency separation for gentle smoothing that keeps texture intact. Start with low-opacity adjustments and zoom in to check realism. Pro tip: Run a quick batch edit with AI tools to handle basics, then refine manually for that natural glow. This keeps your newborn’s skin soft and true.
Mistake #2 — Incorrect Color Balance and Skin Tones
Common issues with color correction

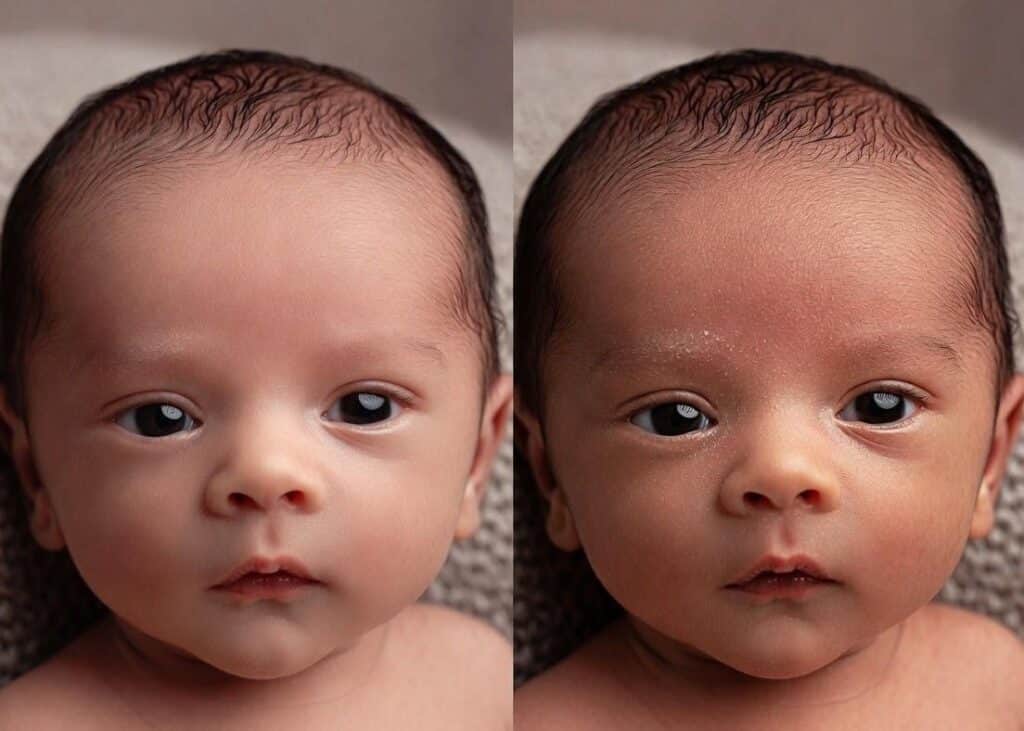
Newborn Photo with Poor Color Balance
White balance slips can turn skin muddy, overly red, or purplish, throwing off the whole image. This happens when lighting varies or presets overcorrect, leading to inconsistent tones that scream “edited” instead of “elegant.”
How to avoid it
Grab a gray card during the shoot for spot-on white balance from the start. In post, apply subtle tweaks via Lightroom’s HSL panel or Photoshop’s selective color—aim for warm, even tones without excess. Batch processing helps maintain consistency across your gallery. For purple hands or feet, use targeted actions at low opacity to blend naturally.
Mistake #3 — Poor Lighting Choices or Direction
Why harsh lighting harms newborn photos

Harsh Lighting Effects on Newborn Features
Direct, intense light casts sharp shadows that flatten delicate features and force heavy post-fixes for contrast. This washes out highlights, making edits tougher and results less flattering.
How to avoid it
Opt for soft, diffused sources like window light or a softbox positioned at a 45-degree angle for even coverage. In editing, balance shadows and highlights gently in Lightroom to enhance that soft glow without overdoing it.
Mistake #4 — Leaving Distracting Elements in the Background
Common background distractions
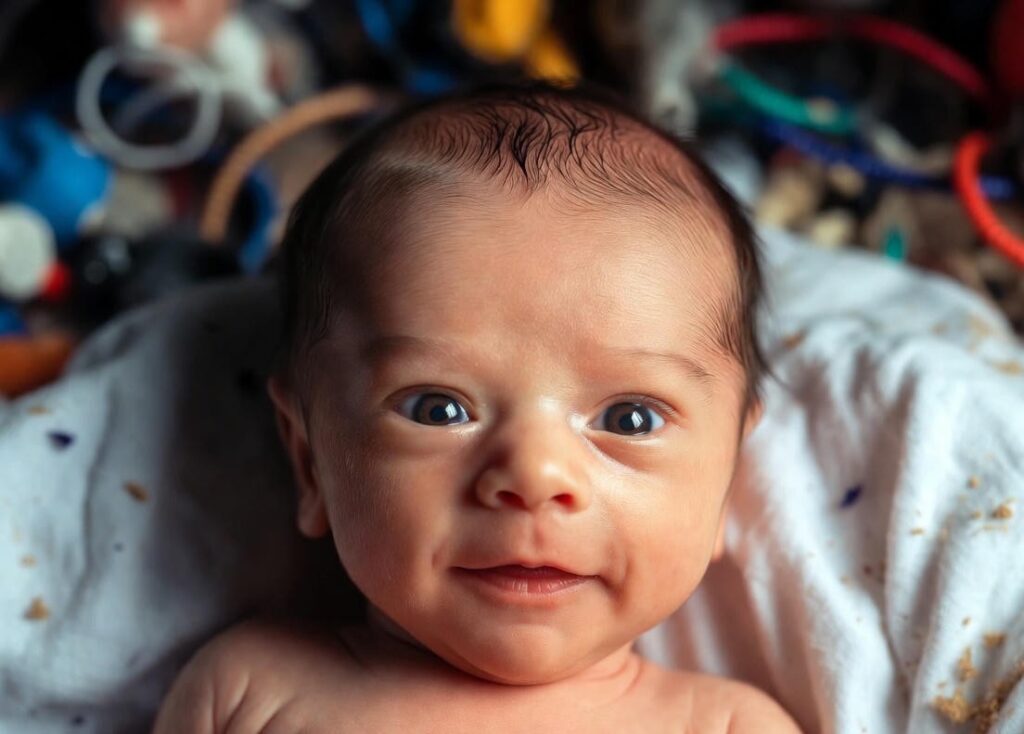
Distracting Background in Newborn Shoot
Wrinkles, lint, or stray props divert eyes from the baby, cluttering the frame and reducing professionalism.
How to avoid it
Prep your setup wrinkle-free beforehand. In post, deploy Photoshop’s clone stamp or content-aware fill for quick cleanups. Blur backgrounds slightly to keep focus sharp on the newborn.
Mistake #5 — Inconsistent Editing Across the Gallery
Why consistency matters
Varying styles or settings make your collection look patchy and unpolished, eroding trust in your work.
How to avoid it
Sync basics with batch edits in Lightroom, then tweak individuals. AI workflows can automate this for speed while ensuring uniform tones.
Mistake #6 — Over-Cropping or Incorrect Composition
Why cropping mistakes hurt photos
Hasty crops disrupt balance, chopping off key elements and limiting print options.
How to avoid it
Crop purposefully, centering the baby. Test ratios like 4:5 for portraits or 1:1 for social media—always preview at full size.
Mistake #7 — Neglecting Detail Shots
Why detail shots matter

Close-Up Detail of Newborn Toes
Skipping close-ups of toes or hair misses those irreplaceable details parents cherish.
How to avoid it
Shoot a mix, including macros for sharpness. Edit these with minimal retouch to highlight textures.
Mistake #8 — Forcing Unnatural Poses in Post-Processing
Why unnatural pose edits fail
Digital tweaks for risky poses look fake and raise safety concerns.
How to avoid it
Capture safe, comfy poses only. Use composites sparingly, with the client okay, sticking to natural flows.
Mistake #9 — Blowing Out Highlights or Overexposure
What over-brightening does
It erases details in skin and fabrics, creating a flat, lifeless vibe.
How to avoid it
Edit for balanced exposure, pulling back highlights and lifting shadows carefully for a natural shine.
Mistake #10 — Overdoing Accessories in Post-Processing
Why do too many props distract
Heavy edits on props overshadow the baby, cluttering the narrative.
How to avoid it
Choose simple props that complement. Edit them subtly to support, not steal, the spotlight.
FAQs On Newborn Retouching
What are the most common newborn retouching errors?
Over-retouching skin tops the list, followed by color imbalances and background distractions. These strip authenticity—focus on subtle fixes instead.
How can I improve newborn skin retouching?
Use low-opacity tools and preserve texture. Start in Lightroom for global adjustments, then Photoshop for details like removing reds gently.
What tips help with newborn photography editing consistency?
Batch process in Lightroom and use AI for baselines. This ensures even tones across sessions.
How to handle overexposure in baby photo editing?
Adjust highlights down and shadows up incrementally. Aim for detail retention without washout.
Why avoid over-editing poses in newborn images?
It creates artificial results and ignores safety. Stick to captured poses for genuine appeal.
Conclusion
Mastering newborn retouching means embracing subtlety—soft skin edits, balanced tones, and clean compositions keep images timeless and true. By dodging these top 10 pitfalls, you’ll craft galleries that capture a baby’s essence without overkill. Remember, the goal is enhancement, not transformation.