Your customer’s journey starts with their eyes. In e-commerce, a “clean” product image isn’t just a preference—it’s a psychological trigger. When a shopper looks at a pair of sneakers or leather boots, they are looking for reasons to trust the brand. Any speck of dust, a “limp” lace, or a distracting background creates friction.
Footwear is notoriously difficult to capture. Between the complex textures of suede, the reflective surfaces of patent leather, and the need for perfect symmetry, getting the shot right in-camera is only half the battle. This guide breaks down professional shoe photo editing techniques in Photoshop to help you transform standard product shots into high-converting assets.
Preparation: The “Before You Edit” Checklist
Before you even open a file, your workflow determines your final quality. High-end retouching starts with RAW files. Unlike JPEGs, RAW data allows you to recover highlights and shadows without introducing digital noise.
Technical Foundations for Web
- Color Profile: Always work in sRGB. While ProPhoto RGB is great for print, most web browsers and mobile screens use sRGB. Working in this profile ensures the color of the shoe on your screen matches what the customer sees.
- Physical Cleanliness: A 30-second wipe-down with a microfiber cloth saves 30 minutes of “healing” in post-production.
- Resolution: Aim for at least 2000px on the longest side to enable the “zoom” feature on platforms like Shopify or Amazon.
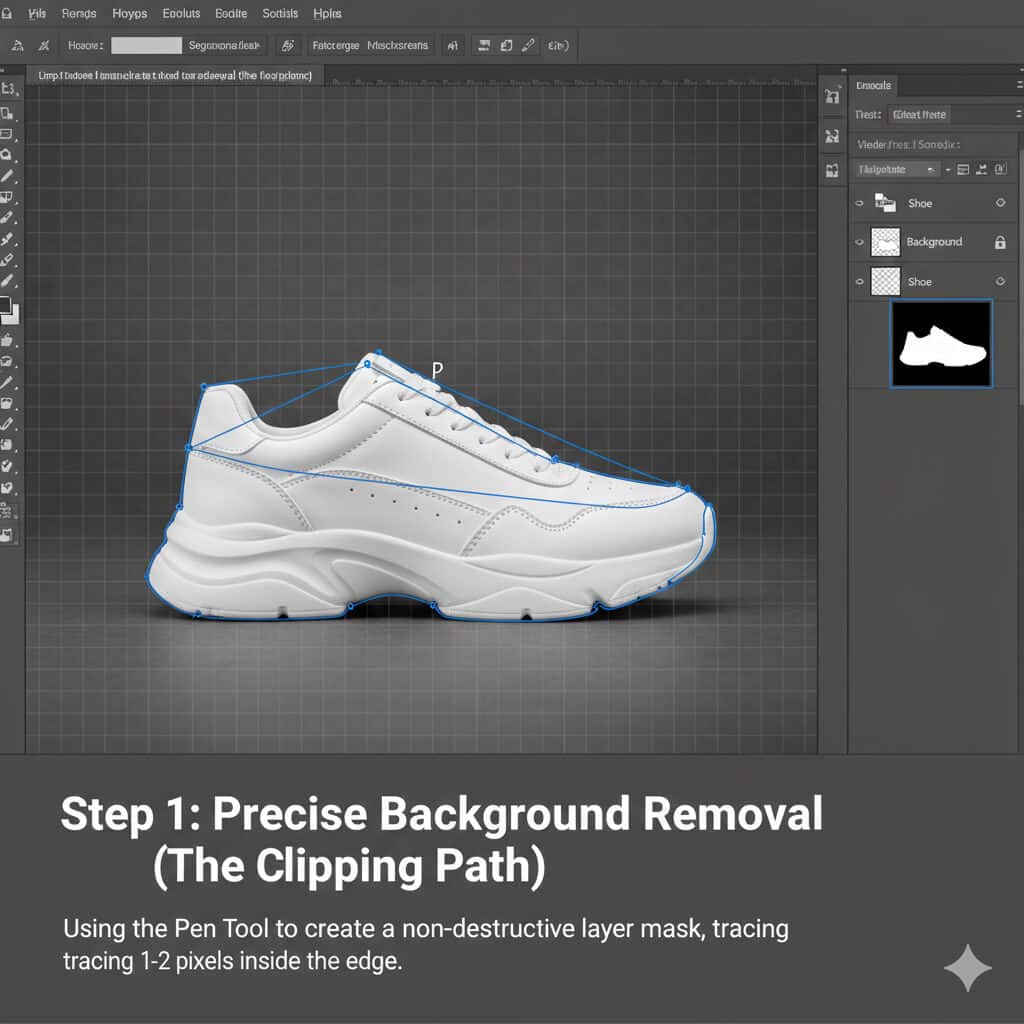
Step 1: Precise Background Removal (The Clipping Path)
Many beginners reach for the Magic Wand or Object Selection tool. While AI is improving, professional editors still rely on the Pen Tool (P). Why? Because shoes have intricate curves and hard edges that automated tools often “chew” up.
Creating a Non-Destructive Edge
- The Path: Trace the shoe with the Pen Tool, ensuring you stay 1–2 pixels inside the edge. This avoids a “white halo” when placed on a different background.
- Layer Masks: Never use the Eraser tool. Convert your path into a selection and apply a Layer Mask. This allows you to bring back any part of the shoe if you accidentally cut too much.
- Smooth Curves: Use as few anchor points as possible. This creates the sleek, professional look seen in high-end catalogs.
Step 2: Retouching Imperfections and Blemishes
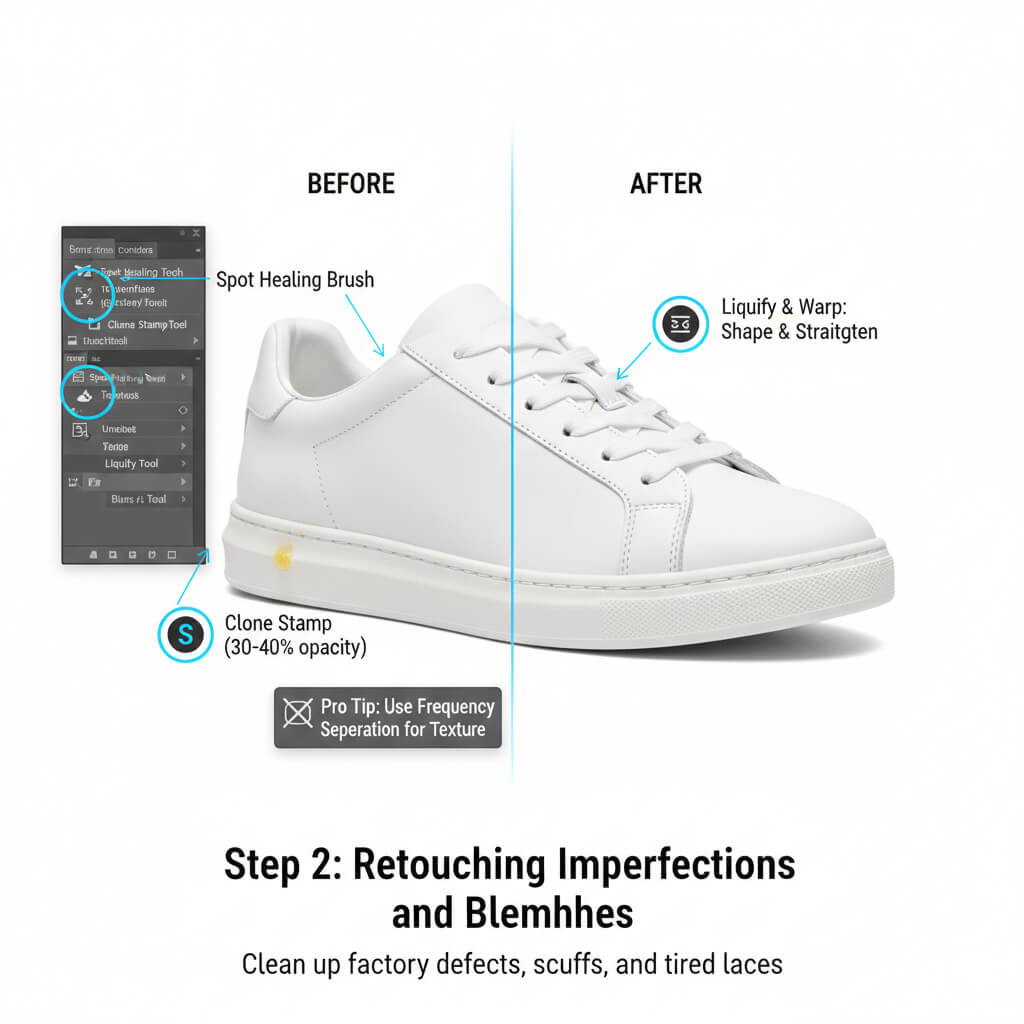
Product samples often arrive with factory defects—excess glue, scuffs, or “tired” laces.
The Toolkit for Texture
- Spot Healing Brush: Perfect for removing tiny dust particles or stray threads.
- Clone Stamp (S): Use this at a low opacity (30-40%) to blend out glue spots near the midsole.
- Liquify & Warp: If the shoe looks “deflated” because there was no foot inside, use the Liquify Tool or Warp Tool to gently push the tongue up or straighten the heel counter.
Pro Tip: When retouching leather, avoid the “Blur” tool. It destroys the natural grain and makes the product look like plastic. Instead, use Frequency Separation to fix color blotches while keeping the texture intact.
Step 3: Achieving Color Accuracy and Vibrance
Color-related returns are a major cost for e-commerce businesses. If the “Ruby Red” sneakers arrive looking “Burgundy,” you’ve lost a customer.
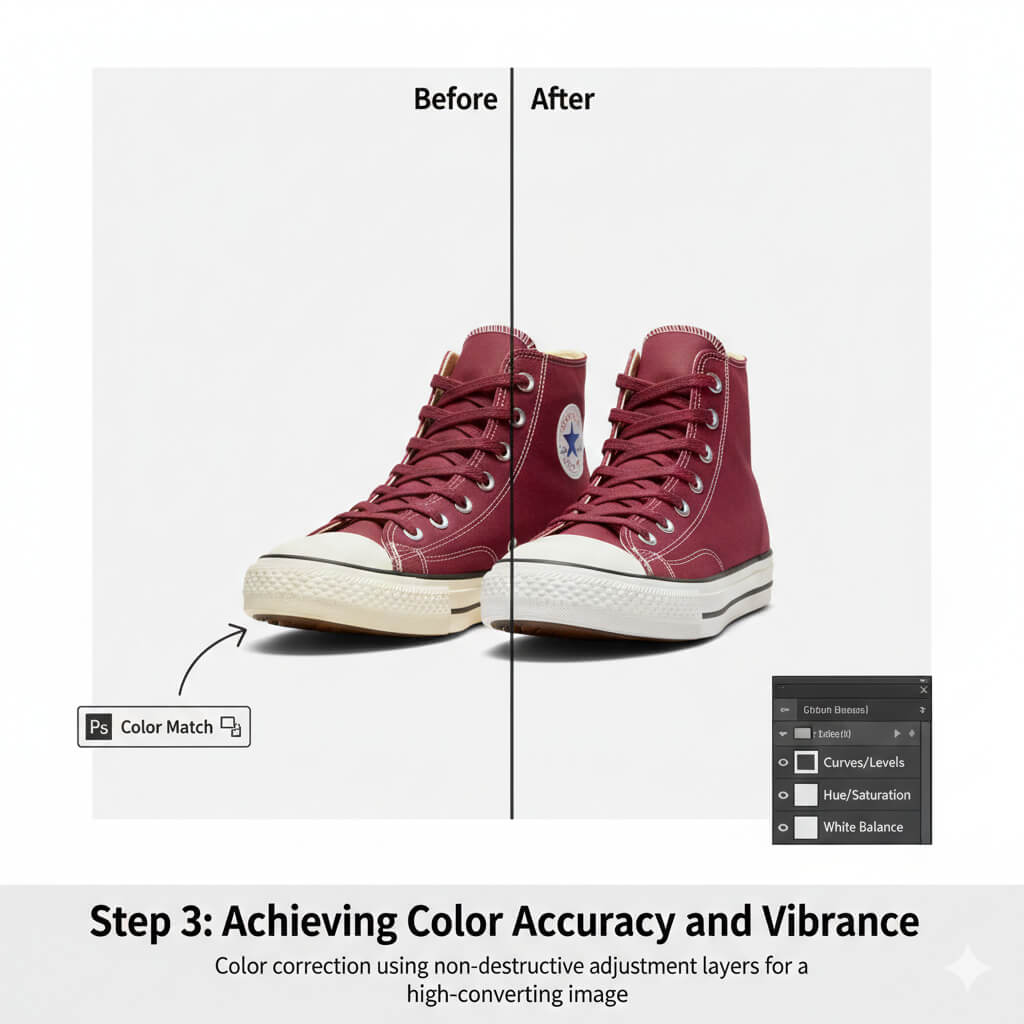
| Feature | Tool to Use | Why it Matters |
| Exposure | Curves/Levels | Balances the highlights on the toe box. |
| Color Match | Hue/Saturation | Adjusts specific tones to match the physical sample. |
| Consistency | White Balance | Ensures the white midsole isn’t “yellowed” by studio lights. |
Use Adjustment Layers for these steps. This keeps your original pixels safe and allows you to go back and tweak the intensity at any time.
Step 4: Adding Depth with Natural Shadows
A shoe on a pure white background without a shadow looks like it’s floating in space. This “floating shoe” problem makes the product feel disconnected and cheap.
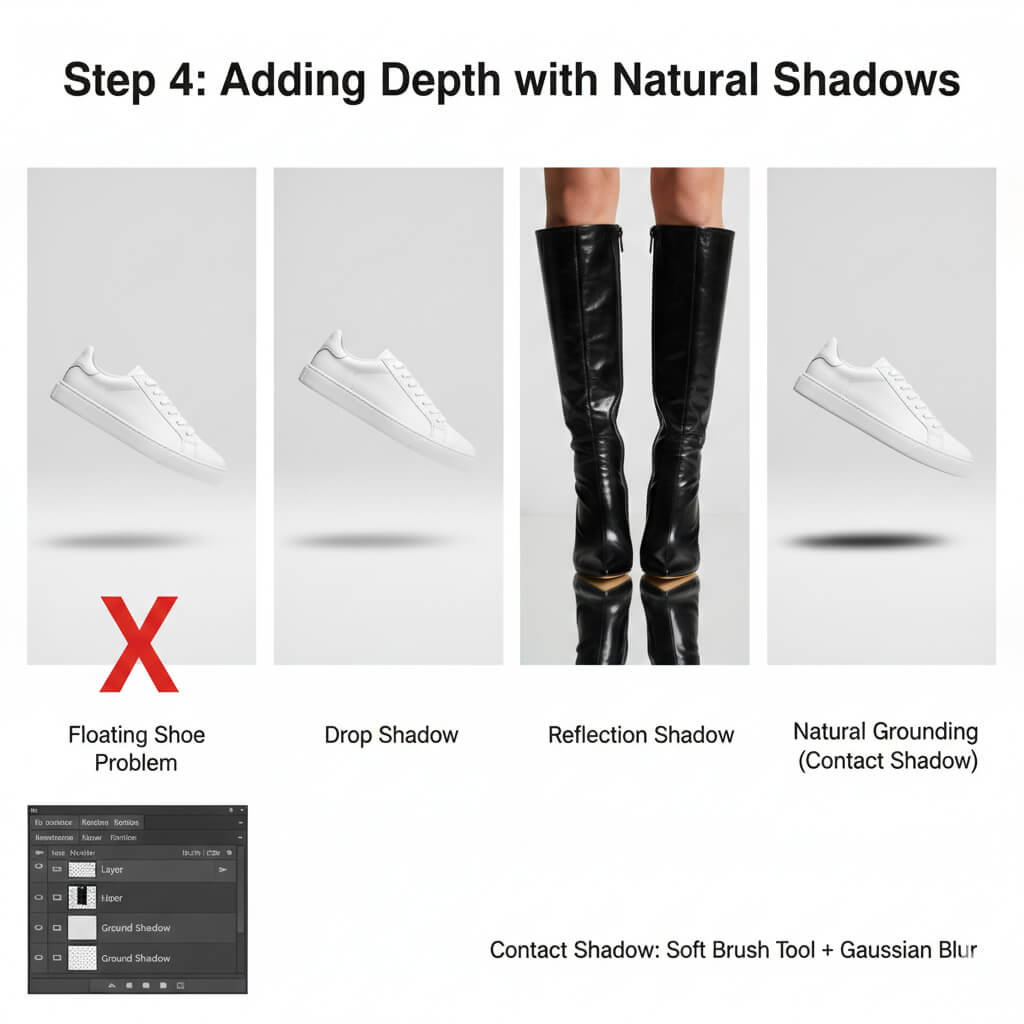
Types of E-commerce Shadows
- Drop Shadow: Subtle and clean, great for general listings.
- Reflection Shadow: Mimics a mirrored surface, often used for luxury heels or dress shoes.
- Natural Grounding (Contact Shadow): The most important. This is the dark, thin shadow right where the outsole touches the ground. Use a soft Brush Tool with a high Gaussian Blur to create a soft fall-off.
Step 5: Final Polish and Exporting for Web
Before saving, your image needs a final “pop.”
- Sharpening: Use the High Pass Filter method. Create a merged layer, set the blend mode to “Overlay,” and apply a High Pass of 1.0–2.0. This sharpens the eyelets and stitching without creating “halos.”
- Cropping: Use a 1:1 (Square) or 4:5 ratio. Ensure the shoe is centered with equal margins on all sides to maintain a consistent look across the category page.
- Export: Use “Save for Web (Legacy)” or “Export As.” Aim for a file size under 500KB to ensure fast page load speeds.
Common Mistakes Beginners Should Avoid
- Over-Smoothing: Suede should look fuzzy, not like a smudge. If you lose the “nap” of the fabric, you’ve gone too far.
- Jagged Edges: This usually happens from using the Magic Wand. Stick to the Pen Tool for a “retail-ready” finish.
- Ignoring Symmetry: Ensure the laces are tucked or aligned. If one shoe looks taller than its pair, use the Transform (Ctrl+T) tool to fix the perspective.
FAQs
Why is the Pen Tool better than AI selection for shoes?
AI often struggles with the high-contrast areas where a shoe meets a white background, leading to “fringing” or jagged edges. The Pen Tool gives you 100% control over the curvature, which is essential for professional shoe photo editing techniques in Photoshop.
How do I keep the texture of leather while removing scuffs?
Use a small Clone Stamp tool or Frequency Separation. This allows you to edit the colors on one layer and the “texture” (the grain of the leather) on another, ensuring the shoe looks real, not rendered.
What is the best background for e-commerce shoes?
Pure white (Hex: https://www.google.com/search?q=%23ffffff) is the standard for Amazon and eBay. However, for social media or brand websites, “off-white” or light grey adds a premium feel.
Conclusion: Perfecting Your Pair
Mastering shoe photo editing techniques in Photoshop is a blend of technical precision and artistic touch. By moving away from destructive editing and embracing tools like the Pen Tool and Adjustment Layers, you create images that don’t just look good—they sell.
Consistency is your best friend. As you build your portfolio, focus on creating a repeatable workflow that delivers sharp, color-accurate, and well-grounded images.