

According to data, 75% of online shoppers rely on product photos when deciding to buy. This fact highlights why learning how to edit clothing product photos is a vital skill for any store owner. Imagine seeing two jackets online. One is dark and wrinkled. The other is crisp and bright. You will naturally choose the professional image every time.
Visuals are the heartbeat of eCommerce. If your photos look bad, you lose the sale instantly. Poor images also lead to high return rates. Customers get frustrated when the real item looks different from the picture. Accurate editing builds trust and helps people see the true fabric texture.
This guide will show you the ropes. You will learn about the best tools. We will cover techniques to fix colors and lighting. I will share the secrets that pros use to drive sales. Let’s dive in and boost your conversion rates.
Why Clothing Product Photo Editing Is Crucial for eCommerce Sales
Your product photos are your “silent salespeople.” They work 24/7 to convince visitors to buy.

High-quality clothing product photos build trust and increase online sales.
Impact on Buyer Psychology
The first impression is the only impression. A clean, professional image builds instant trust. It tells the customer that you are a serious business. High-quality editing helps people visualize the fabric. They can imagine how the fit feels. This visualization is powerful. It reduces the fear of buying the wrong thing. Good photos lower your return rate significantly. When customers see accurate details, they know what to expect.
Impact on Brand Value
Professional photos make your brand look premium. You can charge more for products that look expensive. Consistent editing creates a strong brand identity. People recognize your style instantly. This builds long-term loyalty. Sloppy photos do the opposite. They make your store look cheap and risky.
Types of Clothing Product Photos You Must Edit for eCommerce
Different angles serve different purposes. You need a mix to satisfy every customer.
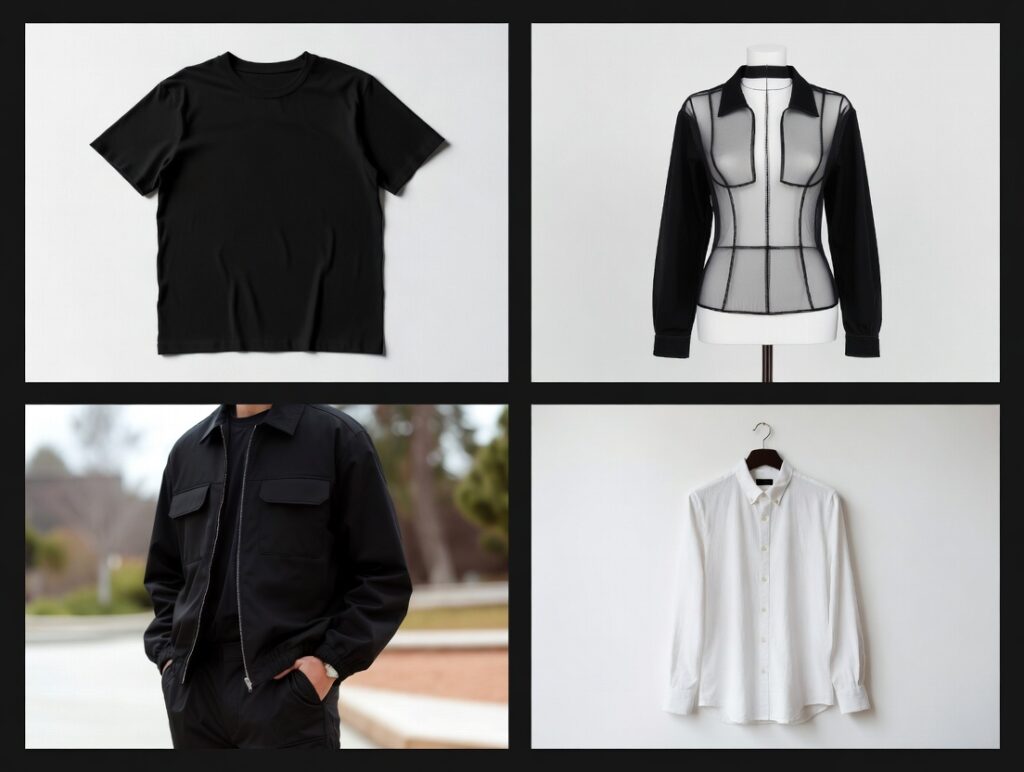
Different clothing product photo styles used in eCommerce stores.
- Flat Lay Clothing Photos: Great for basics like t-shirts. You lay the item flat and shoot from above.
- Ghost Mannequin Photos: Shows the 3D shape of the clothes. It looks like an invisible person is wearing it.
- Model Photos: Vital for showing fit and drape. Shoppers want to see clothes on a real human.
- Lifestyle Fashion Photos: Shows the item in a real-world setting. It sells a vibe or emotion.
- White Background Catalog Images: The standard for clean eCommerce pages. It focuses purely on the product.
- Marketplace Images: Amazon and Etsy have strict rules. You must edit to meet their specific guidelines.
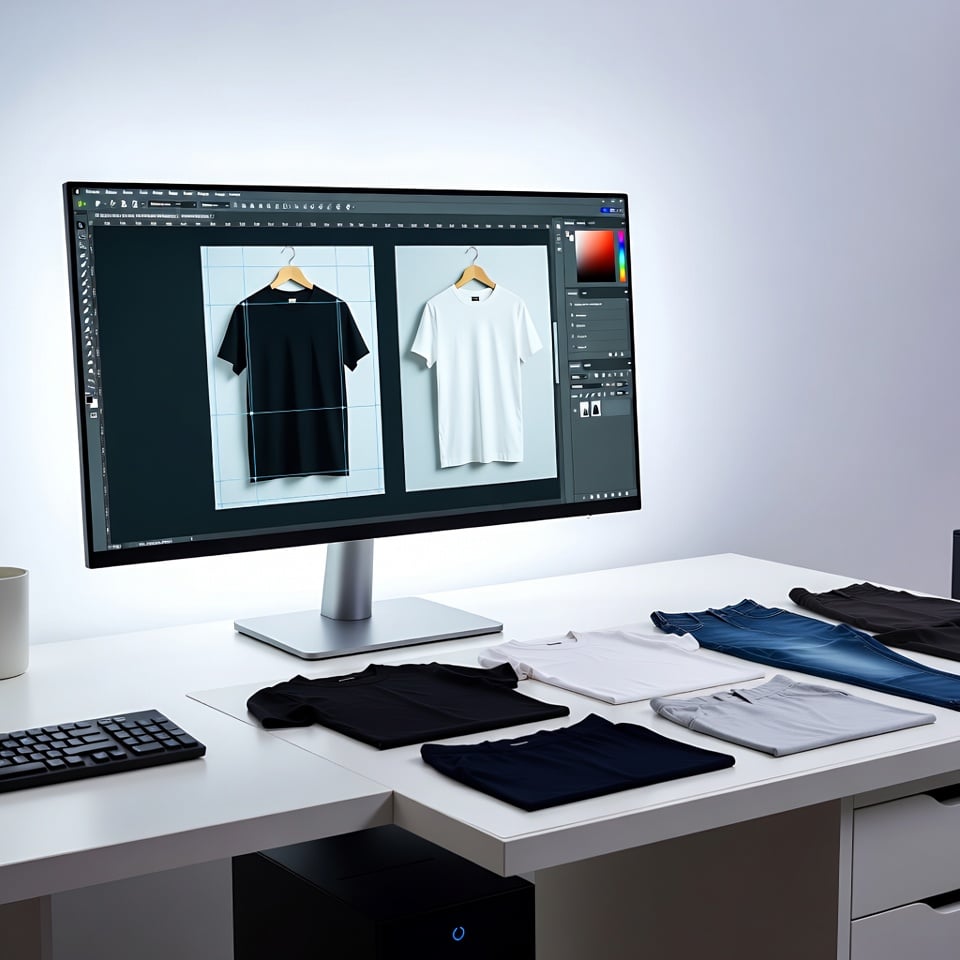
Essential Tools for Editing Clothing Product Photos
You don’t need a Hollywood studio. But you do need the right software.
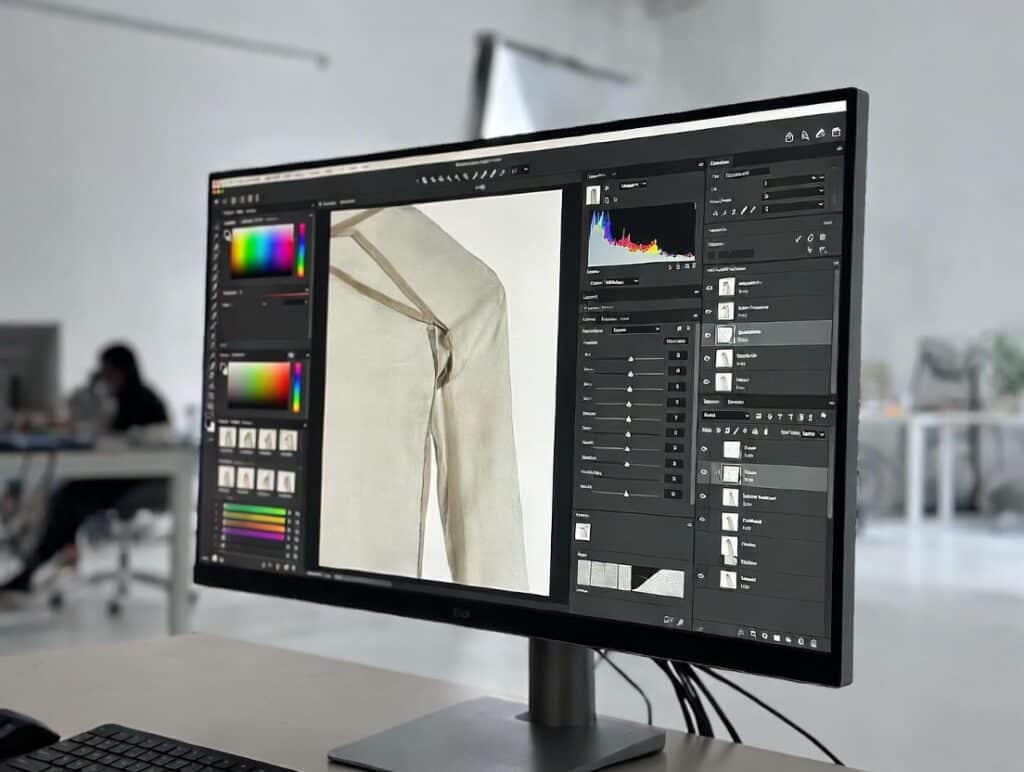
Professional tools used for clothing product photo editing workflow.
Paid Professional Tools
- Adobe Photoshop: The industry standard. It handles complex retouching and ghost mannequin effects best.
- Adobe Lightroom: perfect for color correction. You can batch edit hundreds of photos at once.
- Capture One: offers superior color grading. Many pros prefer it for tethered shooting.
Free Tools
- Canva: great for simple layouts and adding text. It has a basic background remover, too.
- GIMP: a free, open-source alternative to Photoshop. It creates a clothing photo editing for ecommerce workflow without the cost.
- Remove.bg: does one thing perfectly. It removes backgrounds instantly with AI.
- PhotoRoom: an excellent mobile app. It is great for quick edits on your phone.
Professional tools help you adjust lighting and colors precisely. They allow you to remove imperfections for a polished look.
Step-by-Step Clothing Photo Editing Process
This is where the magic happens. Follow these steps for pro results.
Step 1: Background Removal
Background removal creates clean and professional clothing product images.
Start by cleaning up the scene. A pure white background is standard for eCommerce. It removes distractions. It keeps the customer’s eye on the shirt or dress. You can use the Pen Tool for a precise clipping path. AI tools also work well for speed. Background removal for clothing photos makes your store look uniform.
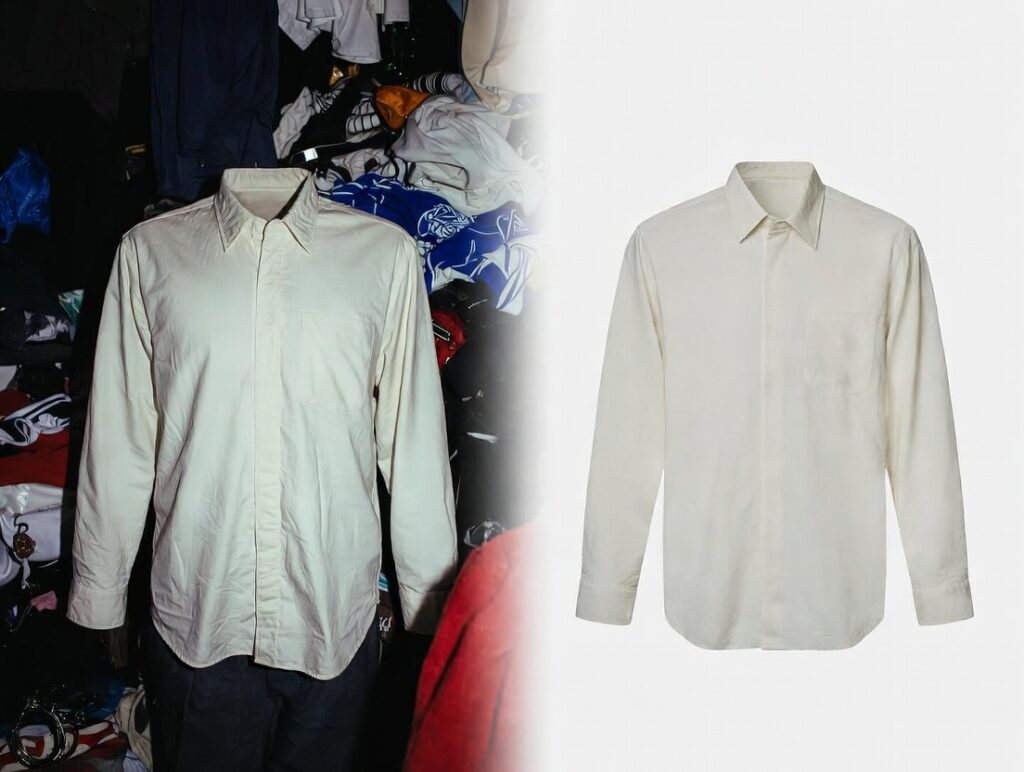
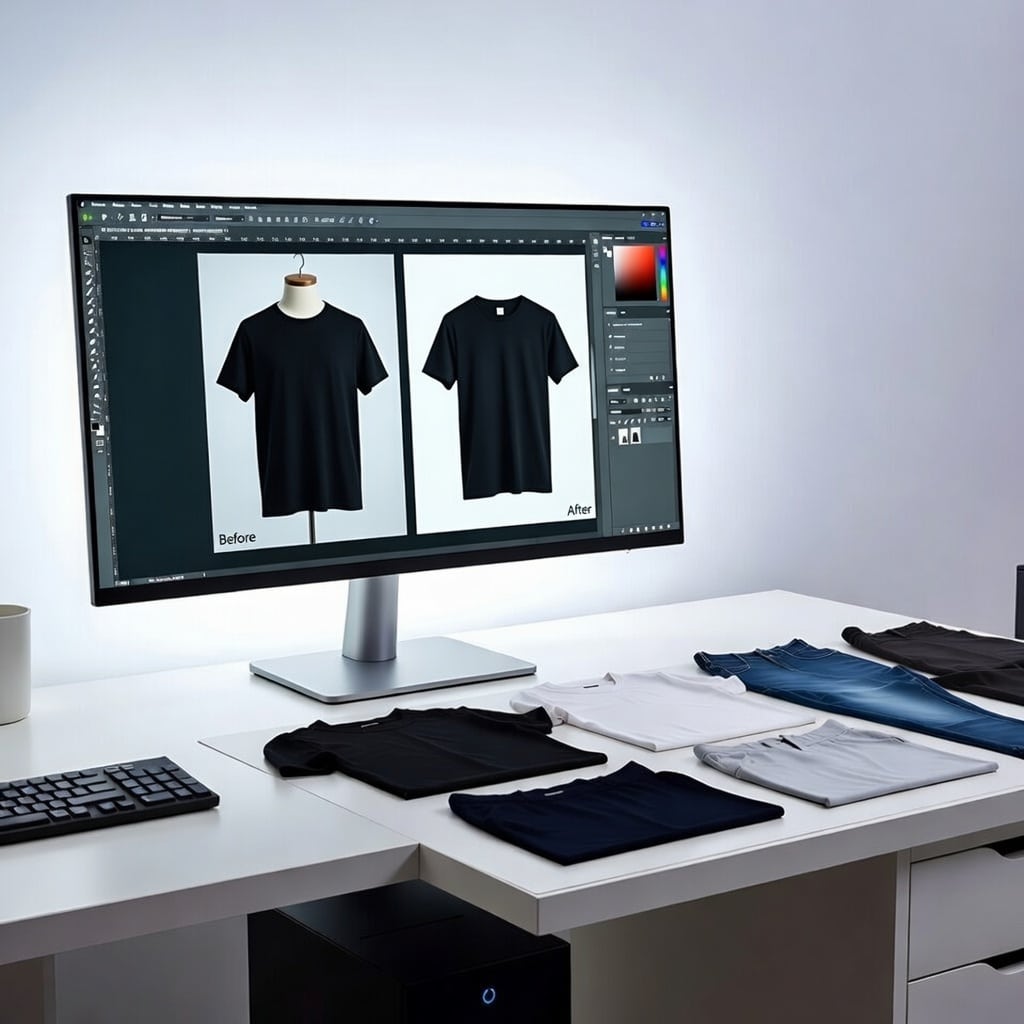
Step 2: Color Correction & White Balance

Accurate color correction ensures a realistic clothing product appearance.
Your camera might get the colors wrong. You must fix this. Match the screen color to the real product. If the dress is navy, don’t let it look black. Fix any weird yellow or blue lighting tints. Color correction for apparel photos builds trust. Accurate colors mean fewer angry returns.
Step 3: Exposure, Brightness & Contrast
Adjusting brightness and contrast enhances clothing details and visual appeal.
Make the clothing pop off the screen. Adjust the exposure if the image is too dark. Boost the contrast slightly for definition. But be careful. Don’t over-edit. You want it to look realistic, not like a cartoon. Highlight the product details clearly.
Step 4: Retouching & Cleanup
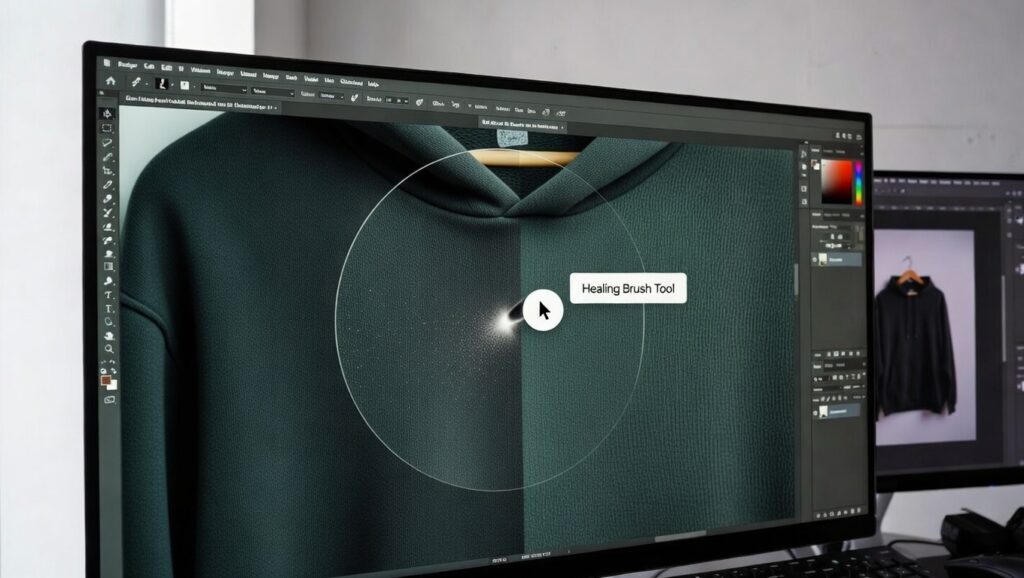
Professional retouching removes wrinkles, dust, and imperfections from clothing photos.
Zoom in to 100%. Look for specks of dust. Remove any loose threads. Fix unsightly wrinkles or creases using the Healing Brush. Smooth the fabric naturally. Clothing image retouching improves perceived quality. It shows you care about the details.
Step 5: Shadow & Reflection
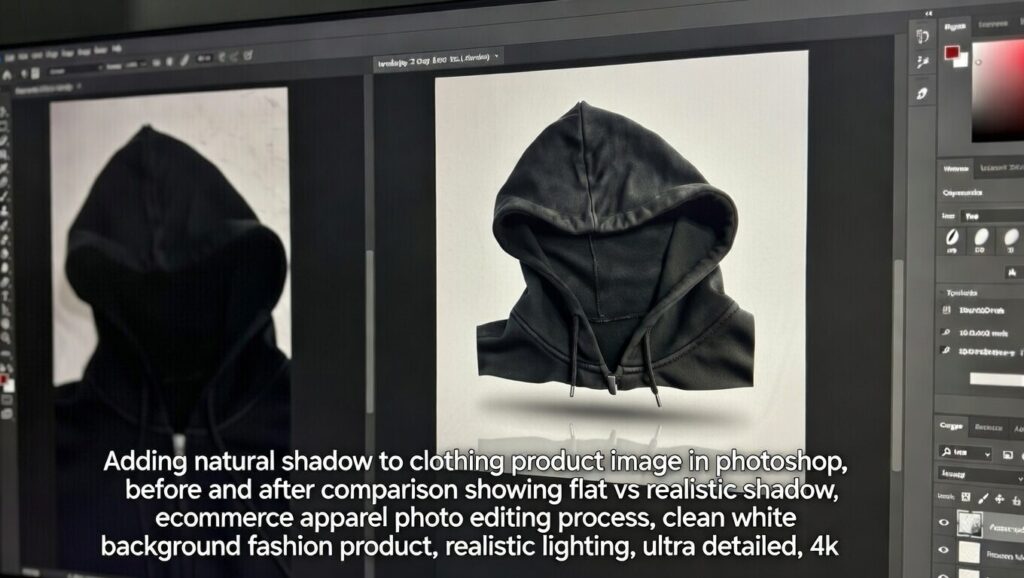
Natural shadow effects add depth and realism to clothing product images.
Flat images look fake. Add a natural shadow back in. It grounds the product. It creates depth and realism. A drop shadow or reflection gives a premium look. It prevents the “floating in space” effect.
Step 6: Cropping & Alignment
Consistent cropping and alignment create a clean and professional product catalog.
Consistency is key for a grid layout. Crop all images to the same aspect ratio (usually 1:1 or 4:5). Center the product perfectly. Leave the same amount of white space (padding) around the edges.
Advanced Techniques Used by Top eCommerce Brands
Want to beat the competition? Use these pro secrets.
Ghost Mannequin Effect
Ghost mannequin effect gives clothing products a professional 3D look without a model.
This technique is a game-changer. It shows the shape and fit professionally. You combine two photos: one of the front, one of the inner neck. It removes the mannequin but keeps the 3D form. Ghost mannequin editing improves conversion for fashion stores effectively.
Skin & Fabric Texture Enhancement
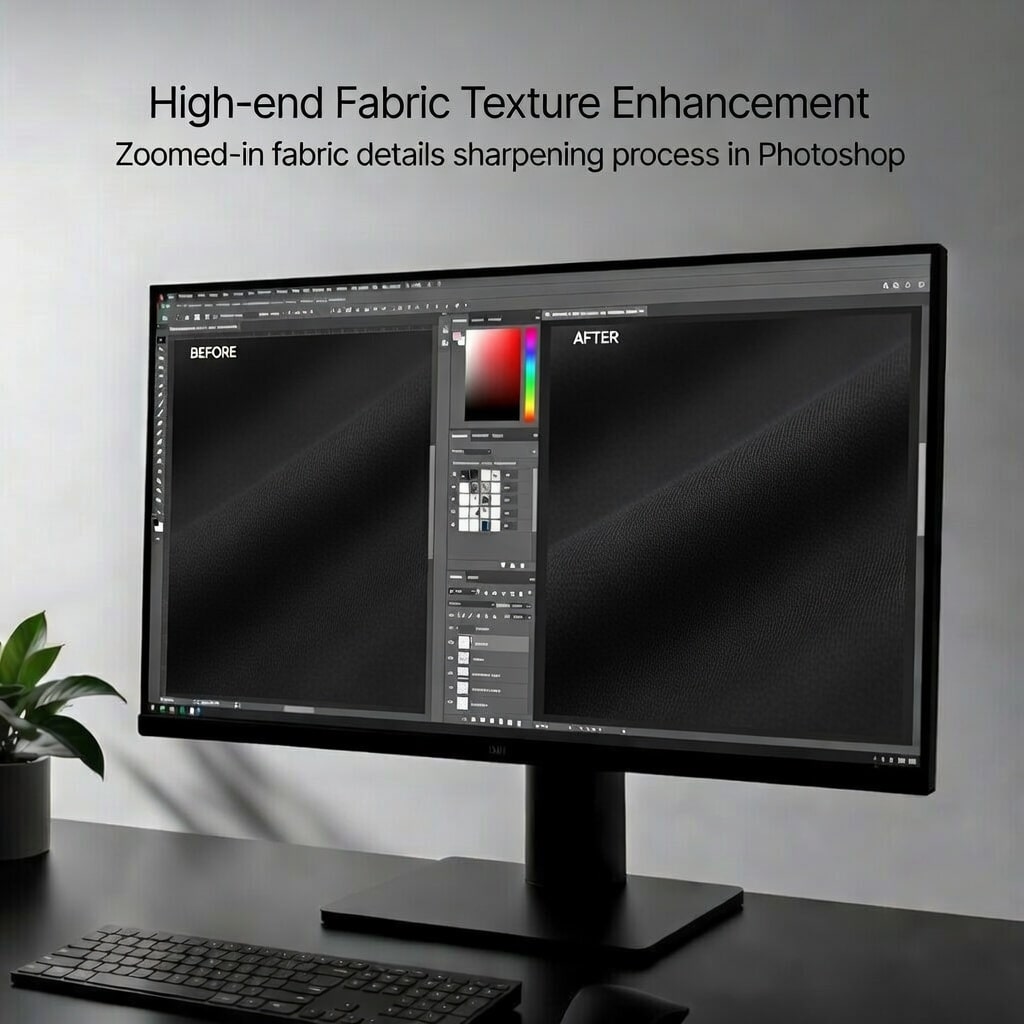
Fabric texture enhancement helps customers see real clothing quality online.
Don’t blur everything. Keep the texture visible. Customers want to see the weave of the cotton or wool. Sharpen the fabric details slightly using “High Pass” filters. If you use models, smooth their skin but keep it real. High-quality product images allow for deep zooming.
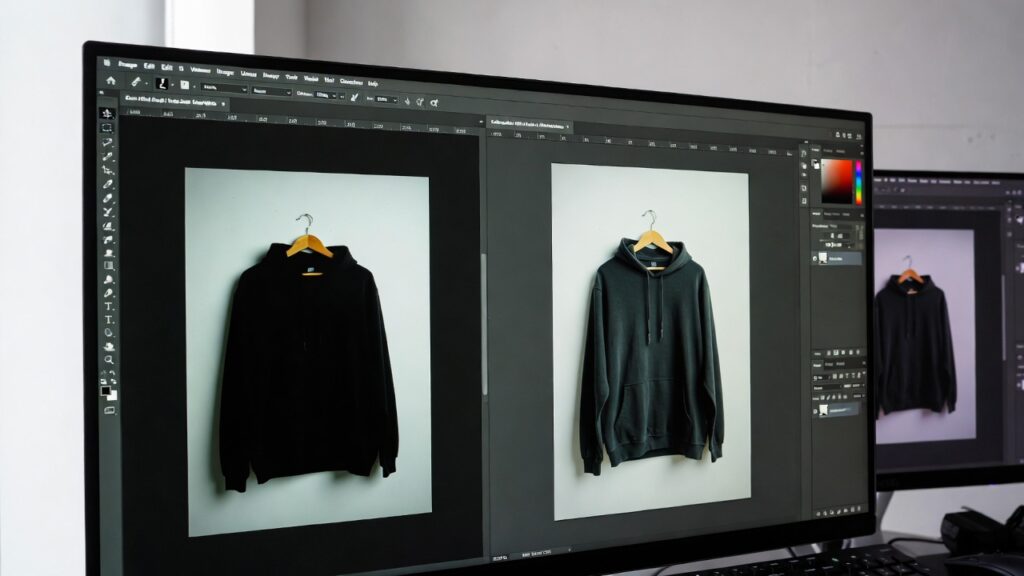
Color Variant Editing
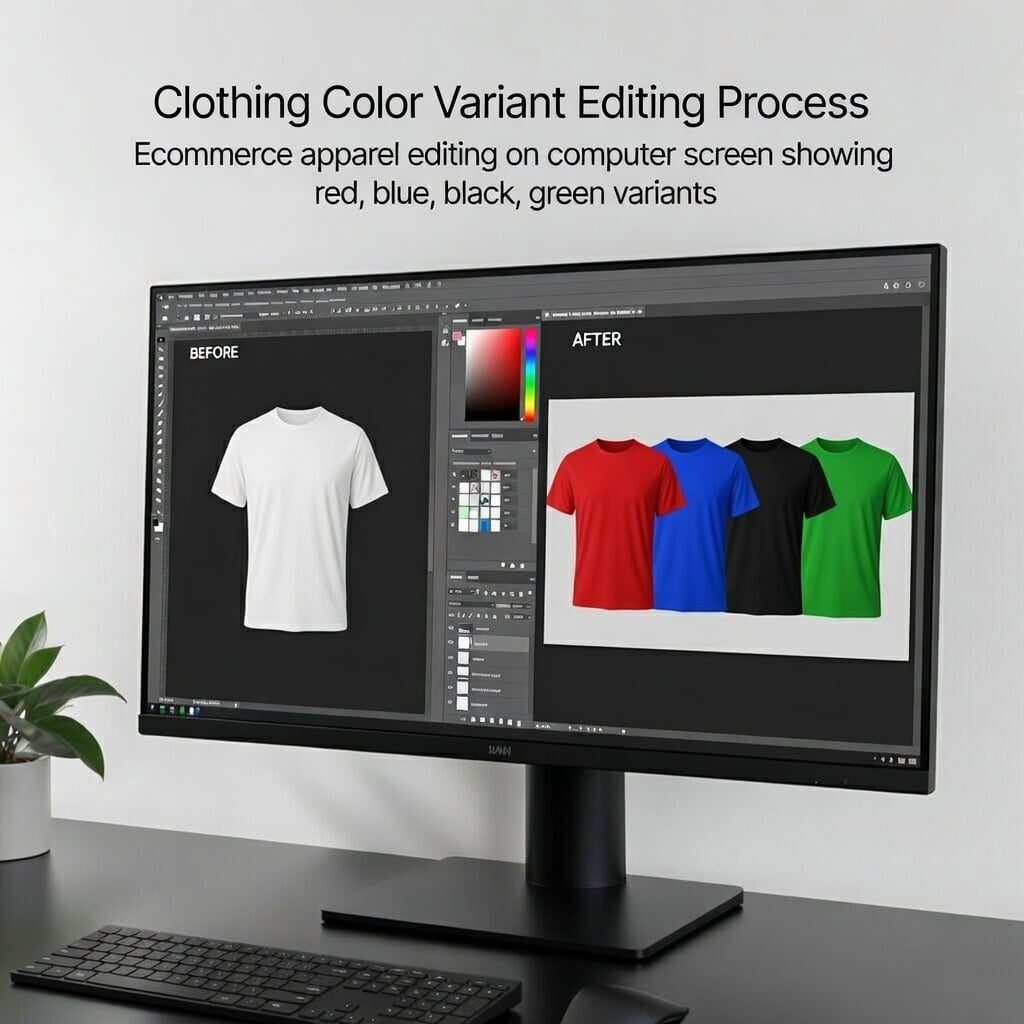
Color variant editing allows one clothing photo to create multiple product colors.
Do you sell one shirt in five colors? Don’t photograph all five. Shoot one perfectly. Then, use software to change the colors. This saves massive amounts of time. It also ensures every color variant looks identical in shape.
Clothing Photo Editing for Different Platforms
One size does not fit all.
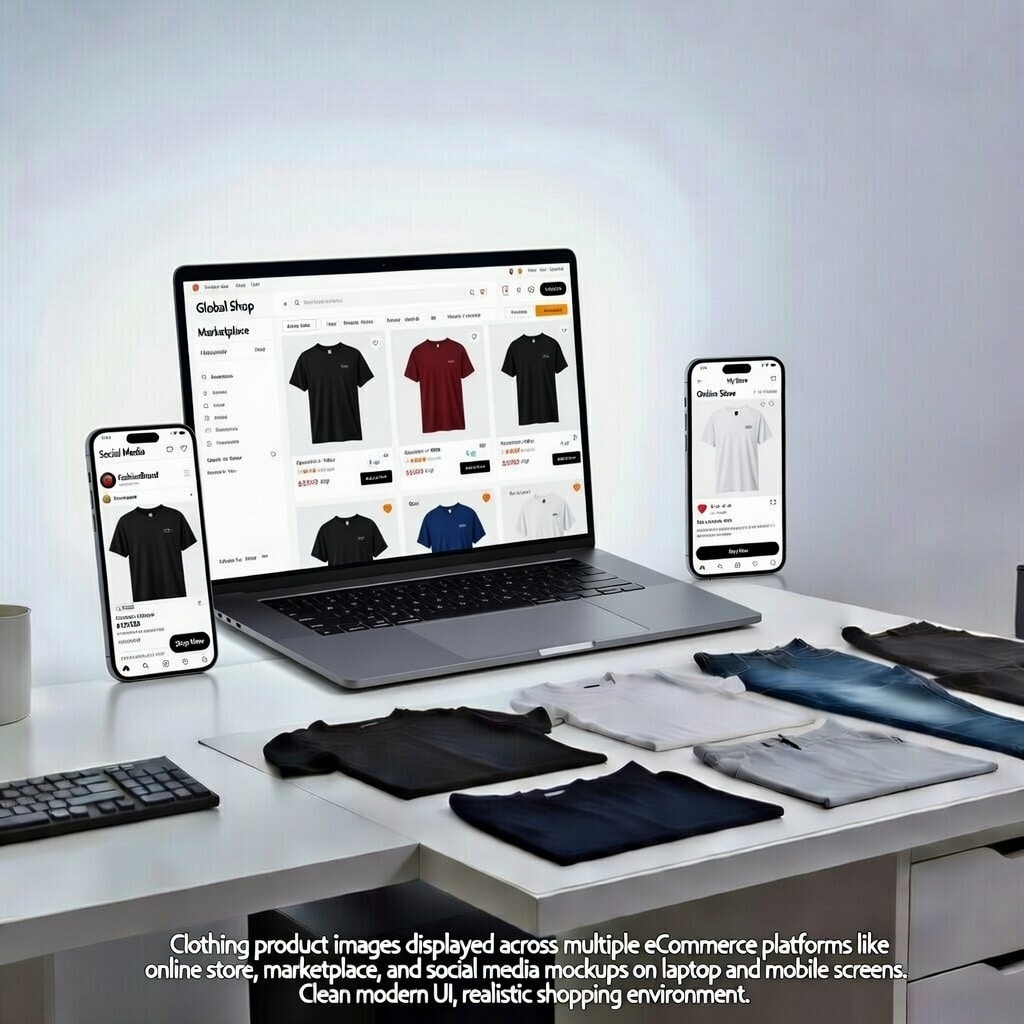
Optimizing clothing images for Shopify, Amazon, and social media platforms.
- Shopify: Supports high-resolution images (up to 4472 x 4472 px). Square images work best for most themes.
- Amazon: Requires a pure white background (RGB 255, 255, 255). The product must fill at least 85% of the frame.
- Etsy: Loves lifestyle shots. Warm, natural lighting works well here.
- eBay: Allows standard images. Clean backgrounds help you stand out from garage sellers.
- Social Media: Vertical images (9:16) rule here. Instagram and Facebook ads need eye-catching, vibrant edits.
DIY vs Professional Clothing Photo Editing Service
Should you do it yourself or hire out? Here is a quick comparison.
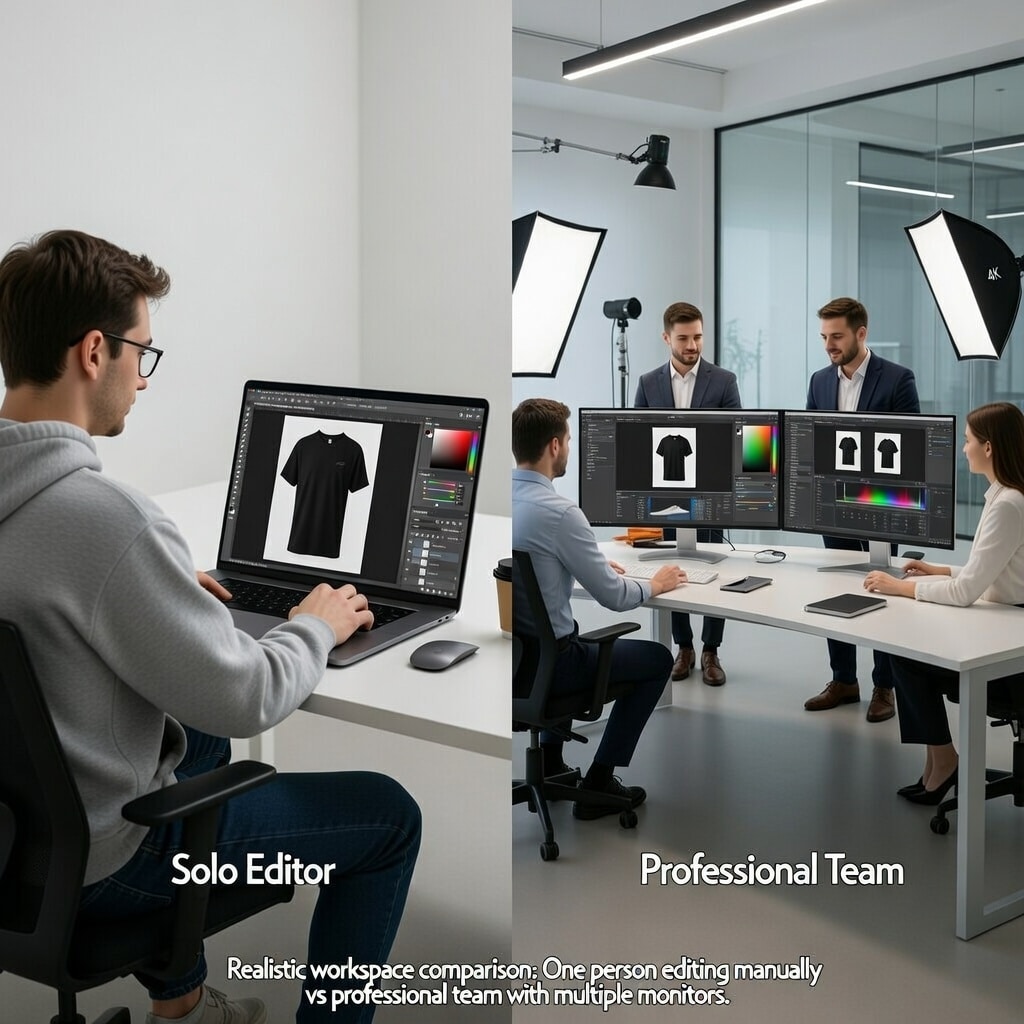
DIY vs professional clothing photo editing service comparison.
| Feature | DIY Editing | Professional Service |
| Cost | Free (Time only) | Paid ($0.50 – $2/image) |
| Time Required | High (Hours per batch) | Low (Just upload files) |
| Quality | Varies by skill | Consistent High-End |
| Scalability | Low (Hard to do 100+) | High (Unlimited volume) |
| Turnaround | Depends on you | Fast (24 hours usually) |
Hiring Professional Service Benefits
A clothing image editing service saves you hours. You get high-end retouching. They handle bulk orders easily. The result is usually better conversion. It frees you up to focus on marketing.
Pro Tips From eCommerce Photo Editing Experts
Here is advice from the trenches.
- Shoot RAW Images: This gives you the most data to edit with.
- Use sRGB Profile: This ensures colors look correct on all web browsers.
- Maintain Style Guide: Write down your settings. Stick to them.
- Always Zoom Check: Look at the photo at 100% size.
- Keep Editing Natural: The goal is realism, not fantasy.
FAQs About Clothing Photo Editing
How to edit clothing photos for Shopify?
Use a square ratio, a white background, and compressed files for speed.
Best background for clothing photos?
Pure white is best for conversions; light grey adds a modern touch.
What is ghost mannequin editing?
It is a technique that removes the mannequin to show the garment’s 3D shape.
How much does clothing photo editing cost?
Basic edits cost $0.50-$2 per image; complex retouching costs more.
Can I edit clothing photos on mobile?
Yes, apps like Lightroom Mobile and PhotoRoom work well for basic edits.
How do you edit clothing product photos professionally?
Use Photoshop, shoot RAW, correct colors, and use consistent cropping.
Conclusion
Great visuals are the backbone of e-commerce. Understanding how to edit clothing product photos is a vital skill. It transforms browsers into buyers. Professional looks build trust and loyalty.
Do not settle for average images. Invest in quality editing. Whether you DIY or hire a professional clothing photo editing team, aim for perfection. Your sales numbers will thank you.