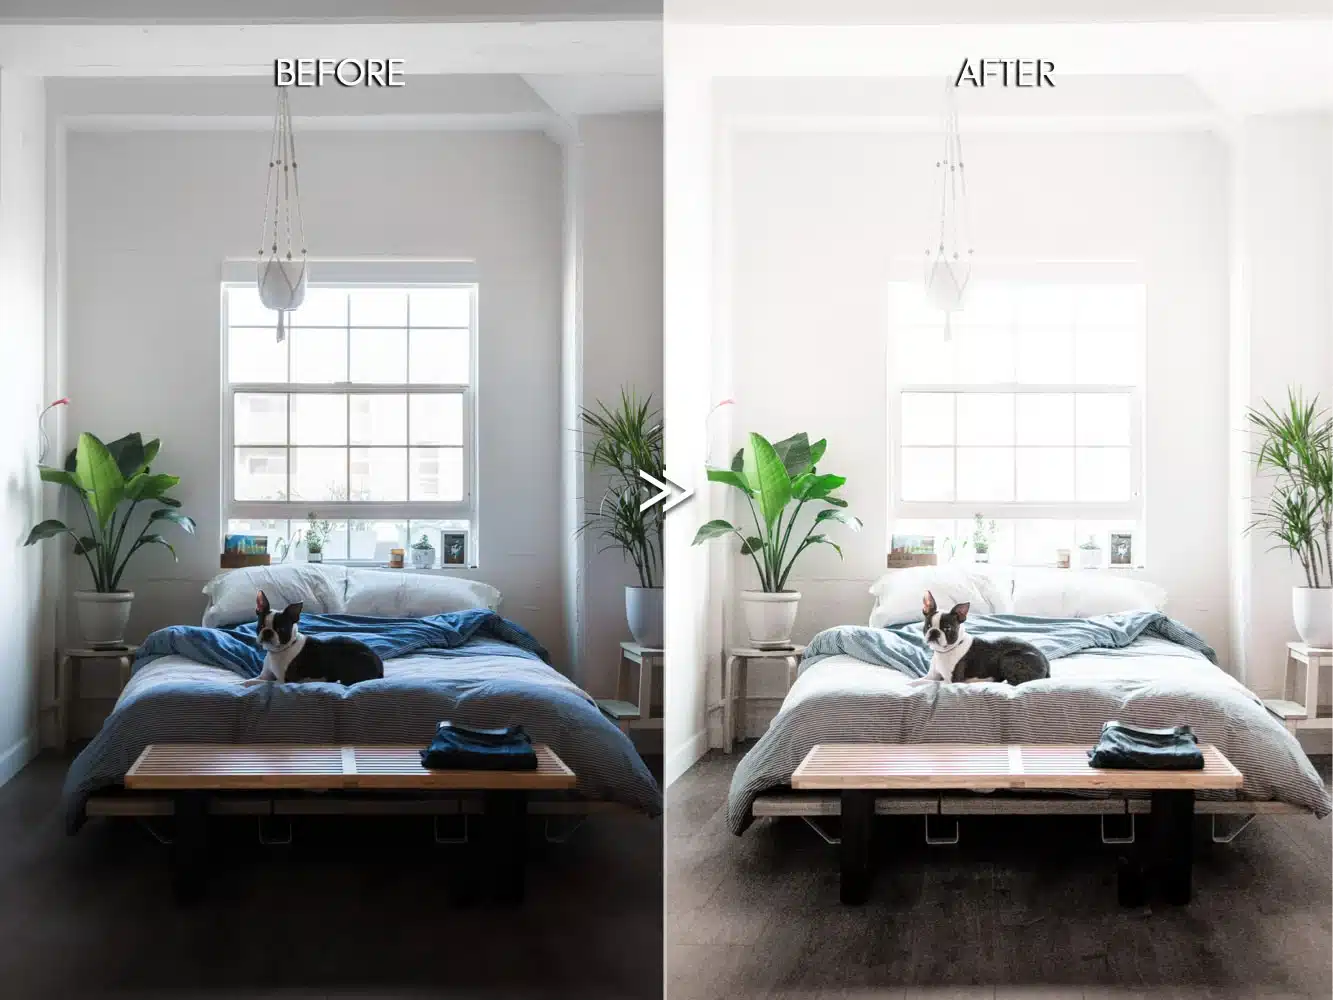
Real estate photographers face a simple truth: the right Lightroom settings make the difference between properties that sit on the market and homes that sell within days. In this digital era, buyers expect bright, accurate, professional images that showcase spaces authentically. The best Lightroom settings transform average property photos into compelling listings that drive showings and close deals.
The gap between casual edits and MLS-ready results comes down to precision. Over-processed HDR looks amateur. Crooked walls kill credibility. Yellow color casts turn buyers away instantly. This guide provides the exact settings, workflows, and techniques professional real estate photographers use to create consistent, high-quality images that meet 2026 industry standards.
Real Estate Photography Editing Goals
Professional real estate editing targets four specific outcomes that buyers and agents demand.
Bright and Airy Without Overexposure
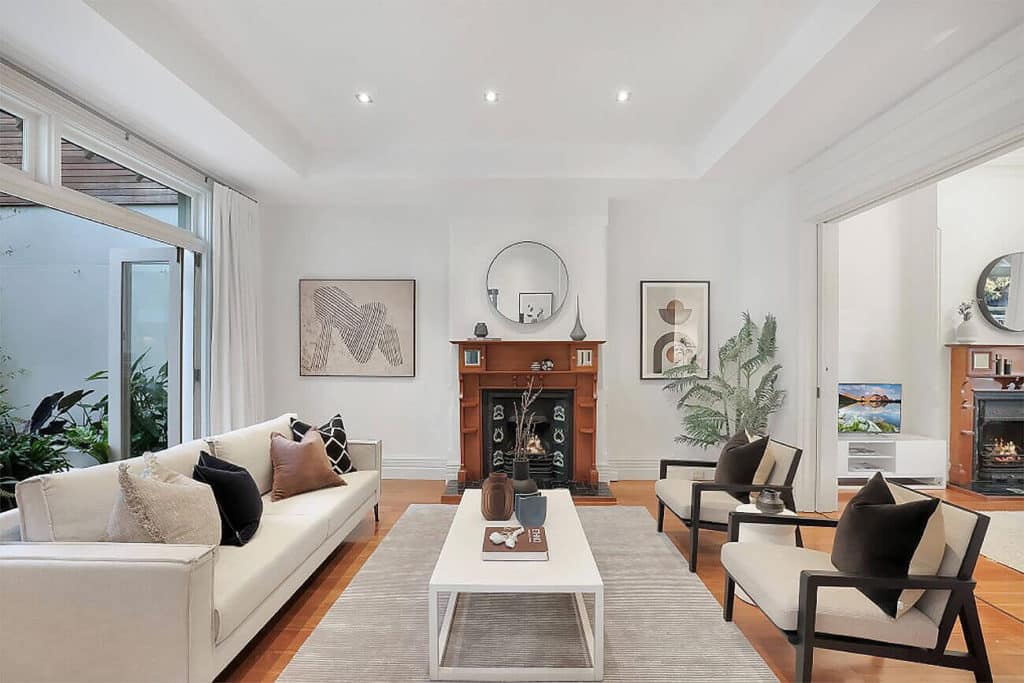
Modern listings need well-lit interiors that feel spacious and inviting. The goal is brightness that showcases every corner while preserving detail in highlights and textures. Overexposure washes out surfaces and creates unrealistic rooms.
Straight Verticals and Correct Geometry
MLS platforms reject images with tilted walls or converging verticals. Proper geometry signals professional work and builds trust with buyers who evaluate hundreds of listings.
True-to-Life Colors Without HDR Abuse
The over-processed HDR aesthetic is outdated. Buyers want accurate colors that represent actual property conditions. Walls should look natural, grass should be green (not neon), and finishes should match reality.
Fast, Repeatable Workflow for Volume Shoots
Professional photographers shoot 3-5 properties daily, processing 100-200 images weekly. Without systematic workflows using presets and batch editing, consistency and speed become impossible.
Lightroom Workspace Setup (Before Editing)
Import Settings
Smart import settings automate repetitive tasks and prevent mistakes.
Apply Lens Profile on Import through import presets. Lightroom automatically corrects barrel distortion and vignetting for most wide-angle lenses (16-35mm range) used in real estate work.
Enable Chromatic Aberration Removal during import. This eliminates purple and green fringing around high-contrast edges like window frames and door jambs.
Create Room-Type Collections as you import—Living Room, Kitchen, Bedroom, Bathroom, Exterior. This organization enables targeted batch editing since different rooms need different treatments.
Monitor and Color Accuracy
Calibrate your display monthly using a hardware colorimeter. Uncalibrated monitors create images that look completely different on client screens, MLS platforms, and buyer devices.
Set Lightroom preview to sRGB color space. Real estate images live on web platforms (MLS, Zillow, Realtor.com) that all use sRGB. Editing in Adobe RGB creates images that look flat online.
Core Global Lightroom Settings (Apply to All Photos)
Lens Corrections
Navigate to the Lens Corrections panel in Lightroom’s Develop module.
Enable Profile Corrections immediately. Lightroom detects your lens from EXIF data and applies the manufacturer’s correction profile, straightening optical distortions from wide-angle lenses.
Remove Chromatic Aberration with a single click. This analyzes high-contrast edges and removes color fringing that undermines professional quality.
Transform and Vertical Alignment
The Transform panel corrects perspective distortion that makes buildings appear to lean backward.
Use Vertical mode for 80% of real estate photos. It straightens vertical lines (walls, doors, windows) while maintaining horizontal perspective. Auto mode sometimes over-corrects.
Apply Guided Transform when Vertical mode fails. Select four points along two vertical lines, and Lightroom calculates precise correction for complex angles.
Straight walls are non-negotiable for MLS. Crooked verticals communicate carelessness and reduce perceived property value.
Sharpening and Noise Reduction
Recommended sharpening values:
- Amount: 40-60
- Radius: 1.0
- Detail: 25-35
- Masking: 50-70 (hold Alt/Option to see the mask)
Higher Masking restricts sharpening to edges rather than flat surfaces, preventing noise amplification.
Noise reduction by ISO:
- ISO 100-400: Luminance 10-20, Color 25
- ISO 400-800: Luminance 25-40, Color 30-40
- ISO 800+: Luminance 40-60, Color 40-50
Best Lightroom Settings for Interior Photos (Bright and Airy Look)
Basic Panel Settings (Typical Ranges)
These starting values create the bright, inviting look buyers expect:
Exposure: +0.5 to +1.0
Most interiors benefit from exposure boosts that create brightness without washing out details. Stay below +1.0 to avoid blown highlights.
Highlights: -50 to -90
Aggressive highlight recovery reveals window detail and exterior views, preventing blown-out white rectangles. Start at -70 and adjust until windows show reasonable detail.
Shadows: +40 to +80
Lifting shadows eliminates dark corners and reveals detail under furniture. Real estate images should have no truly black areas except intentional elements.
Whites: +10 to +25
Small white point adjustments add contrast after recovering highlights. Monitor your histogram to avoid clipping.
Blacks: -15 to -30
Moderate black point adjustments maintain contrast without crushing shadow detail. This prevents the washed-out look while preserving the bright aesthetic.
Presence Adjustments
Clarity: +15 to +20
Enhances midtone contrast and architectural details without creating harsh halos. Real estate photography needs subtle clarity for definition.
Vibrance: +5 to +10
Increases saturation of muted colors while protecting already-saturated tones. This makes colors feel alive without crossing into unnatural territory.
Avoid Saturation adjustments unless Vibrance doesn’t achieve the desired results, and never exceed +10.
White Balance for Interiors
Neutral Walls Without Color Casts
Use the White Balance Selector (W key) and click on neutral white trim or walls. Lightroom calculates the correction needed.
Manual adjustments:
- Yellow casts: Move Temperature slider left (cooler)
- Blue casts: Move Temperature slider right (warmer)
- Green casts: Move the Tint slider toward Magenta
- Magenta casts: Move the Tint slider toward Green
Mixed Lighting Correction
For daytime shoots, balance for window light to keep the natural light looking natural. For evening shoots, balance for interior lighting. Use local adjustment brushes for severe mixed lighting situations.
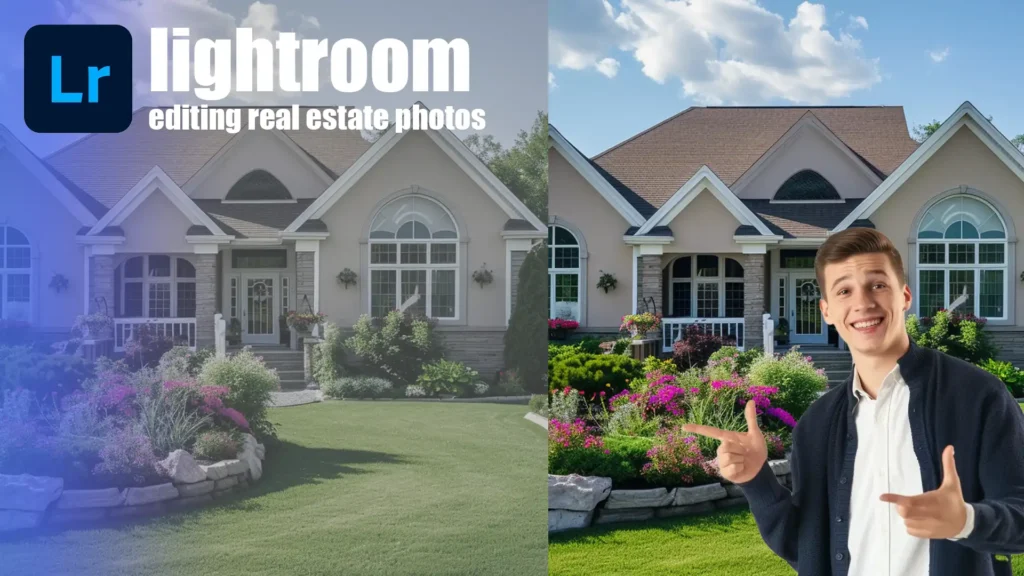
Best Lightroom Settings for Exterior Real Estate Photos
Exposure and Contrast
Balancing Sky and Property:
- Exposure: -0.2 to +0.3
- Highlights: -60 to -90 (aggressive sky recovery)
- Shadows: +40 to +70 (reveal property detail)
- Whites: +15 to +30 (add punch to clouds)
- Blacks: -15 to -5 (anchor tonal range)
- Contrast: +15 to +25 (prevent flat appearance)
Exterior photography needs slightly lower blacks than interiors to create contrast and dimension against the sky.
Sky Enhancement
Dehaze: +5 to +10
Cuts through atmospheric haze, increases sky saturation, and adds cloud definition. Don’t exceed +10 for natural results.
HSL Panel for Sky:
- Blue Saturation: +10 to +25
- Blue Luminance: -10 to -20
- Aqua Saturation: +10 to +20
Lawn and Landscape Color Control
HSL Panel for Natural Greenery:
- Green Hue: -5 to -15 (natural sun-touched grass)
- Green Saturation: +15 to +30 (healthy, vibrant lawns)
- Yellow-Green Saturation: +10 to +20 (natural variation)
- Green Luminance: +5 to +15 (prevent dark lawn areas)
The goal is enhanced reality, not fantasy. Reference well-maintained local lawns and match that appearance.
Lightroom Settings for Aerial and Drone Photography
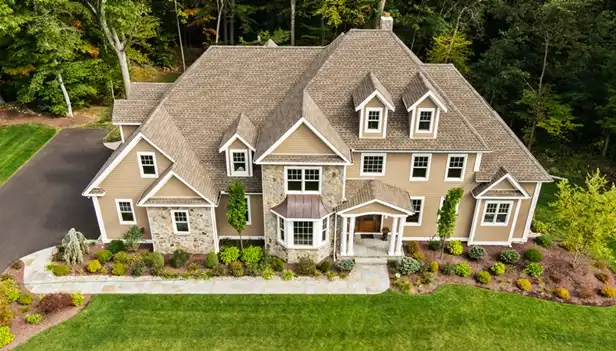
Contrast: +15 to +30
Aerial images appear flat due to atmospheric scattering. Increased contrast restores dimension and separation.
Clarity: +15 to +25
Brings out property boundaries, architectural details, and landscape features without harsh over-processing.
Dehaze: +5 to +10
Drone shots tolerate higher Dehaze values than ground-level photography because you’re counteracting actual atmospheric interference.
Color Accuracy:
- Adjust white balance to neutralize atmospheric color temperature
- Use the HSL panel for roof colors, road tones, and vegetation
- Maintain an accurate representation of property elements
Using Presets for Faster Real Estate Workflow
Why Custom Presets Work Best
Custom presets reflect your specific shooting conditions and editing style, delivering consistent results across all listings.
Room-Specific Presets:
- Kitchen: Higher clarity for tile and countertops
- Bedroom: Softer, warmer tones
- Bathroom: Bright, clean, neutral whites
- Exterior: Sky recovery, lawn enhancement, contrast
- Drone: Aggressive dehaze, contrast, clarity
Recommended Preset Types
Interior Bright Preset:
- Lens Corrections: Enabled
- Transform: Vertical
- Exposure: +0.7
- Highlights: -70
- Shadows: +60
- Whites: +20
- Blacks: -20
- Clarity: +15
- Vibrance: +8
Exterior Punch Preset:
- Lens Corrections: Enabled
- Transform: Level + Vertical
- Exposure: +0.2
- Highlights: -80
- Shadows: +50
- Whites: +25
- Blacks: -10
- Contrast: +20
- Clarity: +15
- Dehaze: +8
Drone-Specific Preset:
- Lens Corrections: Enabled
- Exposure: +0.3
- Highlights: -70
- Shadows: +40
- Contrast: +25
- Clarity: +20
- Dehaze: +8
Professional Preset Packs
The Luxe Lens Interior Collection offers room-specific presets optimized for modern real estate workflows, focusing on the bright and airy aesthetic buyers expect.
Preset Curator provides comprehensive real estate preset libraries with dedicated settings for interiors, exteriors, and aerial photography.
FixThePhoto offers free architectural presets suitable for real estate work, though custom adjustments may be needed.
Presets vs Manual Adjustments
When Presets Save Time:
- Multiple rooms with consistent lighting
- A batch of exteriors shot at the same time
- A series of drone shots from a similar altitude
When Manual Tweaks are Required:
- Mixed lighting scenarios
- Rooms with unusual colors or finishes
- Challenging exposures
- High-end luxury properties
Batch Editing Workflow in Lightroom
Sync Settings Safely: Select your best-edited image, then select similar images. Click Sync Settings and choose which adjustments to copy.
What NOT to Sync:
- Exposure (varies between shots)
- White Balance (unless identical lighting)
- Transform settings (camera angles differ)
- Spot Removal (location-specific)
- Crop and Straighten (composition-specific)
Safe to Sync:
- Lens Corrections
- Chromatic Aberration Removal
- Sharpening
- Noise Reduction
- Preset-based adjustments
Speed Editing Process:
- Import with lens corrections enabled
- Sort into room-type collections
- Edit one image per collection perfectly
- Sync settings to similar images
- Quickly pass fixing individual issues
- Export using saved presets
This workflow allows professionals to edit 100 images in 60-90 minutes with consistent quality.
Workflow Tools
LRTouch Tool and similar hardware controllers speed up slider adjustments during batch editing, reducing repetitive mouse movements.
Export Settings for MLS, Zillow, and Real Estate Websites
Recommended Export Settings
File Format: JPEG
JPEG provides excellent quality at manageable file sizes. Set quality to 80-90 for the best balance.
Color Space: sRGB
All real estate platforms use sRGB. Exporting in Adobe RGB creates flat, dull images online.
Image Dimensions: 2048 pixels (long edge)
This specification provides:
- Sharp images on high-resolution displays
- Reasonable file sizes (2-4MB)
- Compatibility with all major platforms
- Sufficient resolution for print if needed
Set resolution at 72 PPI for web delivery.
Quality Settings:
- 80-85: Large volumes, smaller files (1.5-3MB)
- 85-90: Professional standard (2-4MB)
- 90-95: Luxury properties (3-6MB)
Most professionals use 85-90 quality.
Naming and Delivery Best Practices
SEO-Friendly Names:
- 123-Main-Street-Living-Room.jpg
- 123-Main-Street-Kitchen.jpg
- 123-Main-Street-Exterior-Front.jpg
Organized Delivery Structure:
123 Main Street/
├── 01-Exterior/
├── 02-Living-Areas/
├── 03-Kitchen/
├── 04-Bedrooms/
├── 05-Bathrooms/
└── 06-Aerial/
Common Lightroom Mistakes in Real Estate Photography
Over-HDR Look
Excessive shadow lifting, aggressive highlight recovery, and maxed-out clarity create cartoonish images. Signs include halos around edges, oversaturated colors, and a complete absence of shadows.
Crooked Verticals
Tilted walls communicate amateur work. Every image needs vertical correction using the Transform panel.
Yellow or Blue Color Casts
Color casts make interiors look dirty (yellow) or cold (blue). Neutral, accurate color is non-negotiable.
Over-Sharpening
Excessive sharpening creates harsh, crunchy textures. Use the Masking slider to restrict sharpening to edges rather than flat surfaces.
Lightroom vs AI Editing Tools
Why Lightroom Still Wins for Control
Lightroom provides precise control over every image aspect. You decide exactly how much to adjust each slider, creating consistent results across hundreds of images. AI tools make assumptions that sometimes miss your creative intent.
Where AI Tools Can Assist
AI editing excels at specific tasks:
- Sky replacement for blown or gray skies
- Object removal (power lines, trash cans)
- Perspective correction for challenging angles
- Virtual staging enhancement
Hybrid Workflow Suggestions
- Batch process in Lightroom using presets
- Identify images needing special treatment
- Export specific images to AI tools for corrections
- Reimport into Lightroom catalog
- Final quality check and delivery
Final Tips for Professional Real Estate Editing
Less is More
Professional editing enhances reality without transforming it. Adjust until the image looks great, then pull back 10%. This restraint creates natural, believable images that sell properties.
Consistency Builds Trust
Maintain editing standards across every listing regardless of price point. Buyers browsing multiple properties from the same photographer should see consistent quality.
Edit for Buyers, Not Photographers
Real estate photography serves one purpose: helping buyers evaluate properties. Prioritize accuracy, brightness, and clarity over creative expression.
FAQs
What is the best Lightroom exposure for interiors?
Start with exposure between +0.5 to +1.0 in Lightroom’s Basic panel. This creates the bright, airy feeling buyers expect while maintaining detail. Combine this with highlights at -50 to -90 to preserve window views and shadows at +40 to +80 to eliminate dark corners. The exact value depends on your in-camera exposure, but most properly shot interiors need modest positive adjustment.
How do I fix blown-out windows in Lightroom?
Pull the Highlights slider to -70 or lower in the Basic panel. Use a graduated or radial filter over the window area and reduce exposure by -0.5 to -1.0 stops. Add Dehaze (+5 to +10) to reveal hidden detail. If windows remain completely white, the camera didn’t capture usable data—you needed exposure bracketing during shooting.
What is the best Lightroom export size for MLS?
Export at 2048 pixels on the long edge with JPEG quality at 85-90 in the sRGB color space. This meets requirements for MLS systems, Zillow, and Realtor.com in 2026. The 2048-pixel dimension provides sharp images while creating manageable 2-4MB file sizes. Set resolution to 72 PPI for web delivery.
Should I use presets for real estate photography?
Yes, presets dramatically speed up workflow while maintaining consistency. Create custom room-specific presets (kitchen, bedroom, exterior) based on your shooting conditions. Apply presets as starting points, then make minor manual adjustments for individual images. Professional preset packs like The Luxe Lens Interior Collection or Preset Curator can accelerate your workflow, but custom presets tailored to your style deliver the best results.
What exposure is best for real estate photography?
Shoot at proper exposure in-camera, then add +0.5 to +1.0 stops in Lightroom for interiors to achieve the bright, airy look. For exteriors, use -0.2 to +0.3 depending on sky brightness. The goal is to create inviting brightness without blowing highlights or washing out textures.
How do photographers edit real estate photos?
Professional photographers use systematic Lightroom workflows: apply lens corrections and vertical alignment first, then adjust exposure (lifting shadows, recovering highlights), correct white balance for neutral colors, apply room-specific presets, sync settings across similar images, make individual tweaks, and export at 2048px in sRGB. The process takes 60-90 minutes for 100 images using batch editing techniques.
Conclusion
The best Lightroom settings for real estate photography in 2026 balance speed with quality, creating bright, accurate images that sell properties faster. Start with core global adjustments—lens corrections, vertical alignment, and proper sharpening—then apply room-specific settings that enhance without over-processing. Interior shots need exposure around +0.5 to +1.0, aggressive highlight recovery (-50 to -90), and lifted shadows (+40 to +80) for that bright and airy look buyers expect. Exteriors require contrast (+15 to +25), moderate dehaze (+5 to +10), and natural color enhancement.
Custom presets accelerate your workflow while maintaining consistency across listings. Professional preset packs like The Luxe Lens Interior Collection or tools from Preset Curator deliver proven starting points, but tailoring settings to your specific shooting conditions produces the best results. Batch editing with sync settings handles volume efficiently—expect to process 100 images in 60-90 minutes once your system is dialed in.
Export at 2048 pixels (long edge) in sRGB color space with 85-90% JPEG quality for MLS, Zillow, and all real estate platforms. Remember: edit for buyers, not photographers. Natural enhancement beats artificial transformation every time. Straight walls, neutral colors, and restrained adjustments build trust and credibility that translates directly into faster sales.