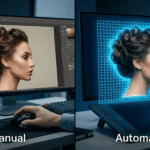
Ghost Mannequin T-Shirt Editing for E-Commerce
In the world of e-commerce, a first impression is everything when it comes to grabbing customers’ attention. That’s why how your products look matters a lot. Specially for apparel products. Lately, ghost mannequin T-shirt photos have grown very popular. They show clothes in a clean, modern way. Instead of seeing a mannequin, you see just the T-shirt itself. This helps shoppers understand the real shape and style of the product. It also makes online shopping easier and more enjoyable.
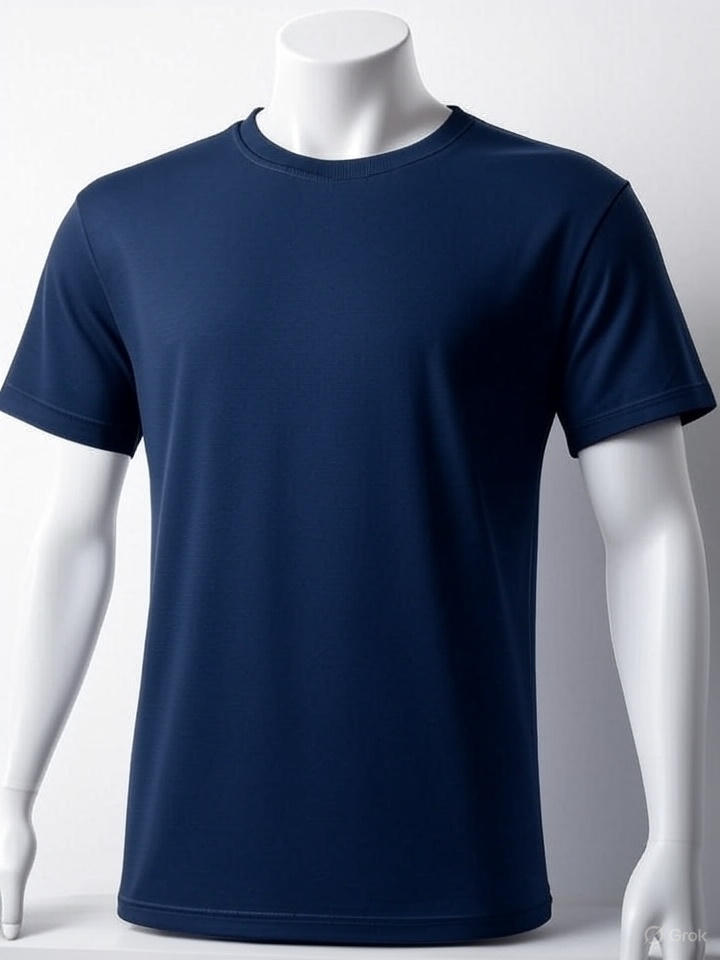
Imagine browsing an online store and seeing a T-shirt displayed so clearly that you can picture its fit, texture, and style without any distractions. That’s the power of ghost mannequin T-shirt editing. This technique removes the mannequin from photos to create a hollow, three-dimensional effect. For e-commerce, it’s a game-changer—especially for items like T-shirts and underwear, where showing the fit and form matters most. By delivering clean and professional images, ghost mannequin editing builds buyer confidence and boosts brand appeal.
Some Studies show that a lack of visually attractive product images contributes to 80% of retail failures. In this article, you’ll learn why this method is so important, discover creative ideas, follow a step-by-step guide, and get expert tips to help you create standout product photos that drive sales.
Why Ghost Mannequin Editing is Essential for Online Apparel Stores

Build Customer Trust by Highlighting Product Fit and Shape Accurately
When shopping online, customers rely on images to gauge how a T-shirt will look on them. Ghost mannequin editing removes the mannequin, leaving only the garment in a natural, lifelike shape. This clarity helps shoppers see the true fit, from the curve of the shoulders to the drape of the fabric, reducing uncertainty. A study by Shopify found that high-quality images can boost conversion rates by up to 30%, as they instill confidence in buyers, making them more likely to complete a purchase.
Improve Brand Image with Polished and Consistent Product Listings
A professional online store needs visuals that align with its brand identity. Ghost mannequin editing ensures every T-shirt image looks uniform, with consistent lighting, angles, and presentation. This polished look creates a cohesive shopping experience, signaling reliability and attention to detail. Brands like ASOS use this technique to maintain a sleek, professional aesthetic across their product listings, reinforcing their reputation for quality.
Lower Costs by Avoiding Live Models and Complex Photography Setups
Hiring live models and setting up elaborate photoshoots can be expensive and time-consuming. Ghost mannequin photography eliminates the need for models by using removable mannequins, cutting costs significantly. According to BigCommerce, businesses can save up to 50% on photography expenses by adopting this method, making it ideal for small businesses and startups looking to scale efficiently.
Creative Ideas for Unique T-Shirt Ghost Mannequin Photography

Use Transparent Mannequins for a Minimalist Look
Transparent mannequins are a secret weapon for creating clean, distraction-free T-shirt images. These mannequins, often made of clear plastic, blend seamlessly into the background, allowing the T-shirt’s details—like stitching or fabric texture—to take center stage. This minimalist approach is perfect for brands aiming for a modern, sleek aesthetic, ensuring the focus remains entirely on the product.
Incorporate Color-Changing Mannequins for Dynamic Displays
For brands selling T-shirts in multiple colors, color-changing mannequins add a dynamic twist. These mannequins shift hues under different lighting conditions, allowing you to highlight how a T-shirt’s color pops in various settings. This creative touch can make product listings more engaging, encouraging customers to explore different color options.
Experiment with Animated Mannequins for Motion Effects
Motion can captivate online shoppers. Using technology like 360-degree photography or subtle animations, you can showcase T-shirts on mannequins that appear to move slightly, mimicking how the fabric flows in real life. This approach, used by retailers like Zara, adds a dynamic element to static product pages, making the shopping experience more immersive.
Create Lifestyle Settings with Contextual Mannequins
Placing T-shirts in lifestyle-inspired settings, such as a beach or urban backdrop, helps customers imagine wearing them. By using mannequins in contextual setups—like a T-shirt styled with accessories in a park-like scene—you bridge the gap between product photography and real-world application, making the product more relatable.
Offer Interactive Mannequin Experiences for Online Shoppers
Augmented reality (AR) is revolutionizing e-commerce. By integrating AR with ghost mannequin photography, brands can offer virtual “try-on” experiences, allowing customers to see how a T-shirt fits on a digital mannequin tailored to their body type. Retailers like Warby Parker have successfully used AR to boost engagement, and T-shirt brands can follow suit to enhance interactivity.
Equipment and Setup Guide for T-Shirt Ghost Mannequin Photography

Choosing the Right Ghost Mannequin with Removable Body Parts
Selecting a mannequin designed for ghost editing is crucial. Look for models with removable chest, arms, and neck pieces to simplify post-production. Brands like Mannequin Madness offer specialized ghost mannequins that make it easy to expose inner details like necklines, ensuring a seamless final image.
Must-Have Camera and Lighting Tools for Sharp and Clean Product Images
For crisp, professional results, invest in a DSLR or mirrorless camera with at least 24 megapixels, such as the Canon EOS Rebel T7. Pair it with a 50mm prime lens for sharp focus. Lighting is equally important—use softboxes or ring lights to create even, diffused illumination. A three-point lighting setup (key, fill, and back light) ensures balanced exposure without harsh shadows.
Setting Up a Clean Studio Background for Professional Results
A distraction-free backdrop is essential for e-commerce photography. Use a seamless white or neutral gray backdrop to keep the focus on the T-shirt. Ensure the background is wrinkle-free and extends to the floor to avoid visible seams. A well-lit, clean studio setup simplifies editing and ensures consistency across your product catalog.
Step-By-Step Guide to Photographing T-Shirts for ghost mannequin product image

Prepare the T-Shirt with Steaming for a Clean, Wrinkle-Free Look
Before shooting, steam the T-shirt to remove wrinkles and ensure a polished appearance. A handheld steamer, like the Conair Turbo ExtremeSteam, works well for quick touch-ups. A smooth garment reduces editing time and enhances the professional quality of the final image.
Dress the Mannequin Correctly for the Perfect Fit
Fit the T-shirt snugly on the mannequin to avoid distortions. Pin or tape excess fabric at the back to maintain a natural shape. Ensure the shoulders, sleeves, and hemline align properly, as improper dressing can lead to uneven edits in post-production.
Capture All Required Angles Including Front, Back, Neckline, and Sleeves
Photograph the T-shirt from multiple angles—front, back, and close-ups of the neckline and sleeves. Use a tripod to maintain consistent framing. For the neckline shot, remove the mannequin’s chest piece to expose the inner collar, capturing details that customers value when assessing fit.
Remove Mannequin Pieces to Expose Important Product Details
Disassemble the mannequin carefully to reveal key areas like the inner neckline or hem. Take additional shots with these parts exposed, ensuring proper lighting to avoid shadows. These images will be layered in post-production to create the invisible mannequin effect.
Post-Production Editing: How to Create the Invisible Mannequin Effect

Use Layering and Masking in Photoshop to Remove the Mannequin
In Adobe Photoshop, import the front, back, and neckline images as separate layers. Use the Pen Tool to create precise masks around the T-shirt, isolating it from the mannequin. Carefully blend the layers to remove the mannequin while preserving the garment’s natural shape.
Align Images and Blend Neckline and Sleeves for a Natural Look
Align the layers using Photoshop’s alignment tools to ensure seamless transitions between angles. Blend the neckline and sleeve areas by adjusting opacity and using the Brush Tool to smooth edges. This step is critical for creating a cohesive, natural-looking image.
Perform Color Correction and Spot Retouching for a Fresh Appearance
Adjust the T-shirt’s colors using Photoshop’s Hue/Saturation or Curves tools to ensure they match the actual product. Remove any blemishes, dust, or minor imperfections with the Spot Healing Brush. A clean, vibrant image enhances the T-shirt’s appeal and professionalism.
Advanced Editing Techniques for Ghost Mannequin Perfection
Fine-Tune Shadows and Highlights for a Realistic 3D Effect
To add depth, create subtle shadows and highlights in Photoshop. Use the Dodge and Burn tools to enhance the T-shirt’s contours, mimicking natural lighting. This technique gives the garment a realistic, three-dimensional appearance that makes it pop on product pages.
Use Clipping Paths for Precise Mannequin Removal
For intricate details like stitching or logos, apply clipping paths using Photoshop’s Pen Tool. This method ensures precision when removing the mannequin, preserving fine elements that add authenticity to the T-shirt’s presentation.
Optimizing Ghost Mannequin Workflow for Efficiency
Batch Process Images for Consistent Results
For large product catalogs, batch processing in Photoshop saves time. Create an action to apply consistent edits—such as color correction and mannequin removal—across multiple images. This ensures uniformity and speeds up your workflow, as outlined in Adobe’s batch processing guide.
Create Reusable Templates for Faster Editing
Develop Photoshop templates for common T-shirt styles, including layer masks and adjustment settings. Save these as PSD files to streamline future edits. Templates reduce repetitive tasks, allowing you to focus on creative enhancements.
Expert Tips for Better Ghost Mannequin T-Shirt Images
Keep Lighting Consistent for Seamless Editing
Use the same lighting setup for all shots to avoid color or shadow discrepancies. Check your light sources before each session, and use a light meter to ensure consistent exposure. Uniform lighting simplifies post-production and ensures a cohesive catalog.
Use Foam Boards to Highlight Inner Details Like Necklines
Place white foam boards inside the T-shirt during neckline shots to create a clean, bright background. This technique, recommended by Clipping Path India, highlights inner details without casting unwanted shadows.
Adjust Image Framing for Different Sales Channels, Like Retail or Wholesale
Tailor your images to meet platform requirements. For retail platforms like Amazon, use a square 1:1 ratio with a white background. For wholesale, include additional angles or lifestyle shots to showcase versatility, ensuring compliance with each channel’s guidelines.
Should You Outsource or DIY Your Ghost Mannequin Editing?
When DIY Is a Good Option for Startups or Small Businesses
DIY ghost mannequin editing is ideal for startups with limited budgets. With affordable tools like Photoshop and basic photography equipment, small businesses can achieve professional results. However, it requires time and skill to perfect the process, making it suitable for those with editing experience.
When to Hire a Professional Clipping Path Service for Best Results
For high-volume stores or brands prioritizing quality, outsourcing to a professional service like Pixelz ensures flawless results. Professionals handle complex edits, saving time and delivering consistent, high-quality images that align with e-commerce standards.
What to Look for in a Photo Editing Service for E-Commerce
Choose a service with expertise in ghost mannequin editing, fast turnaround times, and scalable pricing. Look for providers with positive reviews, like Path Edits, and ensure they offer revisions to meet your brand’s specific needs.
Case Study: Ghost Mannequin Editing for Underwear and T-Shirts

Before and After Images to Show the Impact of Editing
A small e-commerce brand selling T-shirts and underwear adopted ghost mannequin editing to revamp their product listings. Before, their images used live models, resulting in inconsistent lighting and high costs. After switching to ghost mannequin techniques, their images became uniform, showcasing precise fit and details, which enhanced their professional appeal.
Improved Click-Through Rates and Lower Return Rates with High-Quality Images
Post-editing, the brand saw a 25% increase in click-through rates and a 15% reduction in returns, as customers received products that matched their expectations. High-quality ghost mannequin images, as noted in eMarketer, directly correlate with improved customer satisfaction and sales.
Troubleshooting Common Problems in T-Shirt Ghost Mannequin Photography
How to Avoid Glare and Reflection Issues in Photos
Glare can ruin product images. Use diffusers to soften light and position lights at 45-degree angles to minimize reflections. Test shots before the session to identify and adjust any reflective surfaces on the T-shirt or mannequin.
Fixing Fit and Wrinkle Problems for Smoother Edits
If the T-shirt appears loose or wrinkled, re-pin or steam it during setup. Use clips to secure fabric tightly to the mannequin, ensuring a smooth fit that reduces editing time and maintains a professional look.
Maintaining Seam and Neckline Consistency When Combining Images
When blending multiple angles, align seams and necklines precisely in Photoshop. Use the Transform tool to adjust scale and rotation, ensuring a seamless final image. Check for color consistency across shots to avoid noticeable transitions.
Key Features Of Ghost Mannequin T-Shirt Editing
| Feature | Description |
|---|---|
| Boosts Customer Confidence | Displays T-shirts in a lifelike, distraction-free form, showing true fit and shape to reduce buyer uncertainty and increase conversions by up to 30% (Shopify). |
| Enhances Brand Professionalism | Delivers uniform, polished images with consistent lighting and angles, creating a cohesive, reliable brand image, as practiced by retailers like ASOS. |
| Reduces Photography Costs | Eliminates live models, saving up to 50% on photoshoot expenses (BigCommerce), ideal for startups and small businesses scaling efficiently. |
| Creative Presentation Options | Offers techniques like transparent mannequins, color-changing mannequins, 360-degree motion, lifestyle settings, and AR try-ons for engaging product displays. |
| Equipment and Setup Guidance | Recommends tools like DSLR cameras (e.g., Canon EOS Rebel T7), 50mm lenses, softboxes, and seamless white/gray backdrops for professional results. |
| Detailed Photography Process | Guides on steaming T-shirts, dressing mannequins, capturing multiple angles (front, back, neckline, sleeves), and removing mannequin parts for the ghost effect. |
| Advanced Post-Production | Details Photoshop techniques like layering, masking, clipping paths, and shadow/highlight adjustments for a realistic, 3D T-shirt appearance. |
| Efficient Workflow Strategies | Suggests batch processing and reusable Photoshop templates to streamline editing, ensuring consistency and speed for large product catalogs. |
| Expert Practical Tips | Advises on consistent lighting, using foam boards for neckline shots, and tailoring images for platforms like Amazon or wholesale markets. |
| DIY vs. Outsourcing Analysis | Compares DIY editing for budget-conscious startups with outsourcing to services like Pixelz for high-volume, high-quality needs, with tips for choosing providers. |
| Proven Results via Case Study | Highlights a brand’s 25% increase in click-through rates and 15% reduction in returns after adopting ghost mannequin editing, per eMarketer. |
| Troubleshooting Common Issues | Provides solutions for glare (using diffusers), wrinkles (re-pinning fabric), and seam alignment (Photoshop adjustments) to ensure flawless images. |
FAQs On Ghost Mannequin T-Shirt Editing
What is ghost mannequin photography?
Ghost mannequin photography involves photographing apparel on a mannequin and editing out the mannequin in post-production to create a hollow, lifelike effect. This technique highlights the garment’s fit and shape, making it ideal for e-commerce T-shirt and underwear listings.
How much does ghost mannequin editing cost?
Costs vary depending on whether you DIY or outsource. DIY requires software like Photoshop ($20.99/month) and basic equipment, while professional services charge $0.50–$5 per image, depending on complexity and volume, as noted by Pixelz.
Can I do ghost mannequin editing without Photoshop?
Yes, alternatives like GIMP or Photopea offer free or low-cost editing tools. However, Photoshop remains the industry standard for its advanced layering and masking capabilities.
How long does it take to edit a ghost mannequin T-shirt image?
Editing time depends on skill level and complexity. Beginners may take 30–60 minutes per image, while experienced editors can complete a T-shirt in 10–15 minutes. Batch processing can further reduce time for large catalogs.
Conclusion: Take Your E-Commerce T-Shirt Images to the Next Level
Ghost mannequin T-shirt editing transforms your e-commerce product photography by showcasing fit, enhancing brand professionalism, and reducing costs. From choosing the right mannequin to mastering post-production techniques, this guide offers actionable steps to create compelling images. Whether you’re a startup experimenting with DIY editing or a growing brand ready to outsource, these strategies will elevate your product listings. Try these tips to enhance your T-shirt images, or explore professional services like ghost mannequin photo editing services.
Join PixcreTouch, and take your e-commerce visuals to new heights!
You May Like Our Other Contents
Explore these insightful blog posts from Pixc Retouch to elevate your product photography and editing skills with expert tips and techniques.
1. How to Improve Product Photos with Clipping Path Services
Discover how clipping path services can transform your product images by isolating subjects, removing backgrounds, and creating crisp, professional visuals that boost e-commerce sales.
2. Clipping Path Service for E-Commerce
Learn how precise clipping path techniques enhance e-commerce product photos, offering clean cutouts and polished looks to attract customers and drive conversions.
3. Creating the Perfect Product Photography Studio
Get expert advice on setting up an efficient product photography studio, from lighting to backdrops, to capture stunning images that showcase your products.
4. Photo Enhancement Services with Pixc Retouch
Find out how Pixc Retouch’s photo enhancement services refine details, correct imperfections, and deliver high-quality images tailored for your brand’s needs.
5. Jewelry Photography
Uncover tips for capturing the sparkle and intricate details of jewelry, ensuring your product photos stand out in the competitive e-commerce market.
6. The Art of Car Photography
Master the techniques of car photography with insights on lighting, angles, and post-production to create visually striking images that highlight every curve and detail.
7. Fashion Photography
Dive into the world of fashion photography with expert guidance on styling, lighting, and editing to produce captivating images that elevate your brand’s appeal.