Whether you’re an eCommerce seller or a photographer, mastering shoe photo editing with natural shadows boosts product appeal and trust. Shadows aren’t just details; they create depth, mimic real-world lighting, and make footwear feel tangible on screen.
In this guide, we’ll dive into why natural shadows matter for shoe product photography, common pitfalls to avoid, and step-by-step methods using tools like Photoshop or AI alternatives for How to Add Natural Shadow to Shoe Photos. You’ll discover how realistic shadows improve buyer perceptions, with tips backed by industry insights. For instance, well-shadowed images can increase conversion rates by enhancing visual depth, as shadows help products stand out without overwhelming the viewer. Stick around to elevate your eCommerce shoe photo editing game and make your listings pop.
What It Means to Add a Natural Shadow to Shoe Photos
Adding a natural shadow to shoe photos involves creating subtle, light-responsive effects that mimic how shoes interact with surfaces in real life. This technique grounds the product, making it appear stable and three-dimensional rather than detached.
How natural shadows ground shoes and prevent a floating look
Natural shadows anchor shoes to the background, eliminating that awkward “floating” effect common in poorly edited images. By simulating ground contact, they provide context, like a shoe resting on a floor. This is crucial in footwear photos, where soles and heels need to feel connected. Without it, products can seem artificial, deterring potential buyers who crave authenticity.
Why realistic shadows improve depth and product believability
Realistic shadows add layers of depth, turning 2D images into immersive visuals. They enhance textures and shapes, making shoes look believable. In online shopping, this builds confidence—buyers visualize wearing the product. Studies show that images with proper depth can boost perceived quality, leading to higher engagement.
Natural shadow vs artificial drop shadow in shoe images
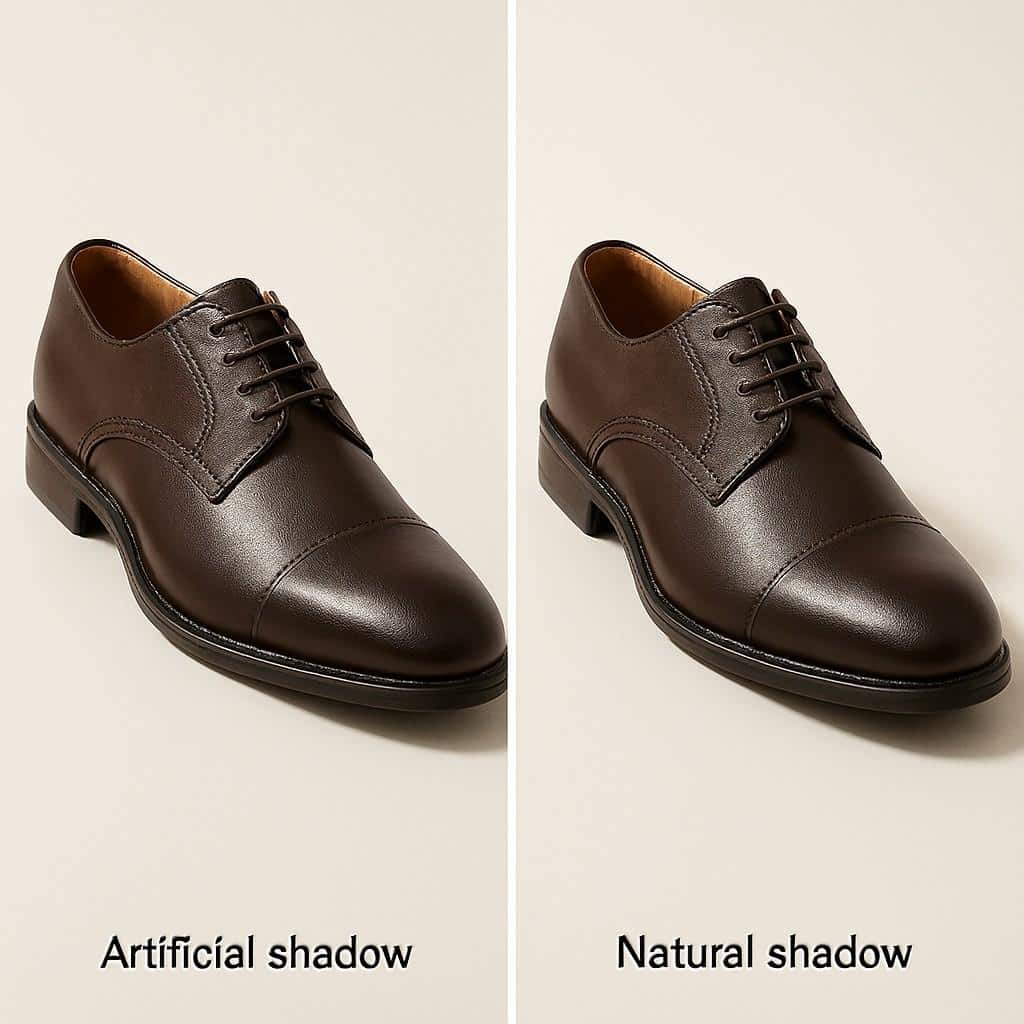
Artificial vs Natural Shadows in Shoe Images
Natural shadows follow light sources organically, varying in softness and direction for realism. Artificial drop shadows, often uniform and harsh, lack nuance and can make images feel generic. Opt for natural ones in shoe image editing to convey premium quality, while reserving drop shadows for quick fixes where subtlety isn’t key.
Why Natural Shadow Product Photography Matters for Shoes
In shoe product photography, natural shadows play a pivotal role in captivating audiences. They elevate simple shots into professional displays, influencing how shoppers perceive and interact with listings.
How shadows influence buyer trust in eCommerce shoe photos
Shadows build trust by making products feel real and reliable. Flat images without them often raise doubts about quality or accuracy. When you add natural shadow to product photos, it reassures buyers that what they see matches reality, reducing returns and boosting satisfaction.
Visual depth and realism in online shopping
Depth from shadows creates a 3D illusion, helping customers assess fit and style. In footwear, this realism highlights details like stitching or material sheen, making online shopping more intuitive and enjoyable.
How flat images reduce perceived product quality
Without shadows, shoes appear low-effort and cheap. This flatness diminishes appeal, as buyers associate it with subpar brands. Adding shadows counters this, signaling attention to detail and elevating overall product value.
The role of shadows in brand consistency and presentation
Consistent shadows unify your catalog, reinforcing brand identity. They ensure every shoe photo aligns, creating a polished, professional look that stands out in competitive markets.
Why uniform shoe photography shadows matter across listings
Uniformity in shadows maintains harmony across pages, aiding navigation and trust. Inconsistent effects confuse viewers, while standardized ones streamline the shopping experience and encourage repeat visits.
Understanding Shoe Product Photography Shadows Before Editing
Before diving into edits, grasp the basics of shadows in footwear images. This knowledge prevents errors and ensures your final results shine.
Types of shadows used in shoe and footwear photos
Shadows vary by purpose: some ground, others enhance luxury. Choosing the right type depends on your product’s style and platform needs.
Cast shadow and how it grounds the shoe
Cast shadows project from the shoe onto the surface, providing stability. They ground the item naturally, ideal for everyday eCommerce shots where realism drives sales.
Drop shadow product photos and when to avoid them
Drop shadows are simple offsets, great for quick edits but often too rigid. Avoid them in premium listings, as they can make shoes look cartoonish compared to organic options.
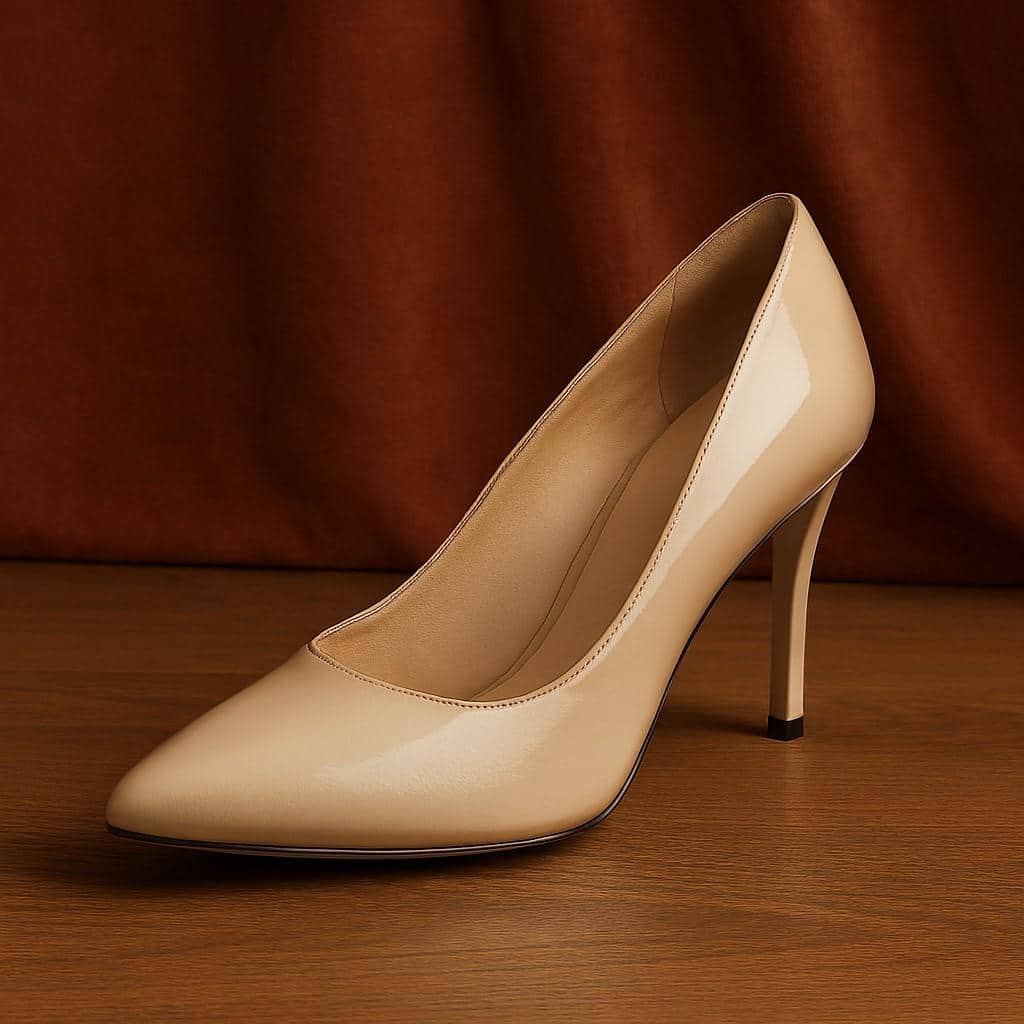
Reflection shadow shoes for premium product displays
Reflection shadows mimic glossy floors, adding elegance. They’re perfect for luxury footwear, creating a high-end vibe without overcomplicating the image.
Common shadow mistakes that make shoes look unnatural
Mistakes like mismatched directions or excessive darkness ruin realism. Spotting these early saves time in post-production.
Overly dark shadows
Heavy shadows overwhelm the shoe, hiding details and creating a gloomy feel. Keep them subtle to maintain balance and highlight the product.
Incorrect shadow direction
Shadows ignoring light sources look off-kilter. Always align them with highlights on the shoe for cohesive, believable results.
Shadows that ignore the shoe sole shape
Generic shadows mismatch sole contours, breaking immersion. Tailor them to the shoe’s form for seamless integration.
Preparing Shoe Photos Before Adding a Natural Shadow
Prep work sets the stage for flawless shadows. Clean images ensure edits blend naturally, avoiding rework.
How to remove harsh shadows from shoes first
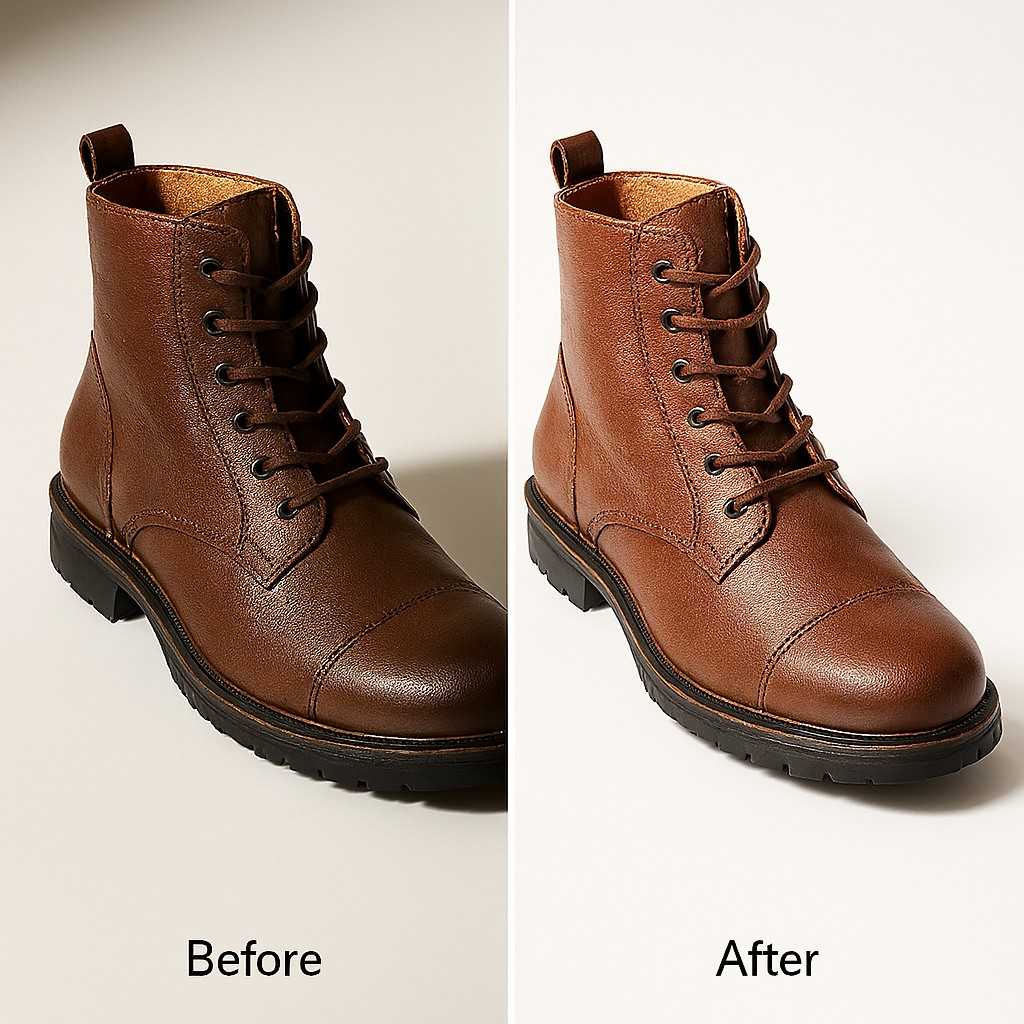
Before and After Removing Harsh Shadows
Start by neutralizing existing shadows to create a blank canvas. This step preserves the shoe’s true colors and shapes.
Cleaning uneven lighting issues
Use adjustment layers to even out the light. Tools like curves fix hotspots, ensuring shadows add value without clashing.
Why harsh shadows break realism
Harsh ones distort perceptions, making shoes seem uneven or flawed. Removing them first allows controlled, natural additions later.
Why clean cutouts matter for realistic shoe shadow Photoshop work
Precise cutouts isolate shoes cleanly, enabling accurate shadow placement. Sloppy edges lead to unnatural blends.
Edge accuracy around soles and heels
Refine edges with tools like the pen for sharp outlines. This precision ensures shadows hug contours realistically.
Background choice for natural shadow for eCommerce shoes
Neutral or white backgrounds complement shadows best. They keep focus on the shoe while allowing flexible edits.
Method 1 – The Photoshop Manual Workflow (Most Realistic Control)
For ultimate precision, manual Photoshop reigns. It offers hands-on tweaks for shadows that feel alive.
Why does manual Photoshop shadow creation look more natural
Manual methods allow custom adjustments, outperforming automated ones in nuance. You control every aspect for tailored realism.
Full control over direction, softness, and depth
Tweak angles and blurs freely. This flexibility matches real lighting, enhancing the shoe’s believability.
Step 1 – Isolate the Shoe on a Clean Background
Begin by separating the shoe. This isolation simplifies shadow building.
Using the Pen Tool or Object Selection Tool
Select with the pen for curves or the object tool for speed. Both ensure clean extractions.
Placing the shoe on a white or neutral background
Drop it onto a plain canvas. This setup highlights edits without distractions.
Step 2 – Duplicate the Shoe Layer to Create the Shadow Base
Copy the layer for your shadow foundation. It mirrors the shoe’s shape accurately.
Naming and organizing layers for a clean workflow
Label layers clearly. Organization speeds up complex projects.
Positioning the shadow layer below the shoe
Slide it underneath. This stacks effects naturally.
Step 3 – Transform and Distort the Shadow for Ground Contact
Shape the shadow to touch the “ground.” Distortions mimic perspective.
Using Transform, Distort, or Perspective tools
Apply these to the angle correctly. They create floor-like contact.
Making the shadow lie flat based on the light source direction
Align with imagined light. Consistency sells the illusion.
Step 4 – Adding Darkness and Blur for Realistic Shadows
Darken and soften for a lifelike fade.
Filling the shadow with dark gray instead of pure black
Gray blends better, avoiding stark contrasts.
Applying Gaussian Blur for soft edges
Blur edges gradually. It softens harsh lines.
Choosing the right blur radius for shoe size
Scale blur to shoe proportions. Larger shoes need more.
Step 5 – Adjusting Opacity and Blending for Natural Results
Fine-tune visibility for subtlety.
Using the Multiply blending mode for realism
Multiply integrates shadows seamlessly.
Setting opacity between 20 and 50 percent
Low opacity prevents overpowering. Adjust per light.
Step 6 – Creating Contact Shadows Where the Shoe Touches the Ground
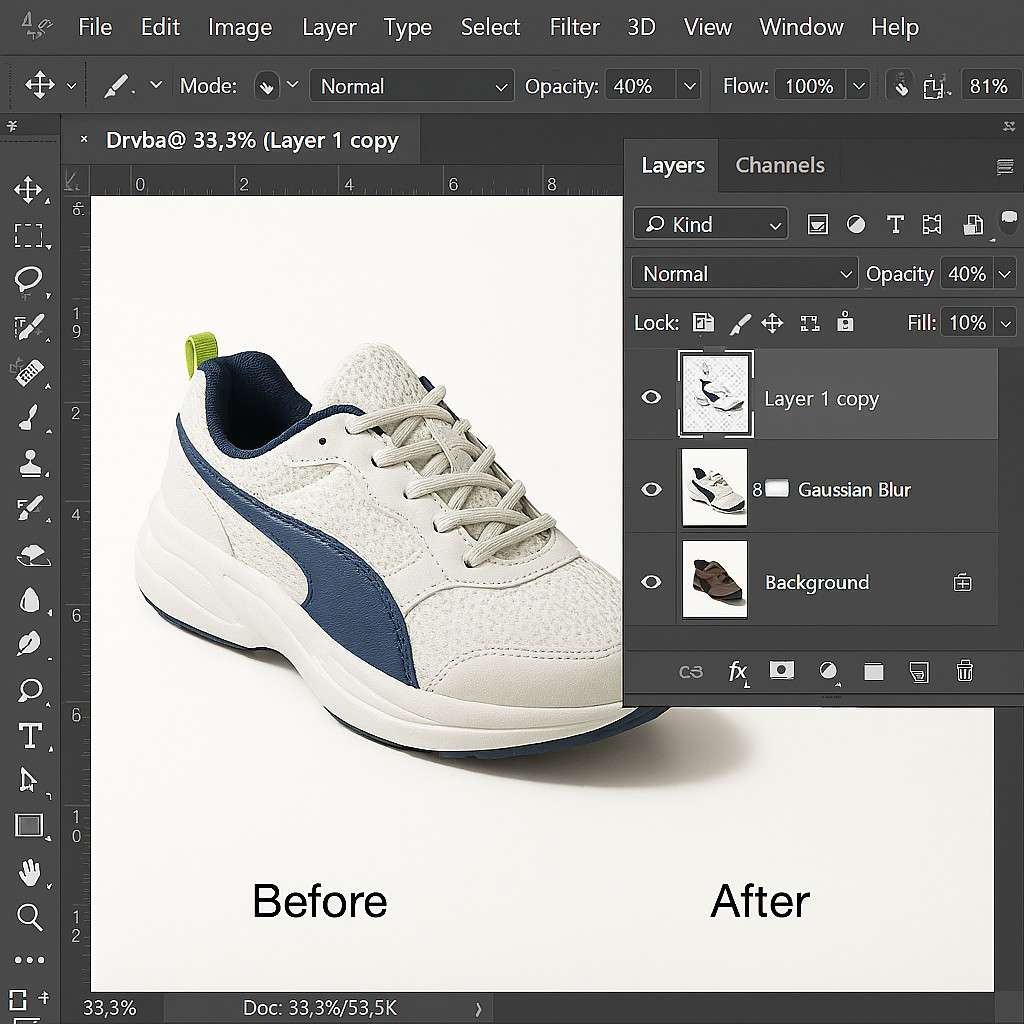
Photoshop Steps for Adding Natural Shadow to Shoes
Add final touches under soles.
Painting thin shadows under the sole
Brush lightly for depth.
Using low opacity brushes for subtle depth
Soft brushes build gradual effects.
Method 2 – AI-Powered Tools to Add Natural Shadow to Shoe Photos
For speed, AI tools streamline the process. They’re ideal when time trumps total control.
When AI tools make sense for large product catalogs
Batch editing huge inventories? AI saves hours, automating repetitive tasks.
Speed and batch processing benefits
Process dozens at once. Efficiency scales with volume.
Trade-offs between control and automation
You sacrifice tweaks for convenience. Use for standard needs.
Using Photoroom to Add Grounded Shoe Shadows
Photoroom analyzes and adds shadows effortlessly.
Automatic light direction analysis
It detects sources, applying fitting shadows.
Best use cases for eCommerce sellers
AI-Edited Shoe with Natural Shadow
Perfect for quick listings, boosting sales visuals.
Using Designify for Readymade Shadow Styles
Designify offers preset options for fast results.
Natural, drop, and reflection shadow options
Choose styles instantly. Versatile for varied shoes.
Fast background removal with shadows
Combines steps, simplifying workflows.
Using X-Design for AI-Generated Product Scenes
X-Design crafts scenes with prompts.
Prompt-based shadow generation
Describe, and it generates. Creative freedom.
Integrated backgrounds with realistic shadows
Blends everything cohesively.
How to Add Floating Shadow to Images Without Losing Realism
Floating shadows suit dynamic layouts, adding lift without detachment.
When floating shadows work for footwear photos
Use them in lifestyle shots or modern grids. They convey energy.
Lifestyle images and modern layouts
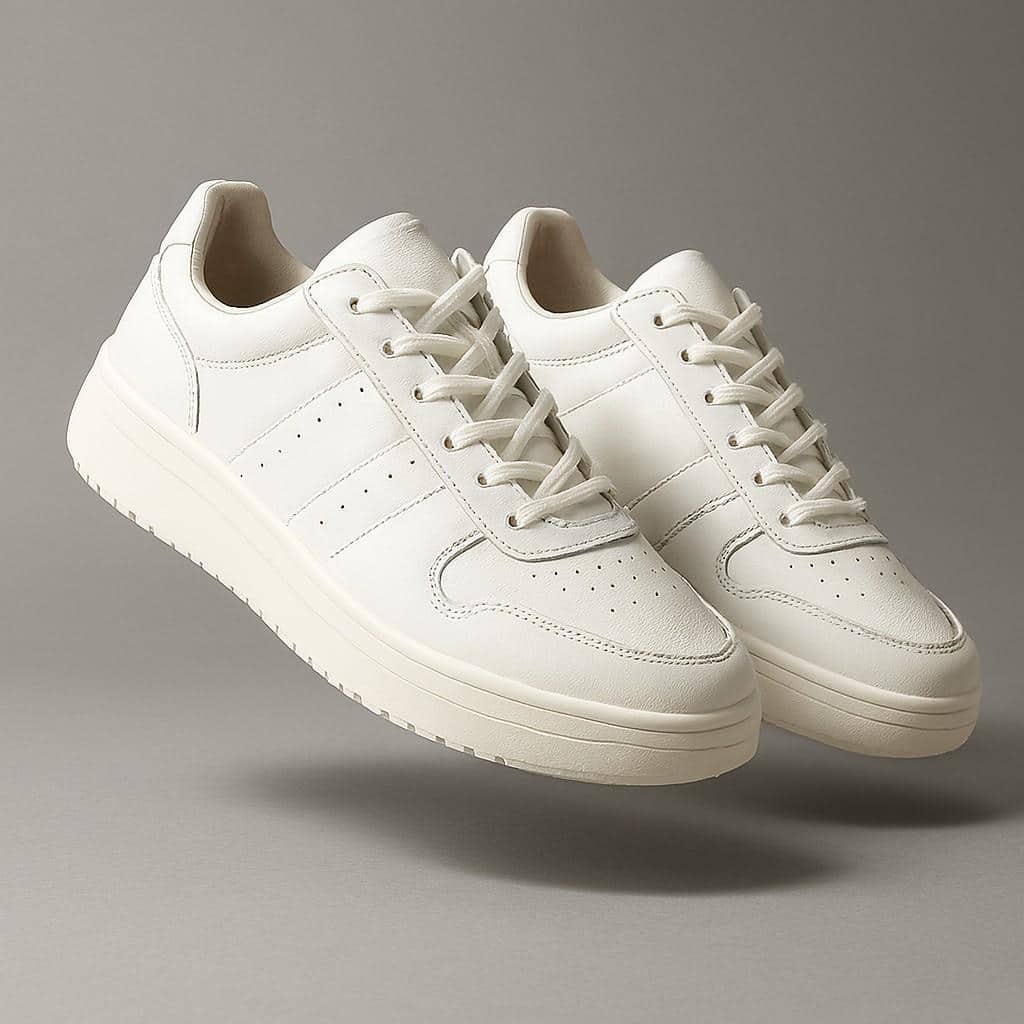
Floating Shadow in Footwear Lifestyle Photo
Enhance storytelling, like shoes in motion.
How to control height and softness in floating shadows
Adjust distance and blur. Keep it light for believability.
Keeping shadows light and believable
Subtlety maintains grounding, even elevated.
How to Create Reflection Shadow Shoes for Premium Product Photos
Reflections add polish for upscale vibes.
When reflection shadows enhance the shoe presentation
Ideal for glossy, luxury items. They evoke sophistication.
Luxury footwear and glossy surfaces
Pair with shiny backgrounds for impact.
Avoiding overuse of reflection effects
Don’t dominate; blend subtly.
Keeping reflections subtle and soft
Soft edges prevent distractions.
Key Tips for Creating Realistic Shoe Shadows That Competitors Miss
Stand out with pro-level nuances in your edits.
Matching the shadow direction with the light source
Sync with the shoe highlights for unity.
Reading highlights on the shoe surface
Observe glints to guide direction.
Fixing mismatched shadow angles
Correct early to avoid re-edits.
Creating soft fall-off for natural shadow depth
Gradual fades mimic nature.
Darker shadows near the shoe
Intensify close, lighten afar.
Lighter and blurrier edges farther away
This builds authentic depth.
Using transparency to avoid fake-looking shadows
Let backgrounds peek through.
Why shadows should never be pure black
Gray allows texture visibility.
Letting background texture show through
Enhances realism seamlessly.
| Tip | Benefit | Common Error to Avoid |
| Match the light source | Cohesive look | Ignoring highlights |
| Soft fall-off | Natural depth | Uniform darkness |
| Use transparency | Believable blend | Solid black fills |
Shadow Consistency for eCommerce Shoe Photo Editing
Consistency turns catalogs into cohesive stories.
Why consistent shadows increase conversion rates
Uniform visuals build trust, encouraging purchases.
Visual harmony across category pages
Harmonized shadows ease browsing.
Building a shadow style guide for footwear photos
Document standards for teams.
Shadow size, opacity, and direction standards
Set rules for repeatable quality.
FAQs
How do I remove harsh shadows from shoes before editing?
Use Photoshop’s adjustment layers, like curves or levels, to balance lighting. Select harsh areas, soften with a brush at low opacity, then proceed to add natural ones.
What’s the difference between cast shadow and drop shadow in product photos?
Cast shadows mimic real projections based on light, grounding items naturally. Drop shadows are basic offsets, quicker but less realistic—best for simple needs.
Can AI tools like Photoroom handle batch shadow addition for shoes?
Yes, Photoroom excels in batch processing, analyzing light automatically for quick, consistent results on large catalogs.
How to make a natural shadow for shoes in Photoshop without it looking fake?
Duplicate the layer, distort for perspective, fill with gray, blur with Gaussian, and blend on multiply mode at 30-40% opacity for seamless integration.
Why do my shoe shadows look mismatched in direction?
Check the shoe’s highlights—they indicate the light source. Align shadows accordingly to fix inconsistencies.
Is the reflection shadow suitable for all types of footwear photos?
No, reserve it for premium or glossy shoes. Overuse of casual styles can make them appear overly polished and unnatural.
In wrapping up how to add natural shadow to shoe photos, remember that these techniques ground your images, boost realism, and drive sales through trust. From manual Photoshop steps to AI shortcuts, consistency and subtlety are key. Apply these to your eCommerce shoe photo editing for standout results.
Ready to transform your listings? Start experimenting with these methods today and watch your product images come to life. Your shoes deserve to shine—make it happen!