Knowing how to add sparkles in Photoshop instantly elevates product photography and magical portrait composites.
How to Add Sparkles in Photoshop is accomplished by creating a custom brush, applying a noise-based glitter overlay, or modifying brush settings. These methods work because they leverage Photoshop’s blend modes and filters to generate realistic light flares that composite naturally over existing highlights.
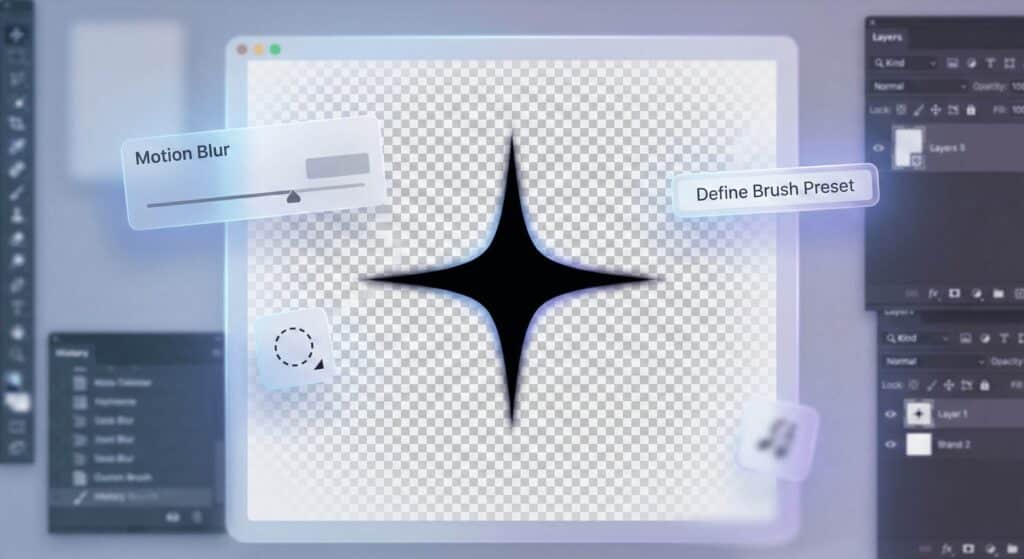
- Create a Custom Brush: Draw an oval, apply Motion Blur to stretch it, duplicate and rotate 90 degrees to form a star, and save it via Edit > Define Brush Preset.
- Use a Glitter Overlay: Create a black layer, apply the Add Noise filter, use a Curves adjustment to isolate the white specks, and set the Blend Mode to Screen or Linear Dodge (Add).
- Modify Brush Settings: Use the Brush Settings panel to increase Spacing, max out Size/Angle Jitter in Shape Dynamics, and increase Scattering to 1000% to paint dynamic fairy dust.
How Do You Use Sparkle and Glitter Effects in Images?
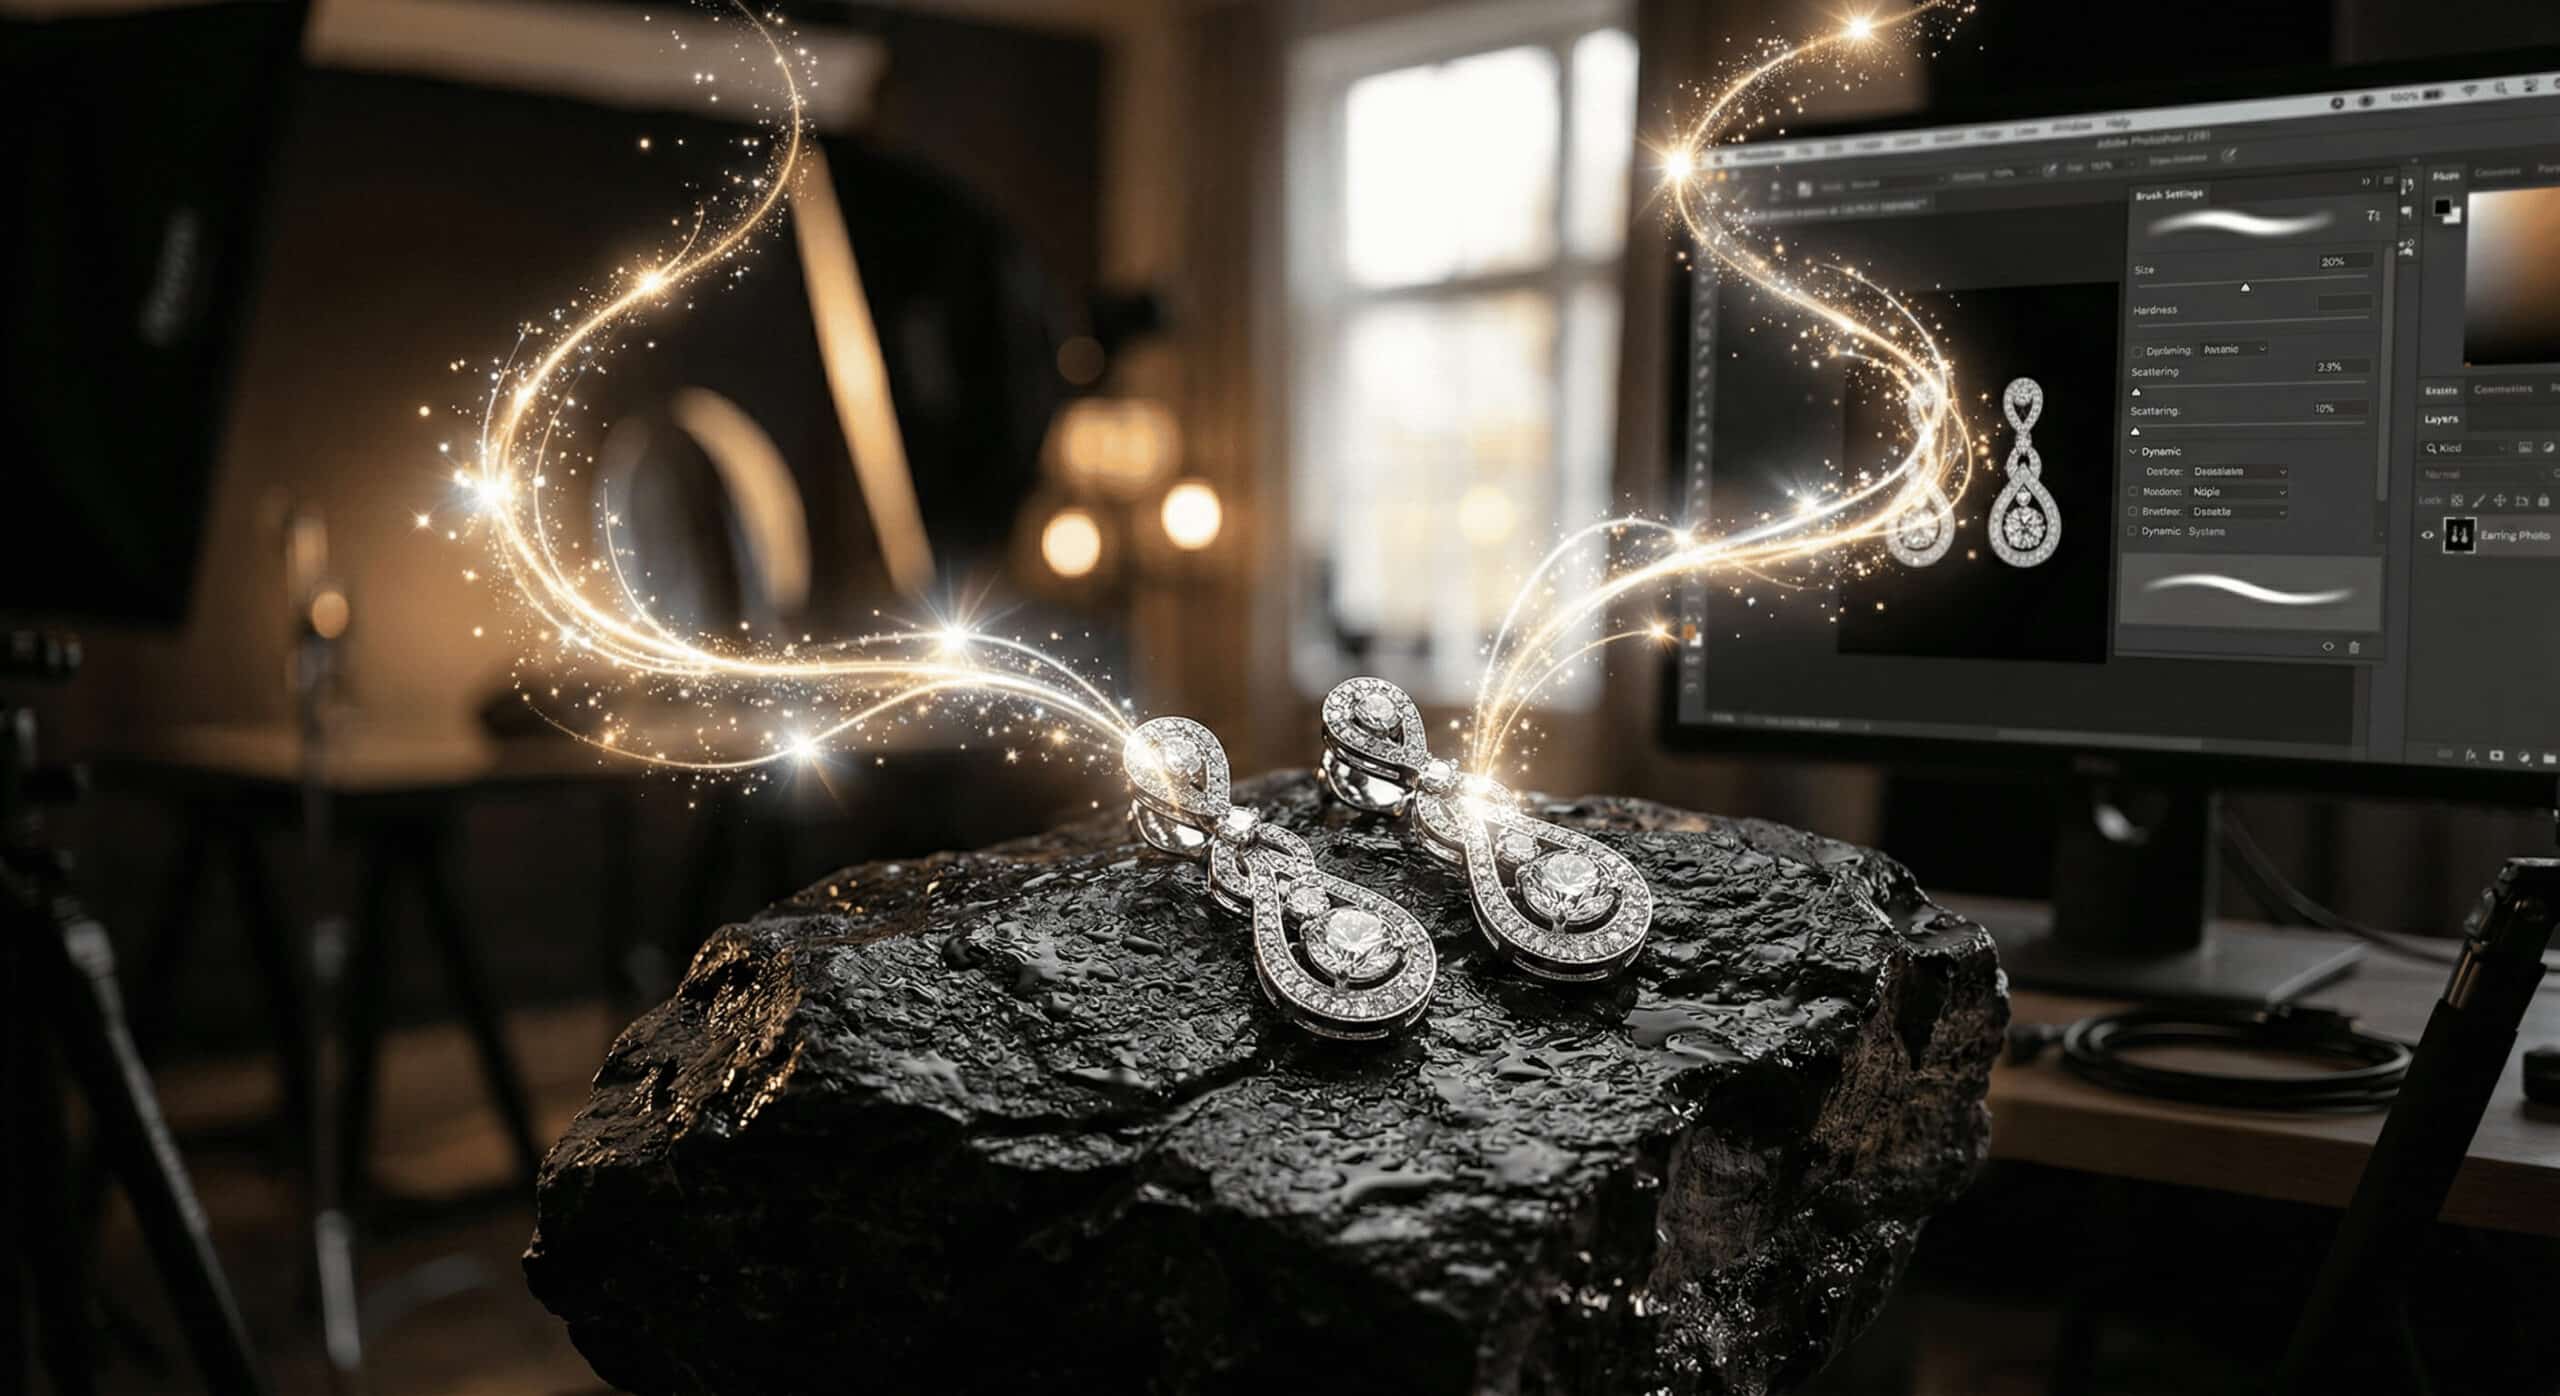
Adding localized light flares or global glitter overlays draws the viewer’s eye and highlights shiny objects like jewelry, water, or cosmetics. This technique builds a professional, polished aesthetic for promotional graphics, turning standard composite imagery into high-converting visual assets with realistic magical lighting.
In practical, daily retouching workflows, we found that correctly applied starburst effects increase client approval on product shots by emphasizing key features without looking artificial.
Method 1: How Do You Create a Custom Sparkle Brush from Scratch?
Building a custom brush preset allows you to stamp individual flares exactly where you need them. By combining the Elliptical Marquee Tool with the Motion Blur filter, you can shape precise light rays that mimic a physical camera’s lens flare.
Step 1: Drawing the Base Star Shape
Open Adobe Photoshop and create a new canvas. Select the Elliptical Marquee Tool to create a thin, black vertical oval in the center of your document, and fill the selection with black.
Step 2: Applying Motion Blur for Light Rays
Go to the Filter menu, select Filter > Blur > Motion Blur, and apply it at a 90° angle to stretch the oval shape. Duplicate this layer in your Layer panel, rotate the duplicate 90 degrees, and merge the layers to form a classic 4-point cross or starburst effect.
Step 3: Defining and Saving the Brush Preset
Navigate to Edit > Define Brush Preset, name your new tool, and click OK. You can now use your Brush Tool to stamp individual flares of high-quality sparkles precisely over the highlights in your composite imagery.
Method 2: How Does the Noise Filter Build a Magical Glitter Overlay?
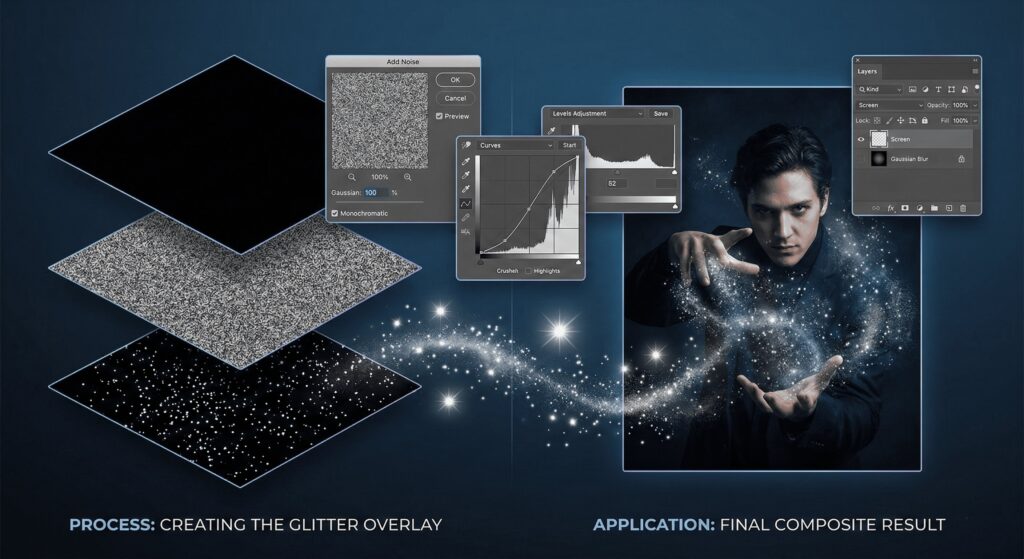
A noise-based glitter overlay is the fastest practical way to generate a starry night effect or fairy dust across an entire image. We use the Add Noise filter and adjustment layers to isolate white specks, then composite the image using specific blending modes.
Step 1: Generating the Noise Base
Create a solid black New Layer above your photo. Open the Filter menu, apply the Add Noise Filter, and set the parameters to 100%, Gaussian distribution, and check the Monochromatic box to remove color artifacts.
Step 2: Isolating the Sparkles with Curves or Levels
Apply a Curves Adjustment or Levels Adjustment directly to the noise layer. Drag the sliders to drastically crush the black tones and brighten the white specks. This isolates the stars and removes the muddy mid-tones. As an alternative workflow, you can use the Sponge filter and Levels for a clustered, organic look.
Step 3: Applying Blend Modes for Seamless Integration
Switch the layer’s Blend Mode to Screen Blend Mode or Linear Dodge (Add). The black background will disappear, leaving only the white specks. Apply a slight Gaussian Blur to soften the light and add depth to your glitter overlay.
Method 3: How Do You Configure the Scatter Brush Technique for Fairy Dust?
To paint dynamic fairy dust, you must adjust the Brush Settings Panel. By modifying shape dynamics and scattering, you randomize the placement, size, and angle of your brush tip, creating a realistic, organic confetti effect as you paint over highlights.
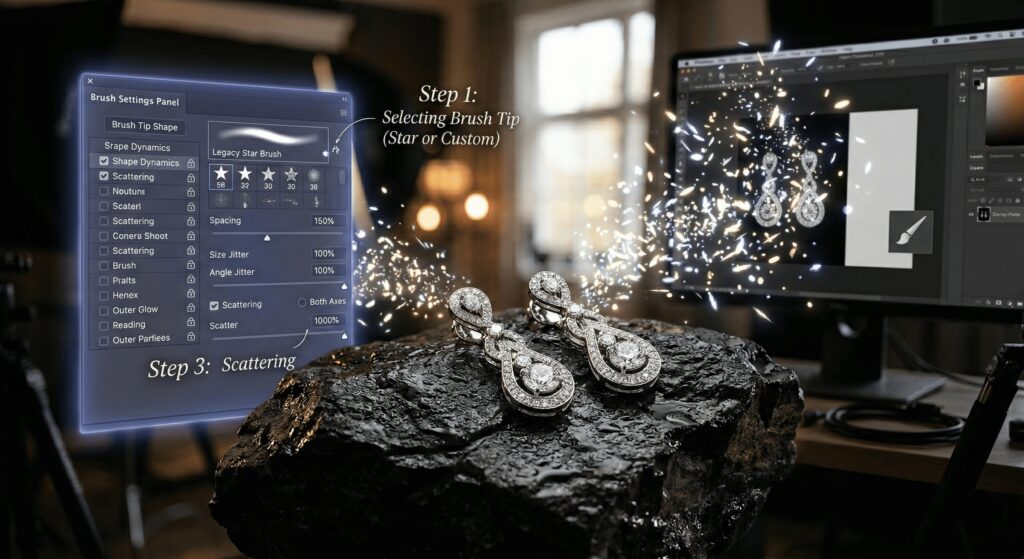
Step 1: Selecting Your Brush Tip
Select the Brush Tool. You can choose a standard soft round brush, locate a Legacy “Star” brush in the default folders, or select the custom brush preset you built in the first method.
Step 2: Adjusting Shape Dynamics and Scattering
Open the Brush Settings Panel (F5). Increase Spacing to roughly 150%. Under Shape Dynamics, max out Size Jitter and Angle Jitter to 100%. Next, check the Scattering box and increase the scatter to 1000% for randomized, dynamic placement.
Step 3: Adding an Outer Glow Layer Style
Double-click your layer to open Layer Styles. Apply an Outer Glow to make the painted strokes pop. Choose a warm yellow or icy blue color to finalize the glowing effect on your scattered fairy dust.
What Are the Pro Retouching Tips for Realistic Lighting Effects?
Amateurs often scatter sparkles indiscriminately, but professionals rely on non-destructive editing to ensure light interacts naturally with the environment. Using layer masks, varied opacity, and specific color grading techniques ensures your magical lighting respects the original photo’s depth and light temperature.
1. Control Placement with Layer Masks
Add a Layer Mask to your effects layer. Mask out the overlays using a soft black brush, so sparkles only appear where they naturally catch the light, intentionally avoiding deep shadows.
2. Vary Size and Opacity
Simulate a camera’s depth of field by creating a soft bokeh style. Keep smaller sparkles sharp in the background, but apply a heavy Gaussian Blur to larger sparkles painted in the foreground.
3. Apply Realistic Color Grading
Instead of plain white pixels, apply a subtle Gradient Overlay using the “Rainbow” preset at a low opacity. This creates a realistic prism effect on your light flares.
| Technique | Best Used For | Key Photoshop Tools Required |
| Custom Brush | Precise placement on specific highlights (e.g., diamonds, catchlights in eyes). | Elliptical Marquee Tool, Motion Blur, and Define Brush Preset. |
| Noise Overlay | Global coverage, starry skies, or dense magical environments. | Add Noise Filter, Curves Adjustment, and Screen Blend Mode. |
| Scatter Brush | Painting organic trails of fairy dust or a confetti effect. | Brush Settings Panel (Shape Dynamics, Scattering), Outer Glow. |
Frequently Asked Questions (FAQs)
How do I make something sparkle in Photoshop without a custom brush?
You can build a global glitter overlay using a solid black layer and the Add Noise filter. Once you isolate the white specks with a Curves adjustment, apply the Screen blend mode to drop out the black pixels.
What is the best blend mode for light effects in Photoshop?
The most effective options are Screen, Lighten, or Linear Dodge (Add). These specific blend modes hide darker pixels and intensify the brightness of your light flares over the underlying image.
How can I make my Photoshop sparkles look more realistic?
Match the color temperature of your light flares to the original photo and vary their opacity to create a realistic depth of field. Use layer masks to hide sparkles from shadow areas where light wouldn’t naturally hit.
The Bottom Line
- Build Custom Tools: Creating a custom brush preset gives you exact control over where light flares sit on your image’s specific highlights.
- Leverage Filters for Speed: The Add Noise filter combined with a Screen blend mode is the most efficient way to generate a dense, global glitter overlay.
- Control the Environment: Always use Layer Masks and adjust the Brush Settings panel (specifically Scattering and Size Jitter) to ensure your light effects look organic rather than stamped.