How to Create Invisible Mannequin (Ghost Mannequin) Effect in Photoshop
You’re scrolling through an online store. You see a beautiful dress displayed perfectly. It shows the shape, fit, and style without any distractions. The mannequin has vanished, leaving only the product in focus.
This magic trick is called invisible mannequin editing. It’s also known as ghost mannequin photography. This technique removes the mannequin while keeping the garment’s natural shape and dimensions.
Why does this matter for your business? Professional product photos boost sales by 30%. They reduce returns and build customer trust. Clean, distraction-free images help shoppers focus on your products.
By the end of this guide, you’ll capture perfect shots. You’ll edit them like a seasoned pro. Your underwear and lingerie products will look brand-ready and irresistible.
Understanding the Invisible Mannequin Technique

The Three-Step Process: Mannequin Shot, Interior View, and Final Composite
The invisible mannequin effect creates a 3D look for flat products. You photograph garments on mannequins, then digitally remove the form to create a realistic image. The result shows clothing with natural shape and depth.
This technique works perfectly for underwear, bras, and intimate apparel. It displays how products fit the body. Customers see the true shape and silhouette.
Key Benefits for Your Business
Enhanced Product Appeal: Clean images draw attention to fabric, design, and details. Nothing competes with your product for the spotlight.
Better Fit Visualization: Shoppers understand how garments will look on them. This clarity reduces size-related returns by up to 40%.
Cost-Effective Solution: Skip expensive model shoots and studio time. One mannequin serves hundreds of products.
Brand Consistency: Every product photo matches your style guide. This uniformity builds professional credibility.
Increased Conversions: Studies show ghost mannequin photos boost click-through rates. More clicks often mean more sales.
Before You Shoot: Planning Your Photo Session
Success starts before you touch the camera. Proper preparation saves hours of editing time. It also delivers better final results.
Choosing the Right Mannequin
| Product Type | Best Mannequin Choice | Why It Works |
| Bras & Lingerie | Realistic bust forms | Natural curves show true fit |
| Basic Underwear | Headless mannequins | Clean lines, no distractions |
| Shapewear | Poseable forms | Showcase compression effects |
| Size Range | Medium (8-10) | Appeals to average customers |
Product Preparation Steps
| Step | Action Required | Time Needed |
| Steam | Remove all wrinkles completely | 2-3 minutes |
| Style | Align straps, seams, and details symmetrically | 3-5 minutes |
| Pin | Secure excess fabric behind the mannequin | 1-2 minutes |
| Check | Verify labels and details face correctly | 1 minute |
Essential Equipment Setup

Professional photography equipment setup for invisible mannequin product photography
| Equipment | Purpose | Budget Option |
| DSLR/Mirrorless Camera | Sharp, high-resolution images | Smartphone with a good camera |
| Tripod | Consistent positioning | Phone tripod adapter |
| Softbox Lights | Even, shadow-free lighting | Natural window light |
| White Backdrop | Clean background removal | White wall or poster board |
Shot List Checklist
| Shot Type | Purpose | Camera Angle |
| Front View | Show main design and fit | Straight on, chest level |
| Back View | Display back details, closures | Same height as the front |
| Interior View | Reveal the inside construction | Flat surface, top down |
| Detail Shots | Highlight special features | Close-up, various angles |
Consistency Tips:
- Mark the camera position with tape
- Keep the lighting setup unchanged
- Use the same height and angle for all products
- Take reference photos of your setup
Photoshop Editing Workflow
Now comes the magic part. We’ll transform your mannequin photos into professional ghost images. Follow these steps carefully for the best results.
Step 1: Open and Organize Your Images
Load all product photos into Photoshop. Create a new document with a white background. Name your layers clearly: “Front Shot,” “Back Shot,” “Interior View.”
Organization saves time during complex edits. You’ll thank yourself later when juggling multiple layers.
Step 2: Background Preparation
Convert your background to solid white or light gray. This step makes selection tools work more accurately. Use the Paint Bucket tool for quick background fills.
Clean backgrounds also speed up the masking process. Less visual noise means better automatic selections.
Step 3: Precise Masking and Selection

Precise masking with the pen tool creates seamless invisible mannequin effects
Photoshop Tools Comparison
| Tool | Best For | Skill Level | Time Required |
| Pen Tool | Complex shapes, clean edges | Advanced | 5-10 minutes |
| Quick Selection | Simple backgrounds | Beginner | 2-5 minutes |
| Magic Wand | High contrast images | Beginner | 1-3 minutes |
| Select and Mask | Refining any selection | Intermediate | 2-5 minutes |
Step 4: Composite Interior Details
Place your interior shot on a new layer. Position it to align with the front garment opening. Use layer masks to blend edges seamlessly.
Pay special attention to necklines and armholes. These areas need perfect alignment for realistic results.
Step 5: Refine and Perfect Edges
Clone Stamp Tool: Remove remaining mannequin parts around edges. Sample nearby fabric to maintain texture consistency.
Healing Brush: Smooth out any harsh transitions. This tool blends colors naturally while preserving texture.
Dodge and Burn: Add depth by lightening highlights and darkening shadows. Subtle changes create a realistic dimension.
Step 6: Background Cleanup
Replace busy backgrounds with clean alternatives. Pure white works best for e-commerce platforms. Light gray adds subtle depth without distraction.
Remove any remaining mannequin shadows or reflections. Your product should appear to float naturally.
Step 7: Final Polish and Export

Consistent, professional results across different underwear styles and colors
Adjust overall brightness and contrast for consistency. Sharpen details to make fabric textures pop. Export as high-resolution PNG for transparent backgrounds or JPEG for web use.
Color correction ensures accurate representation. This step prevents customer disappointment and returns.
Pro Tips for Professional Results

Professional techniques eliminate harsh edges and create natural-looking depth
These advanced techniques separate amateur work from professional editing. Small details make huge differences in the final image quality.
Lighting Consistency Rules
Keep your light setup identical between shots. Mark light positions with tape on the floor. Consistent shadows and highlights make compositing much easier.
Avoid mixing light sources. Don’t combine window light with studio lights. Color temperature differences create editing headaches.
Mannequin Selection Strategy
Realistic vs. Abstract: Underwear needs realistic body forms. Abstract shapes confuse customers about fit and sizing.
Skin Tone Considerations: Choose neutral tones that work with various product colors. Avoid mannequins that compete with your designs.
Adding Realistic Depth
Subtle shadows ground your products in reality. Add soft drop shadows beneath garments. Keep shadows light and slightly blurred.
Avoid flat, cardboard appearances. Use gentle gradients to suggest natural lighting. This technique makes products look touchable.
Color Variation Efficiency

Efficient color variation techniques maximize your invisible mannequin editing investment
Save time by creating color variants from one edit. Use Hue/Saturation adjustments for different colorways. This method works perfectly for basic color changes.
Document your adjustment settings. Consistent color changes across your product line build brand recognition.
Outsourcing vs. DIY: Making the Right Choice
Sometimes professional services make more sense than doing it yourself. Consider these factors when deciding your approach.
DIY vs. Outsourcing Comparison
| Factor | DIY Editing | Professional Service |
| Cost per Image | $0 (your time) | $5-15 per image |
| Quality Control | Full control | Depends on the service |
| Learning Curve | 2-4 weeks of practice | None required |
| Volume Capacity | 5-10 images/day | 50-100 images/day |
| Turnaround Time | Same day | 24-48 hours |
| Special Requests | Unlimited changes | May cost extra |
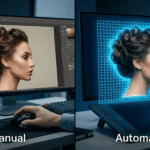
Automation Tools
AI-Powered Solutions: New software automates basic ghost mannequin creation. These tools work well for simple garments and high volumes.
Batch Processing: Photoshop actions speed up repetitive tasks. Record your workflow once, then apply it to similar products.
Why Choose PixcRetouch for Professional Ghost Mannequin Services for Online Retailers and Fashion Brands?
When it comes to selecting a trusted partner for Professional Invisible (ghost) Mannequin Services for Online Retailers and Clothing Companies, PixcRetouch stands out as a leading choice for e-commerce businesses and apparel brands worldwide. Their ghost mannequin editing services start at just $0.20 per image, with attractive discounts available for bulk orders, making high-quality product visuals affordable and accessible to businesses of all sizes.
FAQs On How to Create Invisible Mannequin Effect
What’s the difference between ghost and invisible mannequin effects?
There’s no difference at all. Both terms describe the same technique. Ghost mannequin, invisible mannequin, and hollow man effect all mean removing the mannequin while keeping the garment’s shape.
How many shots are required for each product?
Most products need 2-3 shots minimum. Front and back views on the mannequin, plus one interior shot. Complex items like bras might need additional detail shots.
Which tools create the smoothest edges?
The Pen Tool delivers the cleanest results for professional work. Quick Selection works faster but may need more refinement. Always use the Refine Edge feature for smoother selections.
How long does editing take per image?
Editing Time Breakdown
| Product Complexity | Time Per Image | Main Challenges |
| Simple Panties | 15-20 minutes | Basic edge work |
| Standard Bras | 25-35 minutes | Multiple straps, clasps |
| Complex Lingerie | 45-60 minutes | Lace details, transparency |
| Shapewear | 30-40 minutes | Compression effects |
What are the most common editing mistakes?
Lighting mismatches between different shots create obvious compositing. Poor edge quality makes products look cut out rather than natural. Wrong mannequin choice confuses customers about product fit.
Ready to Transform Your Product Photography?
How to do invisible mannequin editing opens doors to professional-quality product images. This technique elevates your brand above competitors using amateur photography. Clean, consistent images build customer confidence and drive sales.
The investment in learning pays off quickly. Professional product photos increase conversion rates and reduce returns. Your customers see exactly what they’re buying.
Practice makes perfect with this skill. Start with simple products before tackling complex designs. Each successful edit builds your confidence and expertise.
Ready to revolutionize your product photography? Try these techniques with your next photo shoot. Share your before and after results with fellow entrepreneurs. Your improved images will speak louder than any marketing copy.