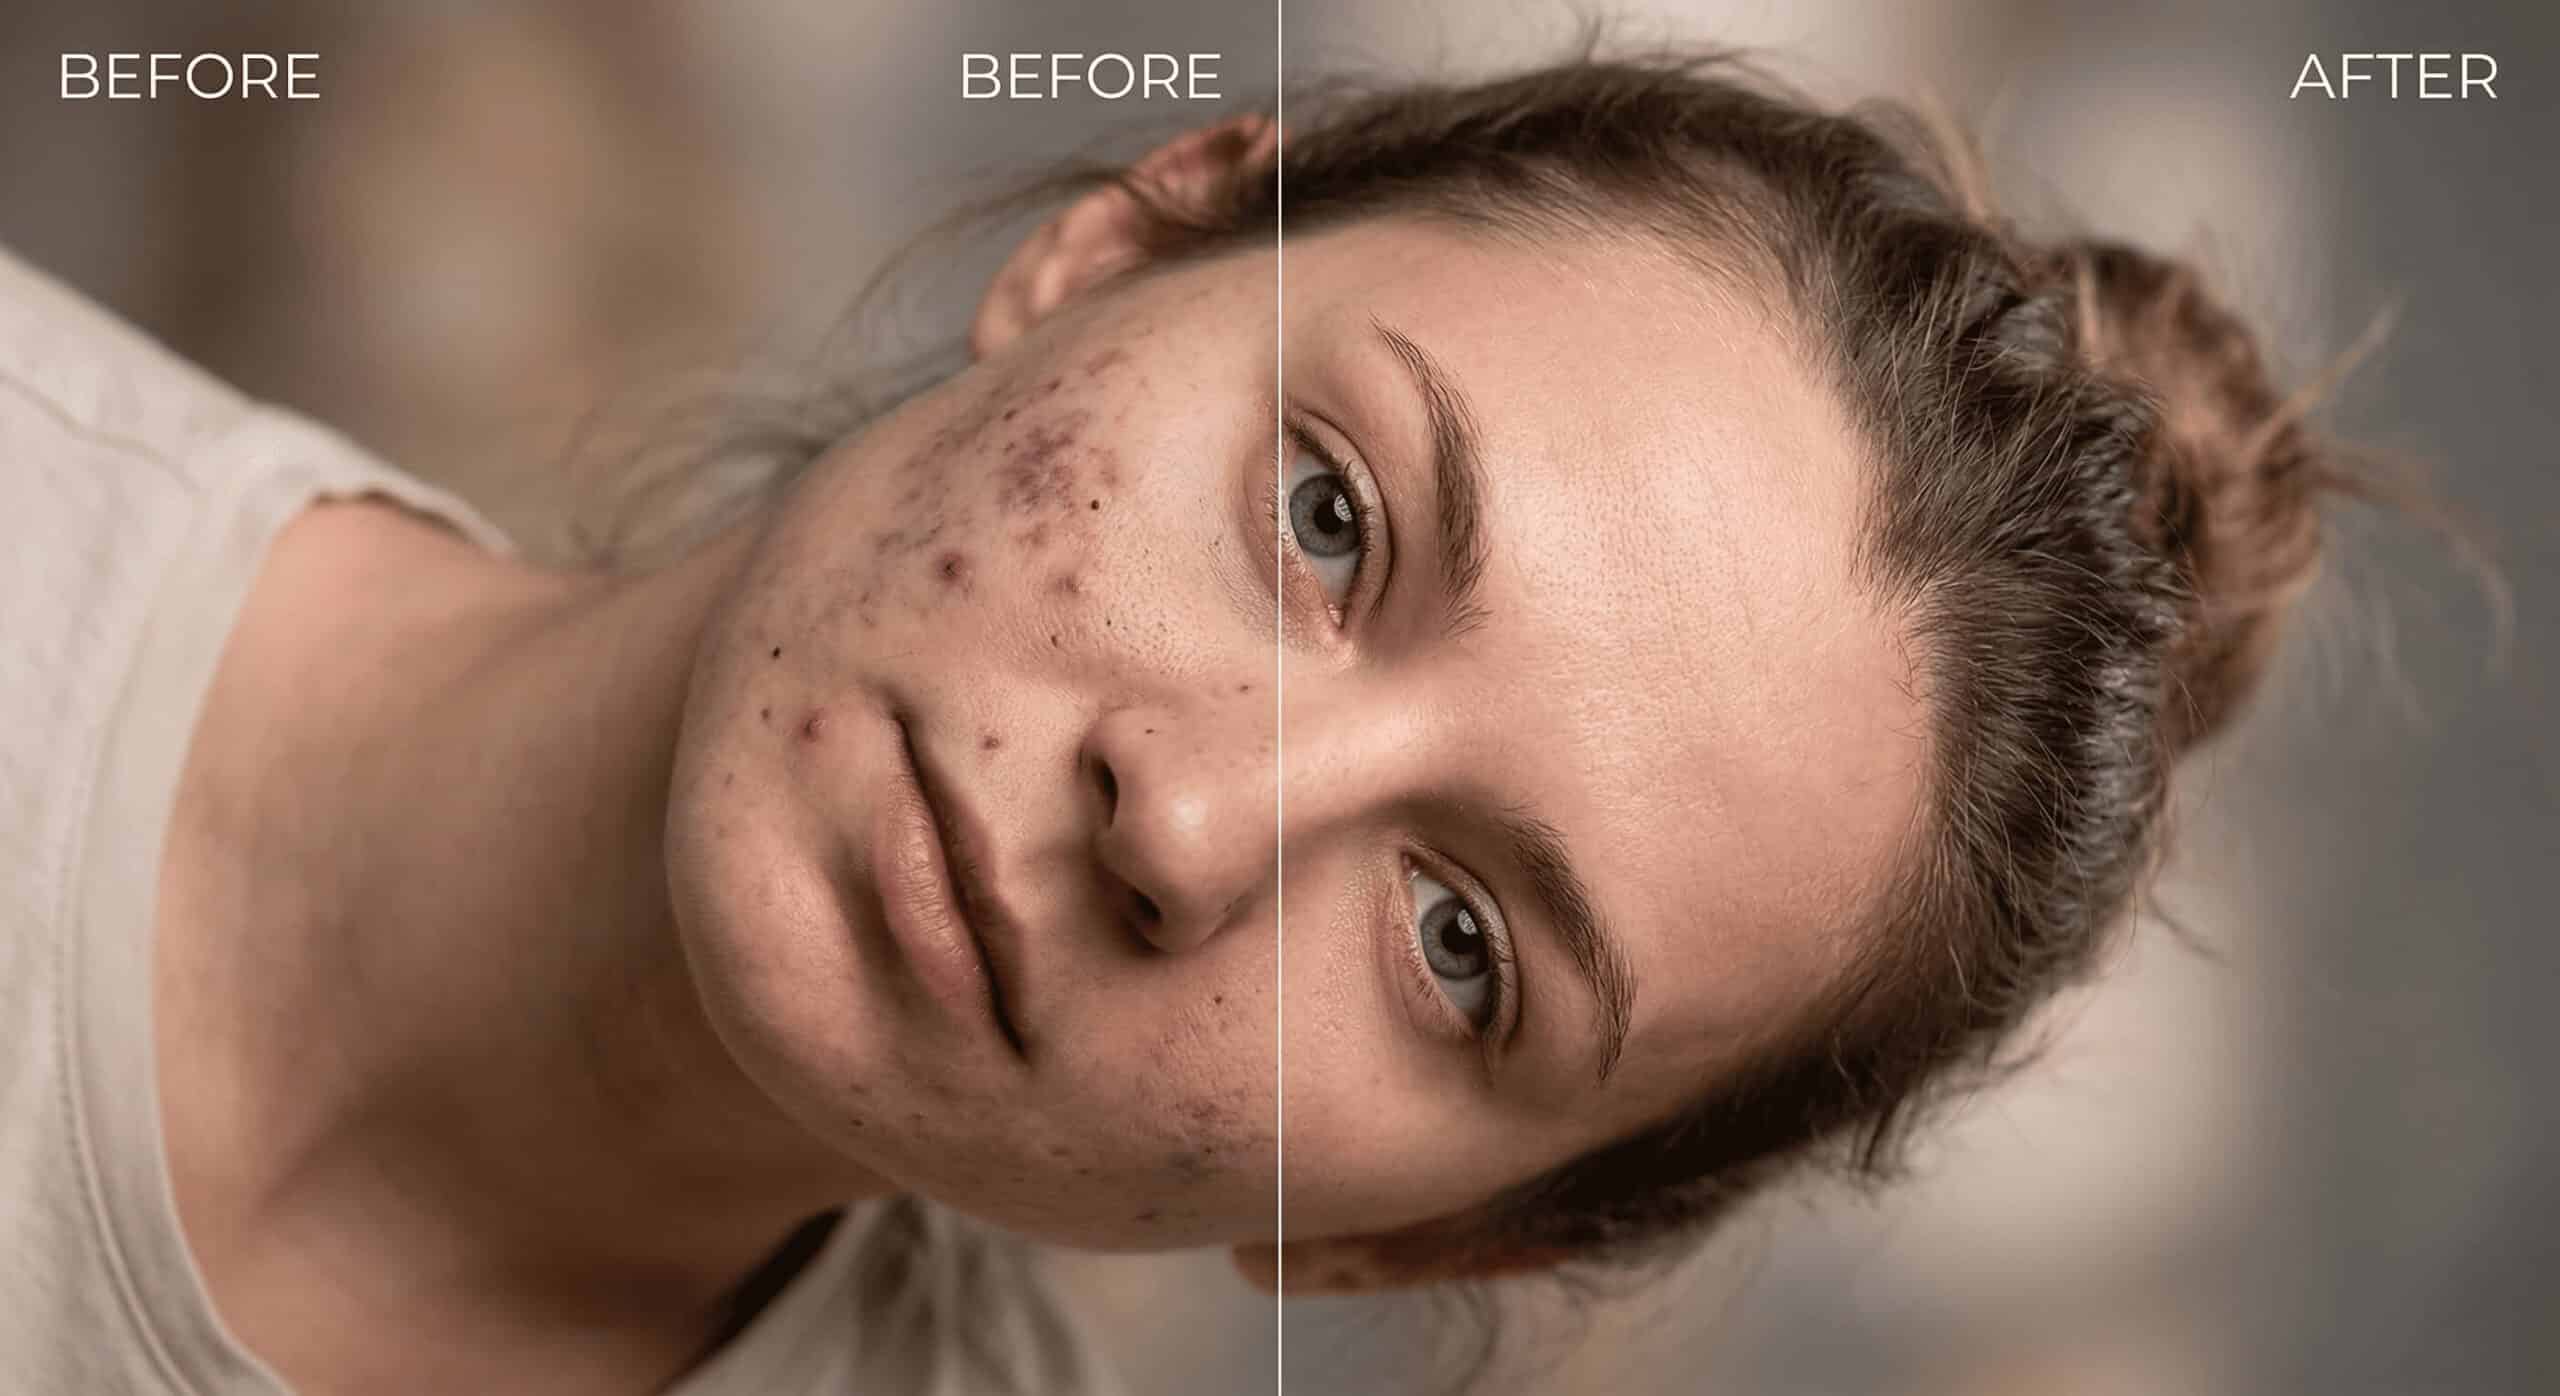
Stop settling for plastic skin and smeared pores when editing portraits. There is a realistic, practical method.
How to remove black spots from face in Photoshop is a process of matching specific blemishes to the correct non-destructive tool. We found that using targeted techniques like Dodging and Burning for flat dark marks and the Spot Healing Brush for raised acne preserves natural skin texture and pores perfectly.
According to a 2024 survey, 15% of people reported post-inflammatory hyperpigmentation (PIH), while global acne rates sit around 9.4%. Dermatology guidance is clear: in real skin, dark spots often take months to fade. That is why professional digital editing exists—to safely remove these marks in minutes for high-resolution photography.
What Are the Different Types of “Black Spots” on the Face?
Before you retouch a headshot, you must identify the specific type of blemish. Treating active acne the same way you treat flat acne marks will result in blurred skin. Different spots require different tools to preserve micro-texture and maintain natural results.
- Active acne/pimples: Raised bumps with redness. These require both texture and shadow removal.
- Acne marks / PIH: Flat, darker patches. These need gentle luminance and color correction, not heavy cloning.
- Blackheads / black dots on face: Tiny dark plugs requiring detail-level cleanup with texture preserved.
- Freckles, moles, and birthmarks: Identity features. We recommend you subtly reduce these rather than erase them completely, unless the client explicitly requests it.
How Do You Set Up a Non-Destructive Workflow in Photoshop?
A non-destructive workflow is the absolute foundation of high-end retouching. Editing directly on the background layer destroys original pixel data. We tested multiple setups, and building a dedicated retouching layer group guarantees you can always back out anytime.
- Duplicate your Background layer: Press (Ctrl/Cmd + J). Never edit the original file.
- Create an empty “Retouch” layer: Select your healing tools and set the sample mode to Current & Below.
- Create a Dodge/Burn Adjustment layer: Go to Layer > New Layer > Mode: Soft Light, and check “Fill with 50% gray”. This keeps everything editable and prevents “baked-in” damage.
What Are the Essential Tools for Fast Face Retouching?
Adobe Photoshop offers multiple tools for spot removal in the Layers panel, but using them incorrectly leads to fake repeating patterns. From our agency tests, separating tools based on the blemish type yields the most realistic retouching results.
- The AI Remove Tool (Generative AI): Photoshop’s latest update allows for complex spot removal with single strokes, cleanly blending surrounding pixels.
- Spot Healing Brush Tool (J): Best for fresh pimples and tiny black marks. Set Type to Content-Aware, Hardness to 60-85% (avoid soft mush), and Size just slightly bigger than the spot. Click once per blemish. Do not scrub.
- Healing Brush Tool (J): Use this when you want speed and control. Alt/Option-click a clean texture source near the spot, then paint lightly over the blemish.
- Patch Tool: Fast and clean for clusters of black spots (like cheek areas). Set Mode to Content-Aware (if available), draw around the mark, and drag to clean skin.
- Clone Stamp Tool (S): Use clone like seasoning, not sauce. Set Opacity to 10-25%, Flow to 10-20%, and Align to On. Relying on it too much makes skin look repetitive and fake.
How Do Pro-Level Techniques Handle Stubborn Dark Marks?
For commercial-grade retouching, heavy healing in Photoshop can smear pores. Stubborn hyperpigmentation requires separating texture from color. This allows you to fix uneven luminance without touching the actual pores, avoiding the dreaded plastic doll effect.
- Micro Dodging & Burning (Best for PIH): Select your Brush Tool (B) with a soft brush and 2-6% Flow. Paint white on your Soft Light gray layer to lift dark marks. Skin literature describes that pigmentation sits in layers; PIH is primarily a luminance/color issue, not a texture problem. This is the cleanest way to correct it while keeping pores intact.
- Frequency Separation (The Industry Standard): A method of splitting the image into a “Texture layer” and a “Color/Tone layer.” You can smooth out uneven skin tone and correct blemishes on the tone layer without blurring the actual high-frequency skin texture.
Which Photoshop Tool Should You Use for Specific Skin Problems?
Selecting the wrong tool is the main reason portrait edits look artificial. We built this quick-reference matrix based on thousands of client edits to show exactly which tool pairs best with common skin complaints.
| Client Request | Actual Dermatological Issue | Best Photoshop Tool | Why It Yields Natural Results |
| “Get rid of pimples.” | Active acne | Spot Healing / Healing Brush | Removes the physical bump quickly without repainting the surrounding skin. |
| “Black dots on face” | Blackheads / tiny plugs | Healing Brush (Small size) | Preserves micro-texture better than scrubbing with large brushes. |
| “Dark marks / black marks” | PIH | Dodging and Burning | Corrects the underlying tone while keeping pores fully intact. |
| “Black spots on the face” | PIH clusters/sun spots | Patch Tool + Dodge & Burn | The patch cleans the broad area; D&B restores the natural gradient. |
What Are the Retouching Rules Professionals Never Break?
Achieving a flawless, premium look requires restraint. Many beginners push editing sliders too far. Over the years, we found that adhering to a strict set of visual rules prevents the uncanny valley effect and keeps the subject looking human.
- Never blur skin as your main method. Skin smoothing should rely on tone correction; blur destroys pores, and pores are what make skin look real.
- Work zoomed out 70% of the time. If it looks good only at 300%, it will not look good in a feed.
- Match surrounding gradients. Maintain natural light falloff on the cheeks and forehead to preserve facial dimensions.
- Leave some reality. Removing every single mark makes faces uncanny. Reduce, do not erase.
- Ask before removing identity features. Freckles and moles are often intentional.
How Can You Speed Up High-Volume Client Work?
When processing hundreds of headshots, efficiency matters just as much as quality. You must build systems that apply complex layer setups instantly, or handle minor spot removal before the files even reach Adobe Photoshop.
- Build Photoshop Actions: Record your Frequency Separation and Dodge/Burn layer setups into one-click Photoshop Actions. This saves minutes per photo.
- Pre-process in Lightroom or Adobe Camera Raw: For bulk portrait batching, use the healing tools in Lightroom to clear obvious, isolated spots across multiple images simultaneously before doing fine-detail work in Photoshop.
Frequently Asked Questions
Can I use these techniques on older, scanned photographs?
Yes, you can apply these exact non-destructive editing methods to scanned images. The Patch Tool and Clone Stamp are particularly effective for removing physical print damage and dust spots.
How do I remove spots without making the skin look blurry?
Avoid using surface blur filters entirely. Instead, use Micro Dodging and Burning or Frequency Separation, which adjust the color and shadow of the blemishes without touching the high-frequency skin texture.
Is the Clone Stamp tool bad for face retouching?
The Clone Stamp Tool is not inherently bad, but it is frequently misused. If used with high opacity, it copies exact textures, creating fake repeating patterns that ruin the realism of the portrait editing.
The Bottom Line
- Follow the “Quick” Retouch Workflow: Pimples (Spot Healing) -> Dark marks (Dodge & Burn) -> Clusters (Patch Tool) -> Clone Stamp (Only if strictly needed).
- Protect your pixels: Always build a non-destructive workflow with dedicated adjustment layers to protect the original background layer.
- Preserve the texture: Match the specific tool to the blemish to preserve pores and natural light gradients, maintaining realistic skin texture.
Ready to scale your photography business without getting bogged down in post-production? Hand off your high-volume portrait editing to a professional retouching team today to guarantee flawless, natural results for every client.