Imagine scrolling through an online store and stopping dead in your tracks because a product image grabs your attention. The lighting is flawless, the colors pop, and every detail screams quality. That’s the power of mastering product photography. Whether you’re a small business owner, an e-commerce entrepreneur, or a creative hobbyist, captivating product images can make or break your brand’s success. In this ultimate guide, we’ll dive deep into the art and science of product photography, sharing practical tips, unique insights, and personal experiences to help you create stunning shots that sell.
Why Product Photography Matters
Great product photography isn’t just about aesthetics; it’s about storytelling. A single image can convey a product’s value, quality, and personality. According to a 2023 Shopify study, 75% of online shoppers rely on product images when deciding to purchase. Poor visuals can erode trust, while professional shots boost conversions by up to 30%. As someone who’s spent countless hours tweaking lighting and angles for my e-commerce store, I’ve seen firsthand how a well-crafted image can transform a casual browser into a loyal customer.
This guide will walk you through every step of mastering product photography, from equipment choices to editing techniques, with insights drawn from industry experts and my trial-and-error journey. Let’s get started.
Essential Equipment for Product Photography
You don’t need a Hollywood budget to create professional product images, but the right tools make a difference. Here’s a breakdown of the essentials, based on my experience and recommendations from Digital Photography School.
Camera Options
A high-quality camera is the foundation of great product photography. While smartphones like the iPhone 15 Pro or Google Pixel 9 have impressive sensors, a DSLR or mirrorless camera offers more control. For beginners, the Canon EOS Rebel T8i or Sony Alpha a6400 are excellent choices due to their versatility and affordability. I started with a Canon Rebel and found its manual settings intuitive for learning exposure and focus.
Lenses for Sharp Details
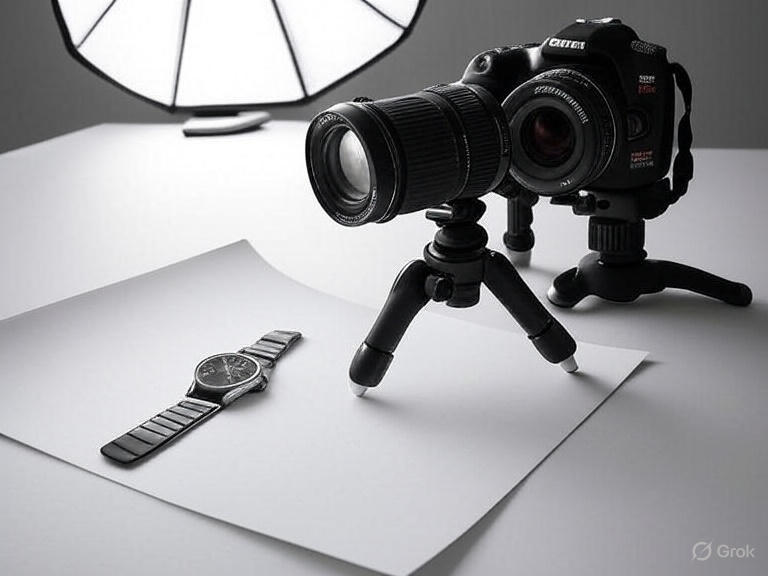
Lenses matter as much as the camera. A 50mm prime lens with a wide aperture (f/1.8 or f/2.8) is ideal for crisp, detailed shots with a pleasing depth of field. For smaller products like jewelry, a macro lens like the Nikon AF-S 60mm f/2.8G captures intricate textures. I once shot a handmade bracelet with a standard kit lens and regretted the lack of sharpness—investing in a macro lens was a game-changer.
Lighting Setup
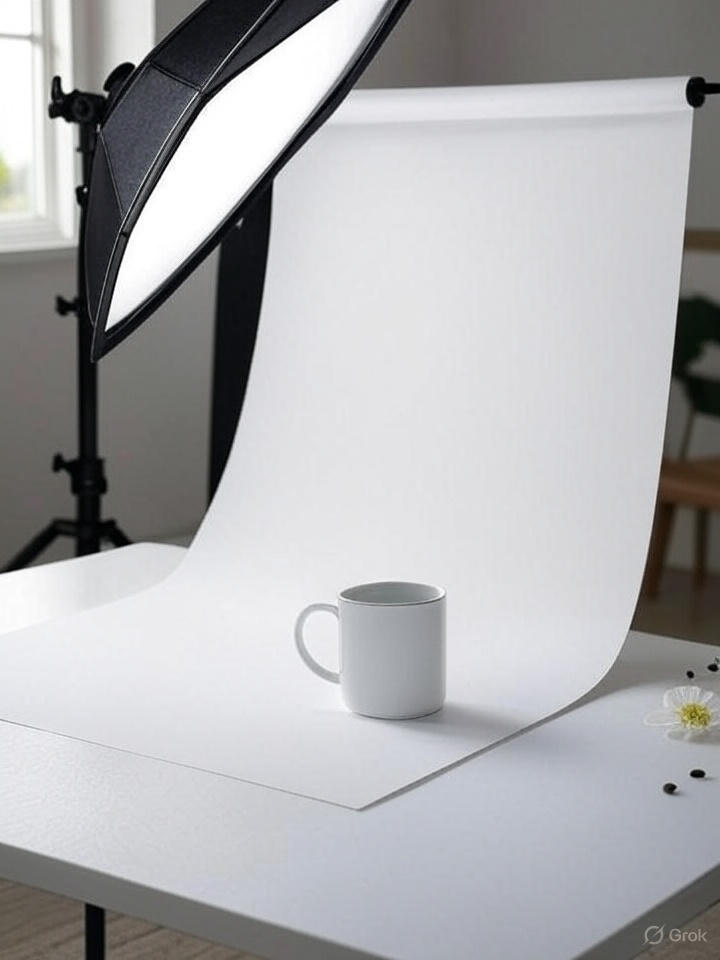
Lighting can make or break your images. Natural light is free and great for soft, organic shots, but it’s unpredictable. For consistent results, invest in a softbox or ring light. A budget-friendly option like the Neewer 660 LED Panel provides adjustable brightness and color temperature. In my early days, I used desk lamps with parchment paper as diffusers effective, but a proper softbox saved me hours of tweaking.
Tripods and Backdrops
A sturdy tripod eliminates shaky shots, especially for long exposures. The Manfrotto Compact Action Tripod is lightweight and reliable. For backdrops, seamless paper or fabric in neutral colors like white, gray, or black works best. I’ve found that a $20 white foam board from a craft store can double as a reflector and backdrop for small products.
Equipment | Budget Option | Pro Option | Why It Matters |
Camera | Smartphone (e.g., iPhone 15 Pro) | Sony Alpha a7 IV | Controls image quality and flexibility |
Lens | 50mm f/1.8 | 60mm f/2.8 Macro | Ensures sharp, detailed product shots |
Lighting | Desk lamp with diffuser | Neewer Softbox Kit | Creates consistent, flattering illumination |
Tripod | Amazon Basics Tripod | Manfrotto Compact Action | Stabilizes the camera for crisp images |
Backdrop | Foam board | Seamless paper roll | Provides clean, professional backgrounds |
Setting Up Your Product Photography Studio
Creating a dedicated space doesn’t require a fancy studio. A corner of your home can work wonders with the right setup. Here’s how to get started.
Choosing the Right Space
Pick a well-lit area near a window for natural light or a room where you can control artificial lighting. I use a foldable table in my garage, which gives me space to experiment without clutter. Ensure your space is free from distractions like patterned walls or stray objects that could appear in shots.
Lighting Techniques
Lighting shapes the mood of your images. For soft, even lighting, place a softbox or diffused light source at a 45-degree angle from your product. Add a reflector (like a white foam board) on the opposite side to bounce light and reduce shadows. For dramatic shots, try a single light source with a grid to focus the beam, as suggested by Fstoppers. I once spent an hour adjusting lights for a ceramic mug, only to realize a simple softbox setup gave the cleanest result.
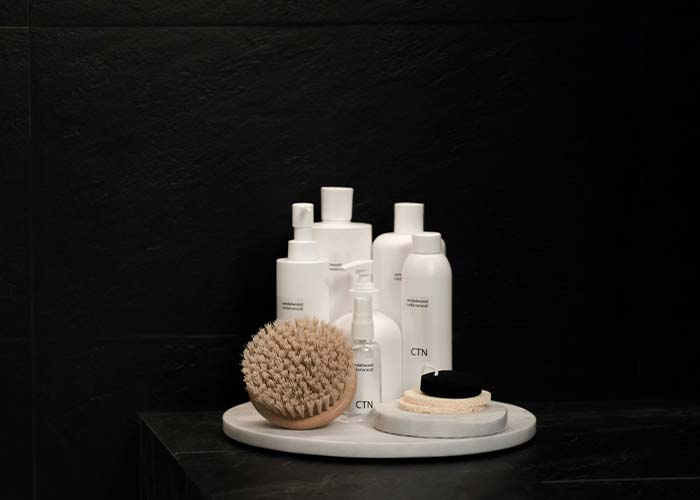
Background and Props
A clean background keeps the focus on your product. White is versatile for e-commerce platforms like Amazon, while textured backgrounds like wood or marble add personality for social media. Use props sparingly—think complementary items like a coffee bean pile for a mug or a silk scarf for a handbag. I learned the hard way that too many props can distract; a single flower next to a candle created a more elegant shot than a cluttered scene.
Camera Settings for Perfect Shots
Mastering product photography requires understanding your camera’s settings. Here’s a quick guide to get you started.
Aperture (f-stop)
A wide aperture (f/2.8–f/5.6) blurs the background, making your product stand out. For flat-lay shots or group products, use a narrower aperture (f/8–f/11) for sharpness across the frame. I typically shoot at f/4 for jewelry to balance detail and bokeh.
Shutter Speed
A fast shutter speed (1/200s or higher) prevents motion blur, especially if you’re hand-holding the camera. For low-light setups, use a tripod and a slower shutter speed (1/60s or lower) to capture more light. My first product shoot taught me to always use a tripod—handheld shots at 1/50s were blurry disasters.
ISO
Keep ISO low (100–200) for clean, noise-free images in well-lit conditions. In dim settings, increase ISO cautiously (400–800) to avoid grain. I once pushed ISO to 1600 for a rushed indoor shoot and spent hours in post-processing to fix the noise.
White Balance
Correct white balance ensures accurate colors. Use the “Daylight” setting for natural light or “Tungsten” for indoor bulbs. Custom white balance with a gray card is ideal for precision. I’ve ruined shots by forgetting to adjust white balance, resulting in orange-tinted products that looked unappealing.
Composition and Styling Tips
Composition is where creativity meets strategy. A well-composed shot draws the viewer’s eye and tells a story. Here are some techniques to elevate your product photography.
Rule of Thirds
Place your product off-center using the rule of thirds for a dynamic composition. Most cameras have a grid overlay to help. I once centered a watch in every shot, and the images felt flat—shifting it slightly to the left made a huge difference.
Angles and Perspectives
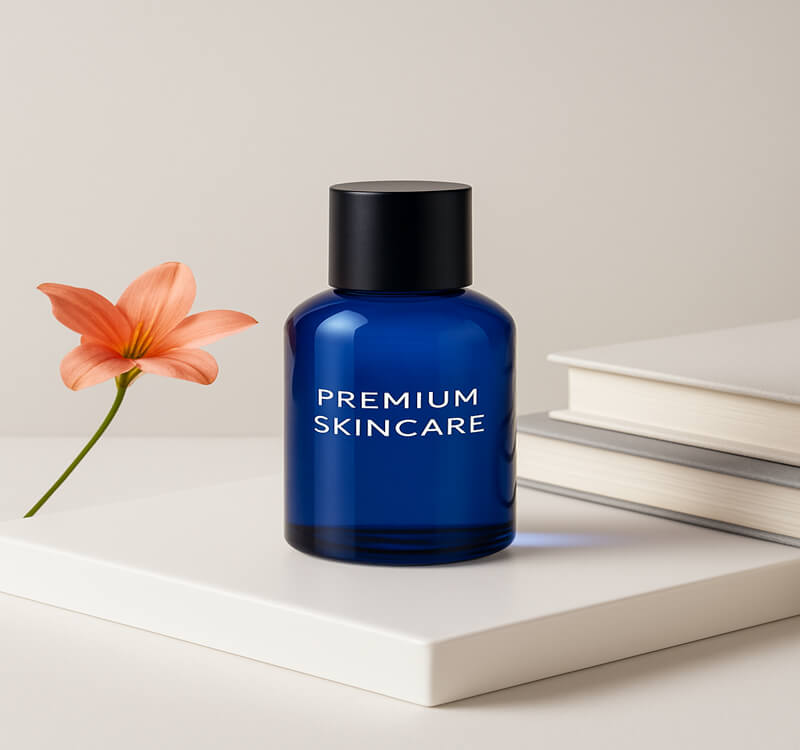
Experiment with angles: eye-level for relatability, top-down for flat lays, or 45-degree angles for depth. For a skincare bottle, I found a low-angle shot with a soft glow made it look luxurious. Test multiple angles to find what highlights your product’s best features.
Negative Space
Leave space around your product to create a clean, modern look. This also makes images versatile for cropping on different platforms. I’ve noticed that images with ample negative space perform better on Instagram, as they feel less crowded.
Color Harmony
Choose colors that complement your product. A color wheel can help you pick contrasting or analogous shades. For a green jade necklace, I used a soft pink background to make the stone pop an unexpected combo that drew compliments.
Post-Processing for Polished Results
Editing enhances your images but shouldn’t overhaul them. Software like Adobe Lightroom or free alternatives like GIMP can refine your shots. Here’s my go-to editing workflow.
Adjust Exposure and Contrast
Brighten underexposed images or tone down highlights to balance the shot. Increase contrast slightly for a punchy look. I once overexposed a white shirt, making it blend into the background—subtle exposure tweaks saved it.
Sharpen and Enhance Details
Use sharpening tools to highlight textures, like the weave of a fabric or the sparkle of a gemstone. Be cautious not to over-sharpen, which can create unnatural edges. My early edits were too aggressive, making products look artificial.
Color Correction
Adjust saturation and vibrance to make colors pop without looking fake. If your product’s color is off, customers may lose trust. I once edited a red scarf too vibrantly, and customers complained it didn’t match the real product.
Remove Imperfections
Use spot-healing tools to remove dust, scratches, or minor blemishes. For complex backgrounds, Photoshop’s Content-Aware Fill is a lifesaver. I’ve used it to erase stray threads on clothing shots seamlessly.
Editing Step | Tool | Purpose | Pro Tip |
Exposure/Contrast | Lightroom Slider | Balances brightness and depth | Adjust highlights first, then shadows |
Sharpening | Photoshop/GIMP Filter | Enhances product details | Use a light touch to avoid artifacts |
Color Correction | Lightroom Color Panel | Ensures accurate product colors | Reference product in person during edits |
Imperfection Removal | Photoshop Spot Heal | Creates a clean, professional look | Zoom in to catch tiny flaws |
Advanced Techniques for Standout Shots
Once you’ve mastered the basics, experiment with these advanced techniques to set your product photography apart.
Lifestyle Photography
Show your product in use to create an emotional connection. A coffee mug on a cozy desk or a watch on a wrist tells a story. I shot a pair of sneakers on a runner mid-stride, and the dynamic energy boosted engagement on social media.
360-Degree Photography
For e-commerce, 360-degree views let customers explore products interactively. Tools like the Ortery PhotoBench automate this process, but you can manually rotate products and stitch images in software like Autopano. My first 360-degree attempt was clunky, but customers loved the interactivity.
Focus Stacking
For ultra-sharp images, especially in macro photography, use focus stacking. Take multiple shots at different focus points and combine them in Photoshop. This technique was a revelation for shooting detailed jewelry, ensuring every facet was crisp.
Common Mistakes to Avoid
Even seasoned photographers make mistakes. Here are pitfalls I’ve encountered and how to avoid them.
Overcomplicated Backgrounds
A busy background distracts from your product. Stick to simple, clean setups. I once used a patterned tablecloth that clashed with a handbag, making the shot look amateurish.
Inconsistent Lighting
Mixing light sources (e.g., daylight and tungsten) creates color casts. Use one light type per shoot. I learned this after a shoot with mixed lighting left my images with an unflattering yellow tint.
Ignoring Platform Requirements
Different platforms have specific image requirements. Amazon prefers white backgrounds, while Instagram favors lifestyle shots. Check guidelines before shooting. I wasted time reshooting product images that didn’t meet Etsy’s size requirements.
FAQs About Mastering Product Photography
What is the best camera for product photography?
DSLRs or mirrorless cameras like the Canon EOS Rebel T8i or Sony Alpha a6400 are great for beginners. Smartphones with advanced sensors (e.g., iPhone 15 Pro) can work for budget setups but offer less control.
How do I make my product photos look professional?
Use soft, diffused lighting, a clean background, and a tripod for sharp images. Edit lightly to enhance details and colors without overprocessing.
What lighting is best for product photography?
Softboxes or ring lights provide consistent, flattering illumination. Natural light works for soft, organic shots but requires careful timing to avoid harsh shadows.
How can I save money on product photography equipment?
Start with a smartphone, natural light, and DIY backdrops like foam boards. Invest in affordable gear like a Neewer softbox or a 50mm lens as your budget grows.
Why do my product photos look blurry?
Blurry images often result from camera shake, incorrect focus, or high ISO. Use a tripod, manual focus, and low ISO (100–200) for sharp results.
Conclusion: Start Shooting Stunning Product Photos Today
Mastering product photography is a journey of creativity, technique, and persistence. By investing in the right equipment, perfecting your lighting and composition, and refining your editing skills, you can create images that captivate and convert. My path—from fumbling with desk lamps to crafting polished e-commerce shots taught me that small tweaks, like adjusting angles or simplifying backgrounds, can yield dramatic results.
Ready to elevate your product photography? Start with one tip from this guide, whether it’s experimenting with a new lighting setup or trying focus stacking. Share your favorite product photography hack in the comments, or explore more tips on our blog to keep learning. If you’re ready to invest in professional gear, check out B&H Photo for deals. Your next stunning shot is just a click away!