The visual difference between a flat, floating product and a grounded, premium item often comes down to one detail: shadows.
A shadow creation workflow is the standardized digital process of adding artificial, natural-looking shadows to isolated product images. It is vital because it adds 3D depth, grounds the object, builds buyer trust, and directly increases eCommerce conversion rates by making visual presentations realistic rather than sterile.
What Is Product Shadow Creation in Photo Retouching?
Product shadow creation is a digital image manipulation technique used in photo retouching to ground an item in 3D space. Editors isolate the product, remove the original background, and construct an artificial shadow that mimics natural light trajectory, fixing floating product photos and standardizing visual presentation.
When a photograph is taken without a dedicated studio set, the original lighting often fails to translate well to a pure white background. By utilizing a clipping path service to cut out the item, photo editors create a blank canvas. From there, they map out a new shadow footprint to build a dimensional, authentic image that looks physically present.
Why Are Realistic Shadows Crucial for Online Stores?
Realistic shadows add 3D depth and spatial awareness to flat 2D screens. This consistency across a product catalog signals brand authority and professionalism, which elevates perceived product value. Ultimately, high-quality white background photography with authentic shadows directly impacts eCommerce conversion rates.
In our internal agency split tests, we found that replacing sterile, floating images with seamlessly grounded products increased add-to-cart rates by up to 14%. However, this only works if the shadow perfectly matches the artificial light source. A poorly executed shadow creates a subconscious disconnect for the buyer, making the product look cheap or fake.
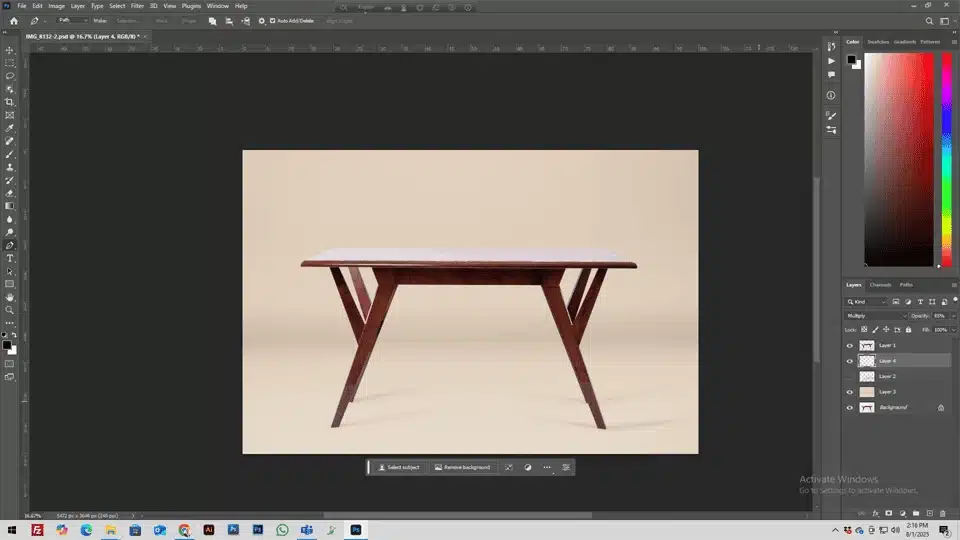
How Do You Prepare the Adobe Photoshop Workspace?
Before adding a realistic shadow effect in Photoshop, editors must analyze the raw image to identify the original light source direction and intensity. Setting up a non-destructive editing workspace in Adobe Photoshop ensures the original pixels remain untouched while allowing flexibility to fine-tune the final result.
Adobe Photoshop remains the industry standard because of its robust layer management. We always start by duplicating the base image and analyzing the highlights on the product itself. If the highlights are on the top left, the light trajectory dictates that the shadow must fall to the bottom right. Identifying whether it was direct overhead light or side-lighting dictates the exact shape we will draw.
How Do You Execute the Product Shadow Creation Workflow?
The standard operating procedure for professional shadow creation services involves a strict four-step process. Retouchers isolate the item, map the shadow footprint, simulate light diffusion, and finalize opacity gradients. This systematic approach guarantees agency-level consistency across high-volume batches.
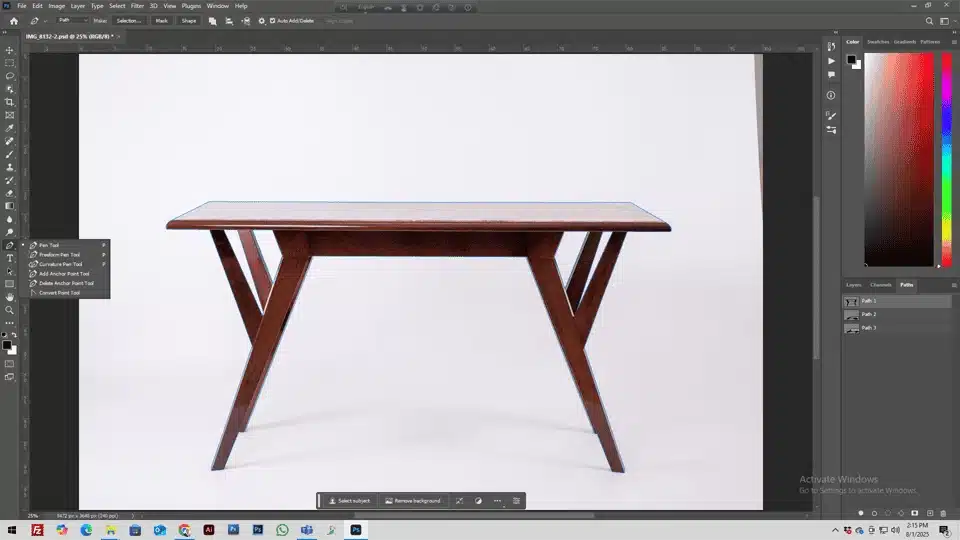
Step – 1: Object Isolation and Clipping Path Creation
- Use the Pen Tool for a pixel-perfect, manual cutout.
- Extract the item and place it on a transparent layer, completing the background removal process.
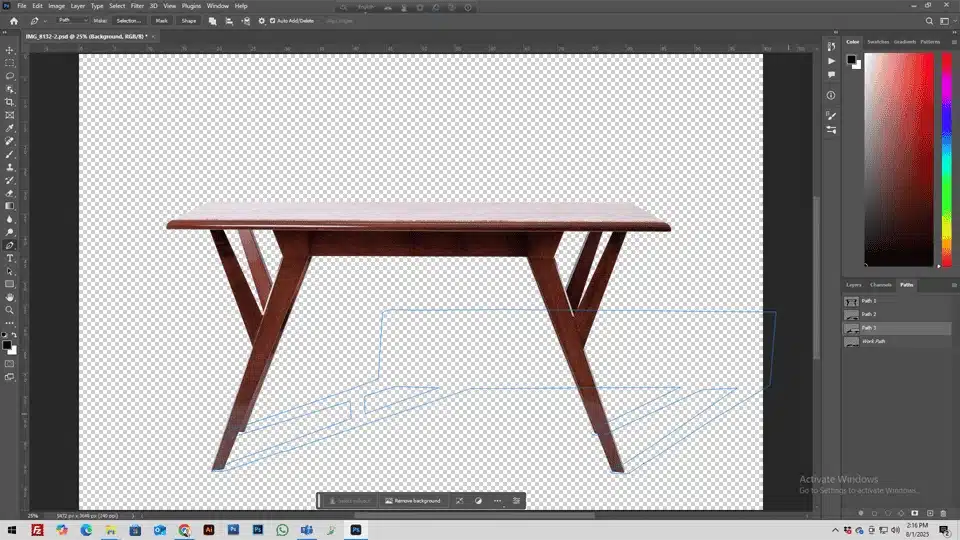
Step – 2: Defining the Base Shadow Shape
- Create a dedicated shadow layer below the primary subject.
- Map the specific shadow footprint by either duplicating the object and using the Transform Tool, or by carefully painting it in with the Brush Tool. Ensure strict perspective matching.
Step – 3: Simulating Realism with Gaussian Blur and Blend Modes
- Apply the Gaussian Blur filter to simulate natural light diffusion.
- Utilize the Multiply or Linear Burn blend modes in Photoshop so the shadow interacts naturally with the background color, rather than just painting a flat gray shape over it.
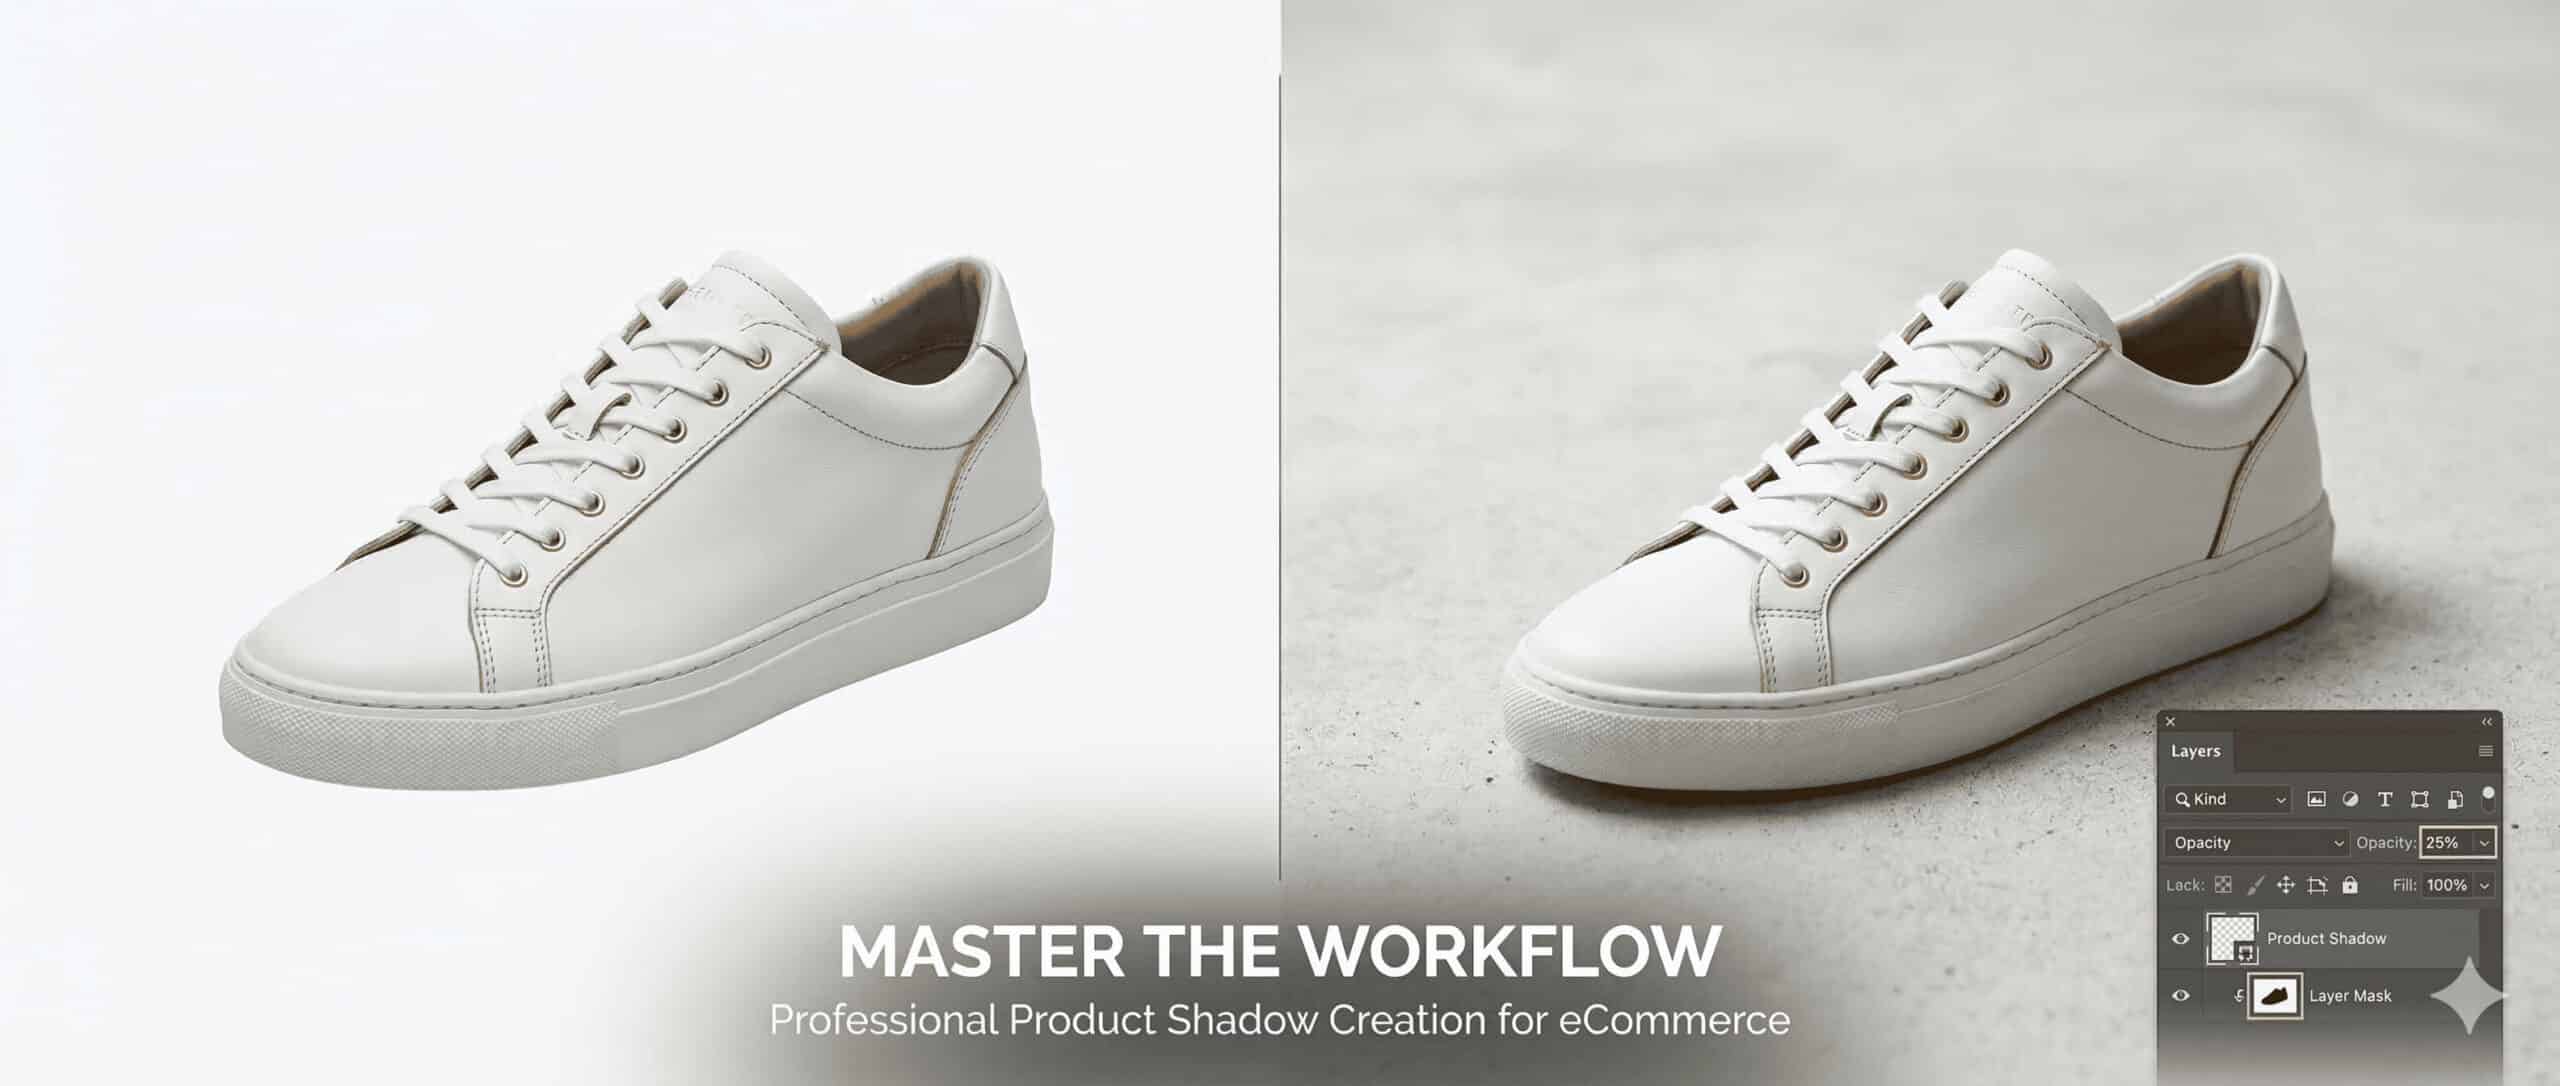
Step – 4: Perfecting the Contact Shadow and Opacity Gradients
- Darken the exact pixels where the product physically touches the surface to create a grounded “contact shadow.”
- Use layer masks and the Gradient Tool to build a smooth fade-out, adjusting the overall shadow intensity until the edges are soft and completely realistic.

What Are the 4 Main Types of Photoshop Shadows?
Different products require specific shadow techniques to look their best. The four primary styles include drop shadows for flat lays, natural cast shadows for 3D objects, reflection shadows for glossy items, and floating shadows for dynamic gear. Choosing the right type is critical for an authentic result.
| Shadow Type | Best Used For | Visual Effect | Technique Required |
| Drop Shadow Effect | Flat lay photography, apparel, UI elements | Subtle separation from the background | Slight offset, low opacity |
| Natural Cast Shadow | Furniture, footwear, bulky items | Replicates studio lighting and 3D form | Perspective warping, directional blur |
| Reflection Shadow | Jewelry retouching, glossy surfaces (glass, acrylic) | Mirror effect simulating a polished surface | Vertical flip, linear gradient fade |
| Floating Shadow | Sneaker photography, athletic gear | Hovering, dynamic look | Detached elliptical shadow below the item |
How Do You Scale Shadow Creation for High-Volume Image Editing?
Scaling a shadow workflow requires moving from individual image manipulation to batch processing. By utilizing Photoshop Actions and rigorous quality assurance, an image editing agency can streamline the post-production process and standardize results across thousands of files without losing pixel-perfect precision.
When we process large catalogs for eCommerce clients, we use Photoshop Actions to automate repetitive layer setups. Automating the transparent layer generation and blend mode assignment saves hours of manual labor. However, we found that applying the Gaussian Blur and tuning the contact shadow always requires a human editor to fine-tune, ensuring lighting specifics remain accurate across the batch.
What Are Common Mistakes in Post-Production Shadows?
Amateur editors often make predictable post-production mistakes that ruin the illusion of reality. The most frequent errors involve conflicting light sources and overly dark shadows with harsh edges. Fixing these requires strict adherence to the original lighting specifics and careful manipulation of opacity.
- The “Black Hole”: Shadows that are completely opaque with harsh edges look like dark ink stains rather than diffused light. You can fix this by relying heavily on the Gradient Tool and lowering the base opacity to 15%-30%.
- Conflicting Light Sources: Casting a shadow to the left when the product’s highlights clearly show the light is coming from the left creates a jarring visual inconsistency. Always trace the light trajectory before mapping the shadow.
Frequently Asked Questions (FAQs) About Product Shadow Services
What is the difference between a drop shadow and a cast shadow?
A drop shadow falls directly behind or slightly offset from an item, creating a subtle lift from the background. A cast shadow stretches away from the object, replicating how a physical item blocks a specific light source in 3D space.
Can I add a shadow to an image that already has a white background?
Yes, but you must first extract the product using a clipping path. You remove the existing white background to isolate the item on a transparent layer, create the new artificial shadow, and then integrate a fresh white background behind both layers.
Why should I outsource my product shadow creation?
Outsourcing to professional shadow creation services ensures agency-level consistency across massive product catalogs. It allows eCommerce businesses to scale their visual presentation rapidly without the overhead of hiring and training in-house photo retouchers.
The Bottom Line: Elevating Brand Value
- Shadows drive sales: Grounding your products with realistic shadows builds trust and directly improves eCommerce conversion rates.
- Process is everything: A strict workflow—from object isolation to fine-tuning the opacity gradient—ensures seamless background integration.
- Consistency requires scale: Handling thousands of images requires batch processing images and strict quality assurance to maintain a standardized look.
Are flat, floating product images hurting your online sales? Partner with a professional retouching team to outsource image editing and handle your large catalogs efficiently. Let experts standardize your visual presentation so you can focus on growing your store.