If your product isn’t selling, there’s a good chance your images are the problem, not your product.
I’ve seen this repeatedly: great products, decent pricing, even solid traffic… but low conversions. The missing piece is almost always how the product is presented visually.
Product photography nowadays is no longer just about “nice-looking photos.” It’s about:
- clarity and detail
- storytelling
- and most importantly, conversion intent
In this guide, I’ll walk you through the top 10 best product photography ideas, and more importantly, I’ll show you when and why to use each one so your images don’t just look good… they actually sell.
Summary
This guide breaks down the top 10 best product photography ideas that actually help improve product page conversions, not just visual appeal.
It covers essential styles like clean background product photography for ecommerce, lifestyle photography for storytelling, and macro shots for product detail, along with more advanced techniques such as 360-degree product images, creative lighting setups, and floating product photography. I also included practical tips on lighting, shooting setup, and photo editing using tools like Photoroom and Lightroom.
The key takeaway is that effective product photography for e-commerce should combine clarity, consistency, and real-world context. Instead of relying on a single style, using a mix of high-converting product images helps customers better understand the product and increases the chances of a purchase.
What Makes Product Photography “Effective”?
Before jumping into ideas, it’s important to define what actually works.
In my experience, beginners often focus too much on creativity and ignore conversion fundamentals.
Here’s what effective product photography really comes down to:
1. Clarity and Sharpness
Customers should instantly understand what they’re looking at. No confusion, no distractions.
2. Lighting Quality
Bad lighting kills trust faster than anything. Soft, even lighting usually performs best for e-commerce.
3. Emotional Connection
People don’t just buy products—they buy outcomes, feelings, and identity.
4. Brand Consistency
Your images should feel like they belong together—same tone, same style, same quality.
5. Conversion-Focused Visuals
Every image should answer a question:
- What is it?
- How does it look?
- How does it feel to use?
If your images don’t do that, they’re not doing their job.
Top 10 Best Product Photography Ideas
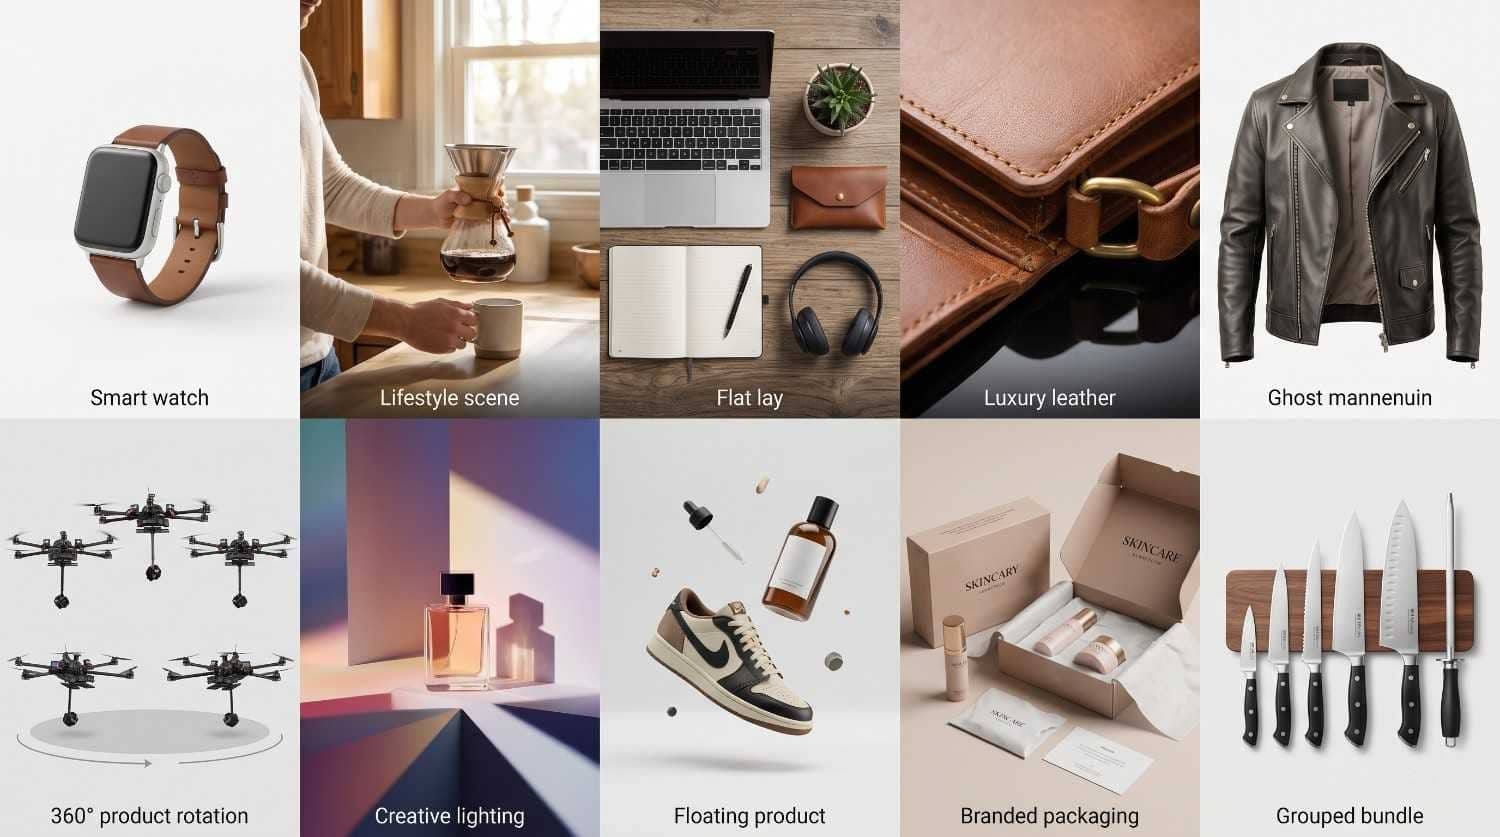
1. Clean Background (Individual Product Shot)
This is your foundation. Every product needs this.
A simple white or neutral background:
- removes distractions
- improves clarity
- works perfectly for platforms like Amazon, Shopify, and Daraz
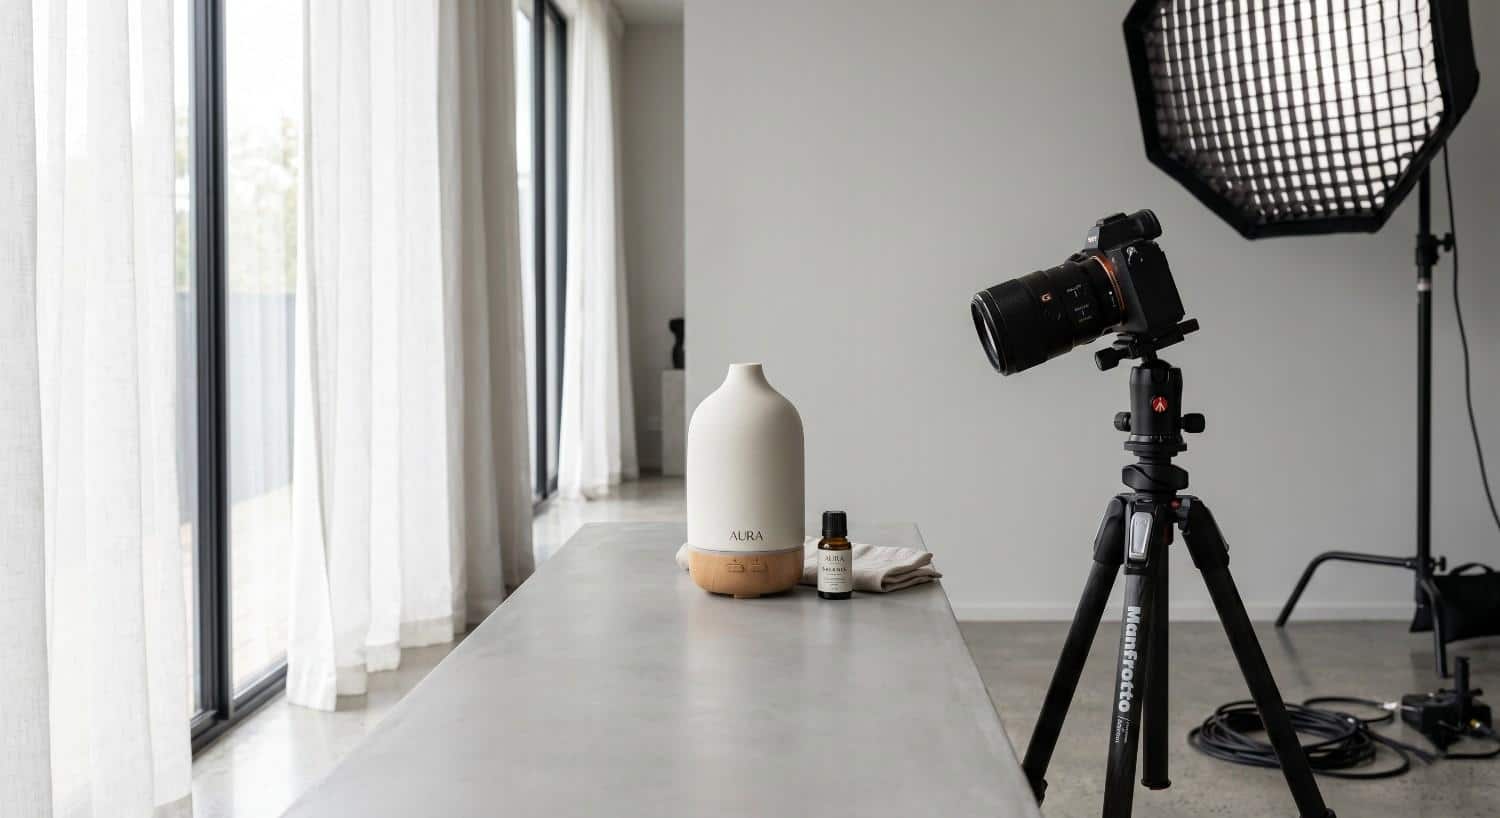
In practice:
You don’t need a studio. A window + white surface works.
Basic setup:
- Natural window light from the side
- Whiteboard or sheet as background
- Reflector (even a piece of paper) to soften shadows
One mistake I see often:
Harsh shadows or uneven lighting. Fix this by diffusing light (curtain, softbox, or paper).
2. Lifestyle Photography (Storytelling Approach)
This is where products start selling emotionally.
Instead of just showing the product, you show:
- Who uses it
- where it’s used
- How it fits into life
Simple storytelling formula:
Who + Where + Mood
Example:
A coffee mug isn’t just a mug—it’s:
- a person working from home
- morning sunlight
- calm, productive vibe
Why it works:
Customers can visualize themselves using it.
3. Flat Lay Photography (Modern Composition)
Flat lays are everywhere for a reason—they work.
Top-down shots create:
- clean compositions
- social-media-friendly visuals
- easy storytelling
Composition rules I actually use:
- Rule of thirds (don’t center everything)
- Odd-number grouping (3, 5 items feel natural)
- Use textures (wood, fabric, paper)
Flat lays are especially powerful for:
- beauty products
- accessories
- food items
4. Macro / Close-Up Photography
If your product has texture, details, or premium materials, this is essential.
In my experience, close-ups are one of the fastest ways to:
- build trust
- justify higher pricing
Tools:
- DSLR + macro lens (ideal)
- Smartphone + clip-on macro lens (budget option)
Lighting tip:
Use side lighting to enhance texture. Front lighting flattens details.
5. Ghost Mannequin Photography (Apparel Focus)
This creates that “invisible model” look you see on major fashion stores.
It gives:
- a 3D shape to clothing
- a clean, distraction-free presentation
How it works (simplified):
- Take front and inner shots of a mannequin
- Combine them in editing (Photoshop)
Why it matters:
Clothing looks more realistic than flat images, but cleaner than using models.
6. 360-Degree / Interactive Photography
This is becoming more common in 2026, especially for premium products.
It allows users to:
- Rotate the product
- view all angles
Set up basics:
- 24–72 images per rotation
- Consistent lighting and positioning
Tools:
- Sirv
- WebRotate
- Shopify 360 viewers
When to use:
- electronics
- footwear
- high-ticket items
7. Creative Lighting Techniques (Pro-Level)
Lighting is where beginners struggle—and where professionals stand out.
Techniques worth trying:
- Gradient lighting (background color transitions)
- Glow-through lighting (great for liquids or glass)
- Single-light dramatic setups
In practice:
You don’t need expensive gear. What matters is light direction and control.
One thing I’ve noticed:
Even one well-placed light can outperform a messy multi-light setup.
8. Floating / Suspended Product Shots
These instantly feel premium and modern.
You’ve probably seen:
- floating shoes
- suspended bottles
- levitating gadgets
How it’s done:
- Use string, stands, or supports
- Remove them in post-production
Editing tools:
- Adobe Photoshop
- Photoroom (AI background removal for beginners)
Why it works:
It grabs attention—especially in ads and social media.
9. Packaging & Branding Shots
Packaging is part of the product experience.
In many cases, it’s what builds trust before the product is even used.
What to include:
- box design
- labels
- materials
- unboxing sequence
In practice:
I’ve seen brands increase perceived value just by improving how packaging is shown.
10. Group / Bundle Photography
If you sell multiple products, don’t show them separately.
Show them together.
Why it works:
- encourages upsells
- increases perceived value
Visual hierarchy tip:
- main product = center or largest
- secondary items = supporting positions
Equipment Setup (Beginner to Pro)
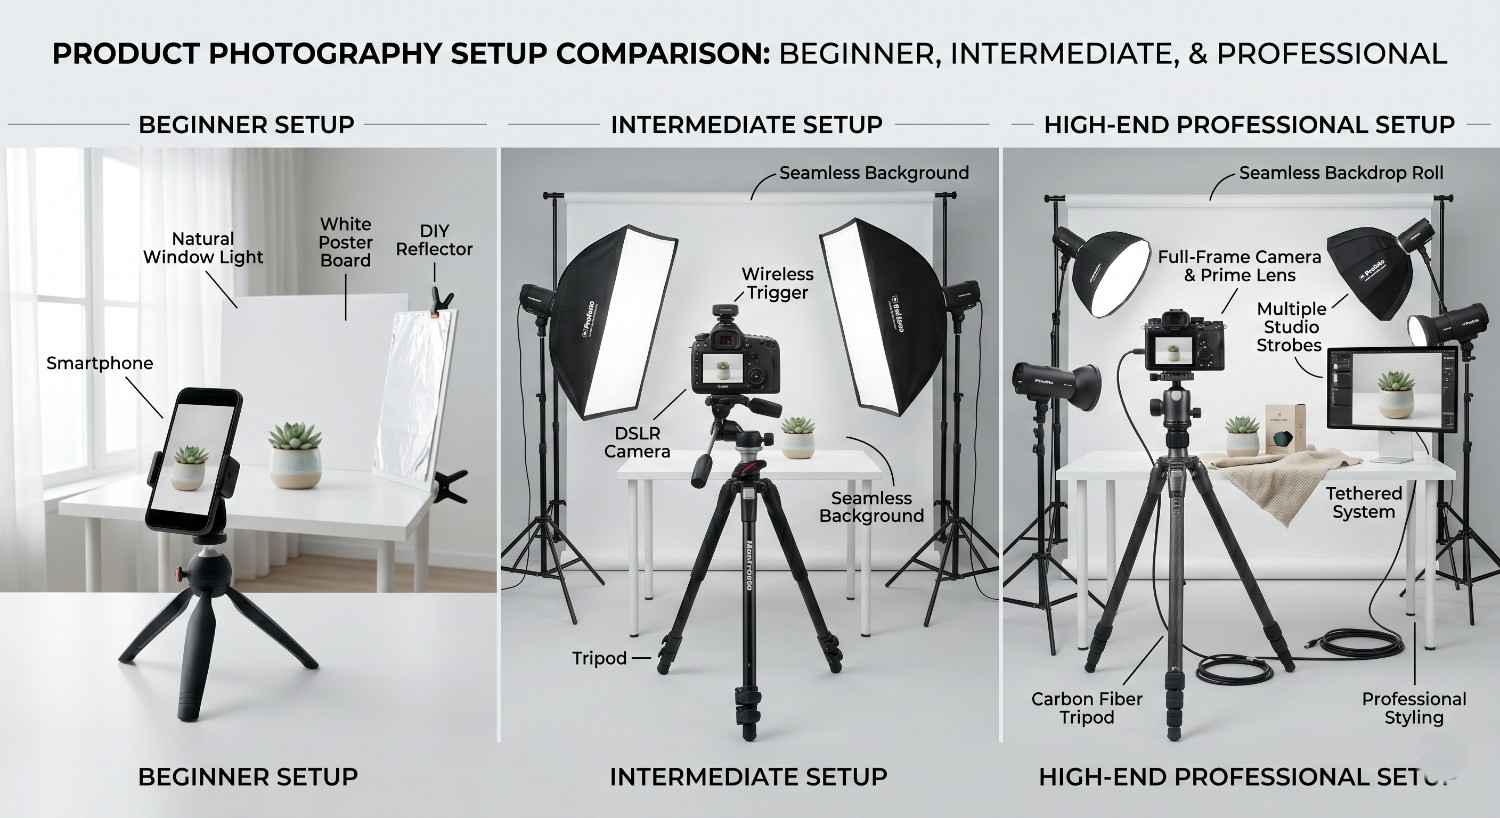
You don’t need expensive gear to start—but you do need the right basics.
Beginner Setup:
- Smartphone (modern camera)
- Natural window light
- White background
- DIY reflector
Intermediate:
- Entry-level DSLR or mirrorless
- Tripod
- Softbox lighting
Pro Setup:
- Full-frame camera
- Multiple light sources
- Studio setup
Basic checklist:
- tripod
- lighting source
- clean background
- editing software
Editing & Post-Production Workflow
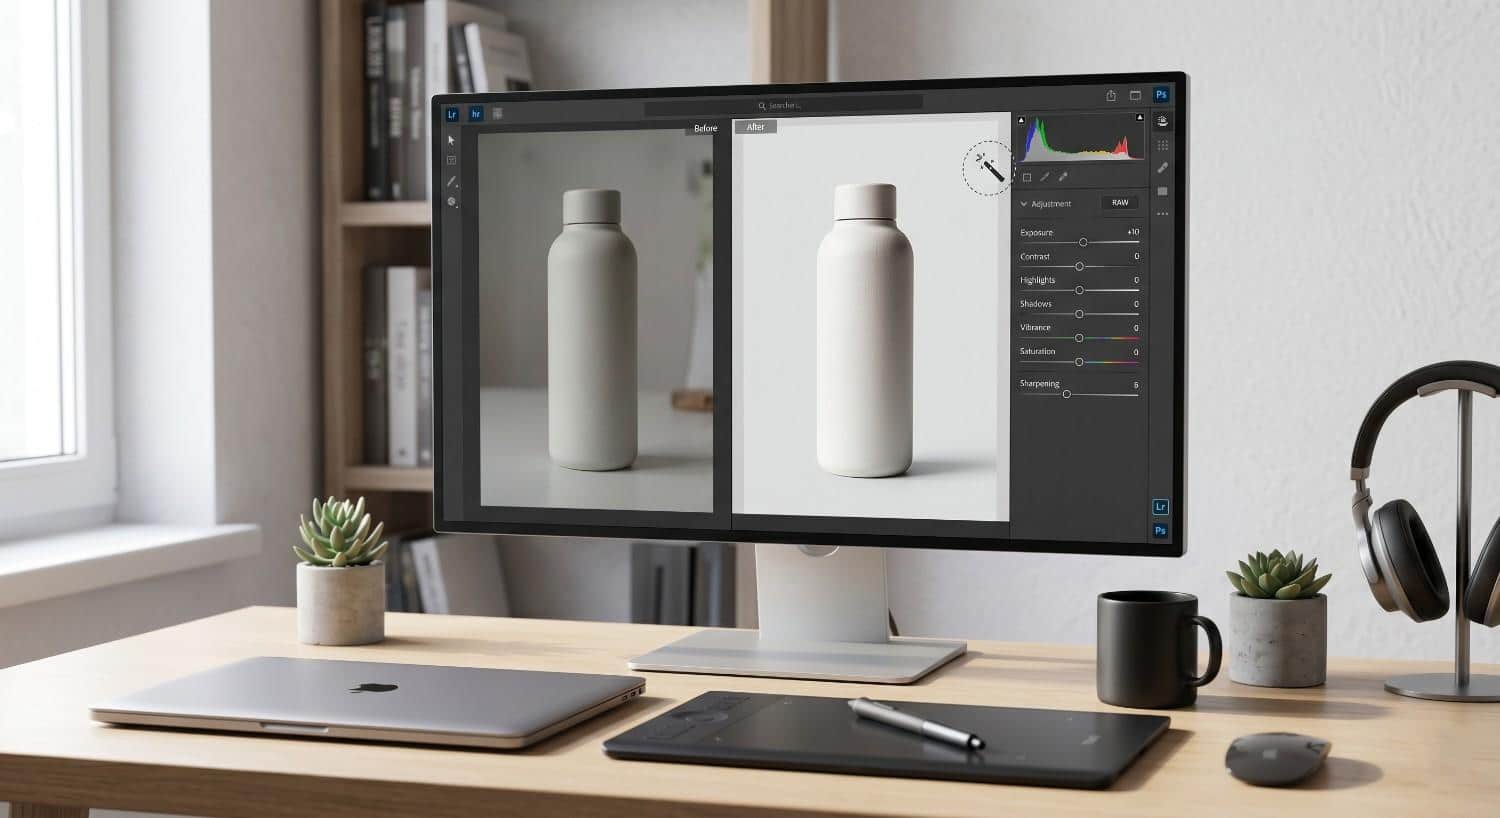
Editing is not optional—it’s where good images become great.
Tools:
- Photoroom → beginner-friendly, AI background removal
- Adobe Lightroom → color correction, exposure
- Photoshop → advanced editing
Basic workflow:
- Adjust exposure and brightness
- Fix colors (white balance)
- Remove distractions
- Sharpen details
One mistake I see often:
Over-editing. If the product looks unrealistic, trust drops.
How to Use These Images for Sales
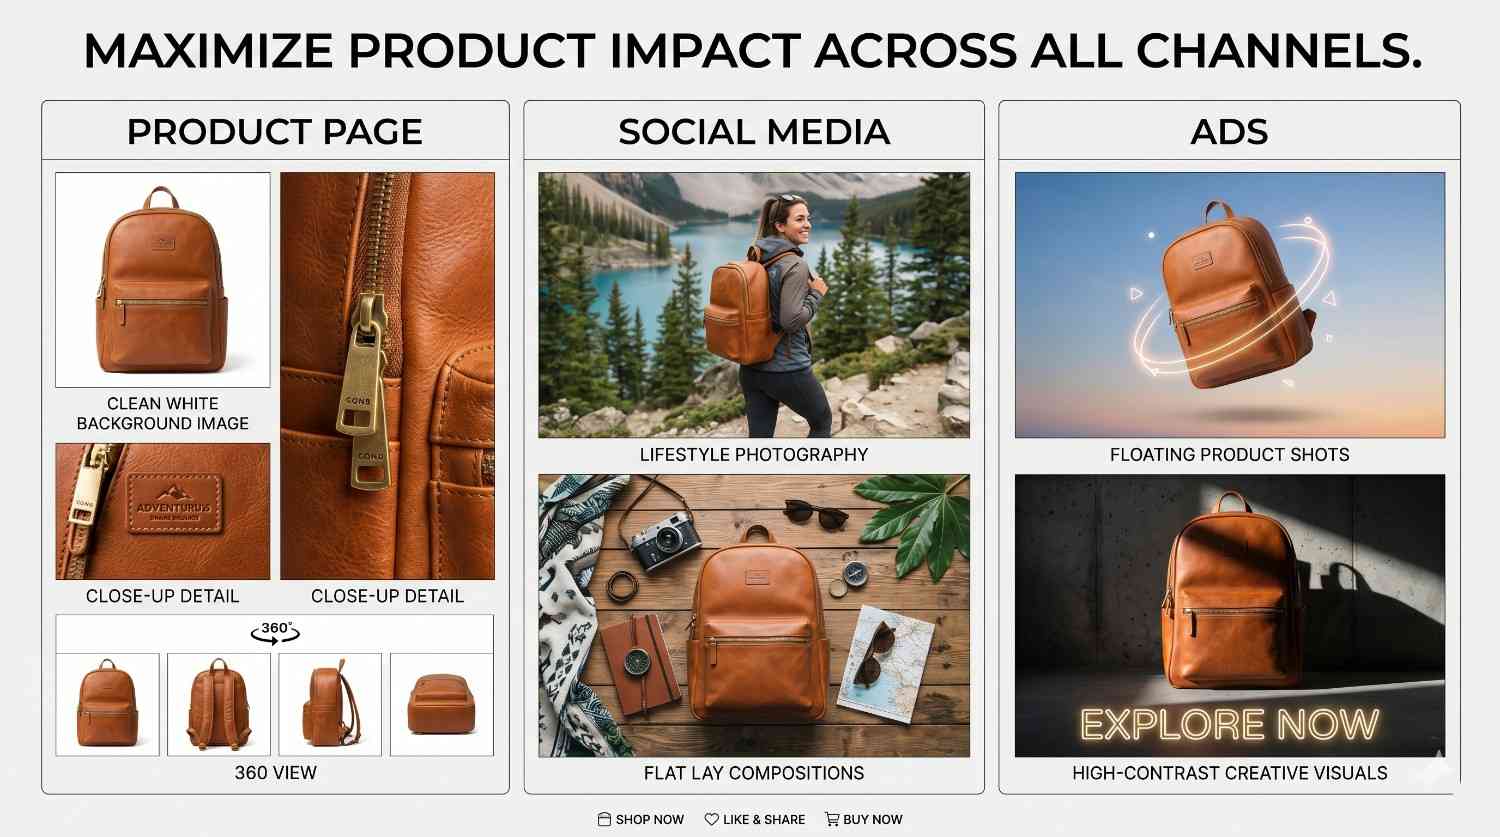
This is where most blogs stop, but this is what actually matters.
Different images serve different purposes:
Product Page:
- clean background (main image)
- close-ups (details)
- 360 view (if possible)
Social Media:
- lifestyle shots
- flat lays
- creative visuals
Ads:
- floating shots
- high-contrast images
- attention-grabbing compositions
Key insight:
Don’t use one image everywhere. Match the image type to the platform and intent.
Conclusion
Good product photography isn’t about creativity alone—it’s about strategy.
If you want better results, focus on this:
3 Practical Takeaways:
- Always start with clear, well-lit product shots
- Use lifestyle and storytelling to create an emotional connection
- Combine multiple styles instead of relying on just one
Next Step:
Pick 2–3 ideas from this list and test them on your product pages. Track what actually improves conversions—because in practice, that’s what matters most.
FAQs
What is the most important type of product photography?
Clean background product shots are the most important because they provide clarity and are required for most e-commerce platforms.
Can I do product photography with a smartphone?
Yes. In many cases, a smartphone with good lighting and proper setup can produce excellent results, especially for beginners.
How many images should a product have?
Ideally, 5–8 images, including main shot, close-ups, lifestyle, and usage images.
What lighting is best for product photography?
Soft, diffused lighting works best. Natural window light is a great starting point.
Do product images really affect sales?
Yes. Poor images reduce trust, while high-quality visuals can significantly improve conversion rates.