

Photography is more than owning a good camera. I’ve watched countless beginners buy expensive gear and then wonder why their photos still look flat. The difference between snapshots and compelling images isn’t the equipment—it’s the eye behind it.
If you want to learn how to become a good photographer, this guide walks you through every step: understanding your camera, mastering light and composition, building a daily practice habit, learning photo editing, and developing a style that’s distinctly yours.
Whether you’re shooting on a Canon DSLR, a Sony mirrorless, or even a smartphone, the fundamentals covered here apply to all of them.
Quick Answer: How to Become a Better Photographer in 7 Steps
- Learn how your camera works
- Master the exposure triangle (aperture, shutter speed, ISO)
- Understand natural and artificial lighting
- Apply composition techniques deliberately
- Practice consistently, daily if possible
- Learn photo editing for beginners using Adobe Lightroom or Snapseed
- Develop your own creative style
What Makes a Good Photographer?

A good photographer combines technical skills, creative vision, storytelling ability, and editing knowledge to create visually compelling images that communicate emotion or meaning. It’s not one skill; it’s a system of interrelated abilities that reinforce each other over time. Photography basics for beginners may seem straightforward, but how to become a professional photographer requires that all these elements work together.
In my experience, beginners focus almost exclusively on camera settings for beginners while ignoring light and composition. But senior photographers often say the opposite: the technical stuff becomes automatic, and it’s the artistic choices that define great work.
Technical Skills
- Aperture — controls depth of field, explained simply: how much of the scene is in focus
- Shutter speed — determines motion blur or freeze; central to the exposure triangle in photography
- ISO in photography — your camera’s sensitivity to light; higher ISO means more noise
- Focus modes — single-point, continuous, and zone focusing for different subjects
Artistic Skills
- Composition techniques photography — placement and arrangement of elements within the frame
- Color — understanding tone, saturation, and color correction in photography
- Perspective — choosing the angle that tells the most compelling story
- Timing — knowing when to press the shutter for the decisive moment
Creative Vision
Creative vision is harder to teach but easier to develop than most people think. It comes from studying great photographers, shooting subjects you genuinely love, and building self-awareness about what draws your eye. Photographers like Henri Cartier-Bresson and Ansel Adams didn’t just know their cameras; they had a clear point of view. Henri Cartier-Bresson’s philosophy of the ‘decisive moment’ and Ansel Adams’ mastery of tonal range in landscape photography are benchmarks every serious photographer should study. Visual storytelling photography is the invisible thread that connects technical execution to emotional impact.
Step 1 – Learn How Your Camera Works
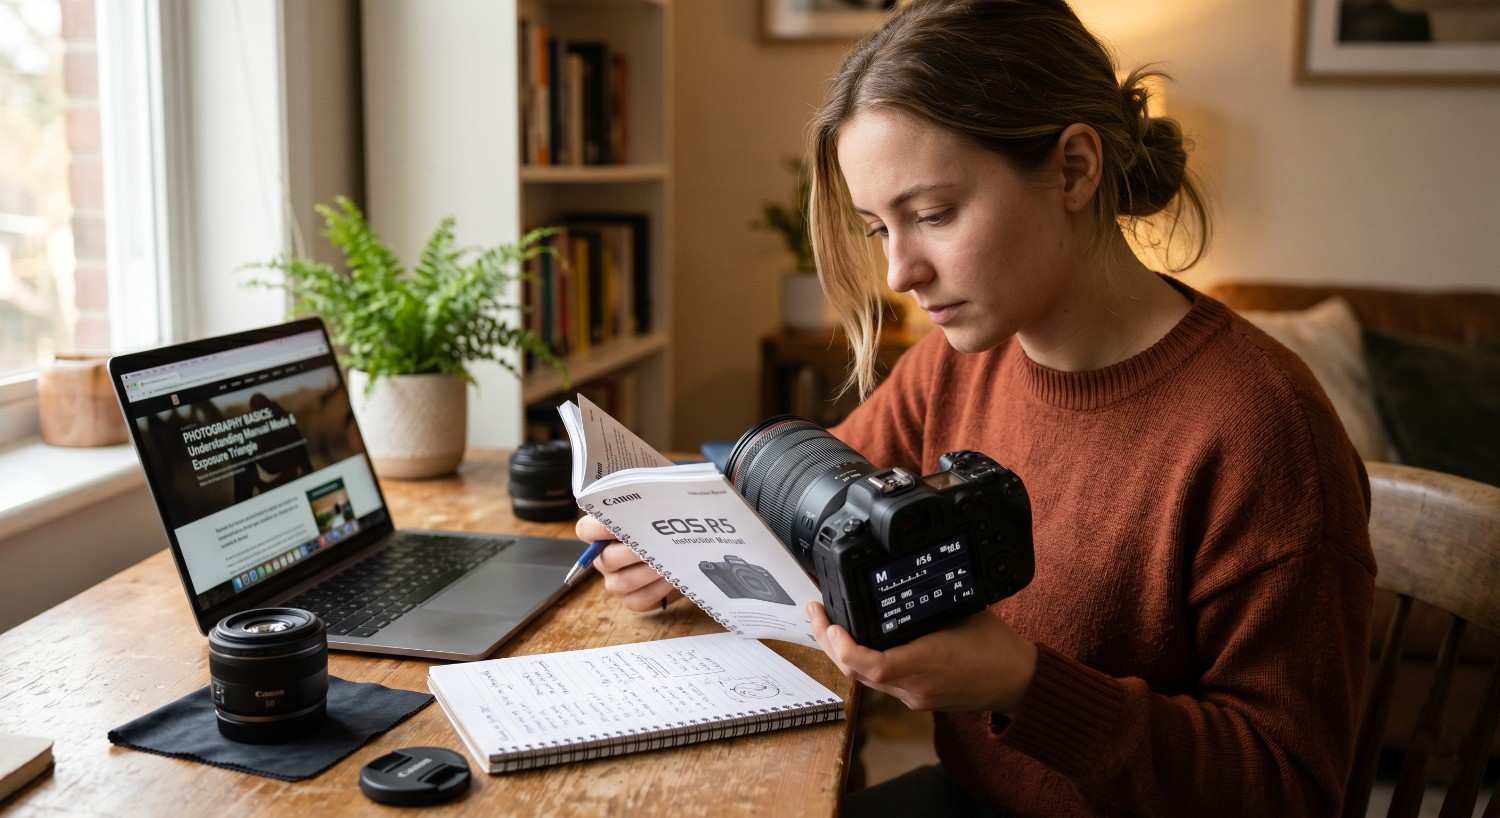
Before anything else, spend real time with your camera manual. This is the first real step in how to start photography for beginners. Your camera can only do what you tell it to, and you can only tell it what you know. One mistake I see constantly is beginners skipping this and wondering why their images don’t look the way they imagined.
Camera Modes Explained
Mode | What It Does | Best For |
Auto (A) | Camera controls all settings | Absolute beginners — learn the basics |
Aperture Priority (Av/A) | You set the aperture, camera sets the shutter | Portraits, landscapes, depth control |
Shutter Priority (Tv/S) | You set the shutter, and the camera sets the aperture | Sports, wildlife, motion photography |
Manual (M) | You control everything | Full creative control, tricky lighting |
I always recommend beginners move to Aperture Priority mode as soon as they understand what aperture does. It gives you creative control without the overwhelm of full manual mode photography.
Important Camera Settings to Learn Early
- White balance — adjust this to match your light source to avoid color casts
- Focus modes — use single autofocus (AF-S) for still subjects, continuous (AF-C) for moving ones
- Metering modes — evaluative/matrix metering works well in most situations
- RAW vs JPEG photography — RAW captures more data and gives far more flexibility in editing
RAW files are not photos; they’re data. They need editing. JPEG files are processed in-camera. For anyone serious about how to learn photography step by step, RAW is the better choice.
Step 2 – Master the Exposure Triangle
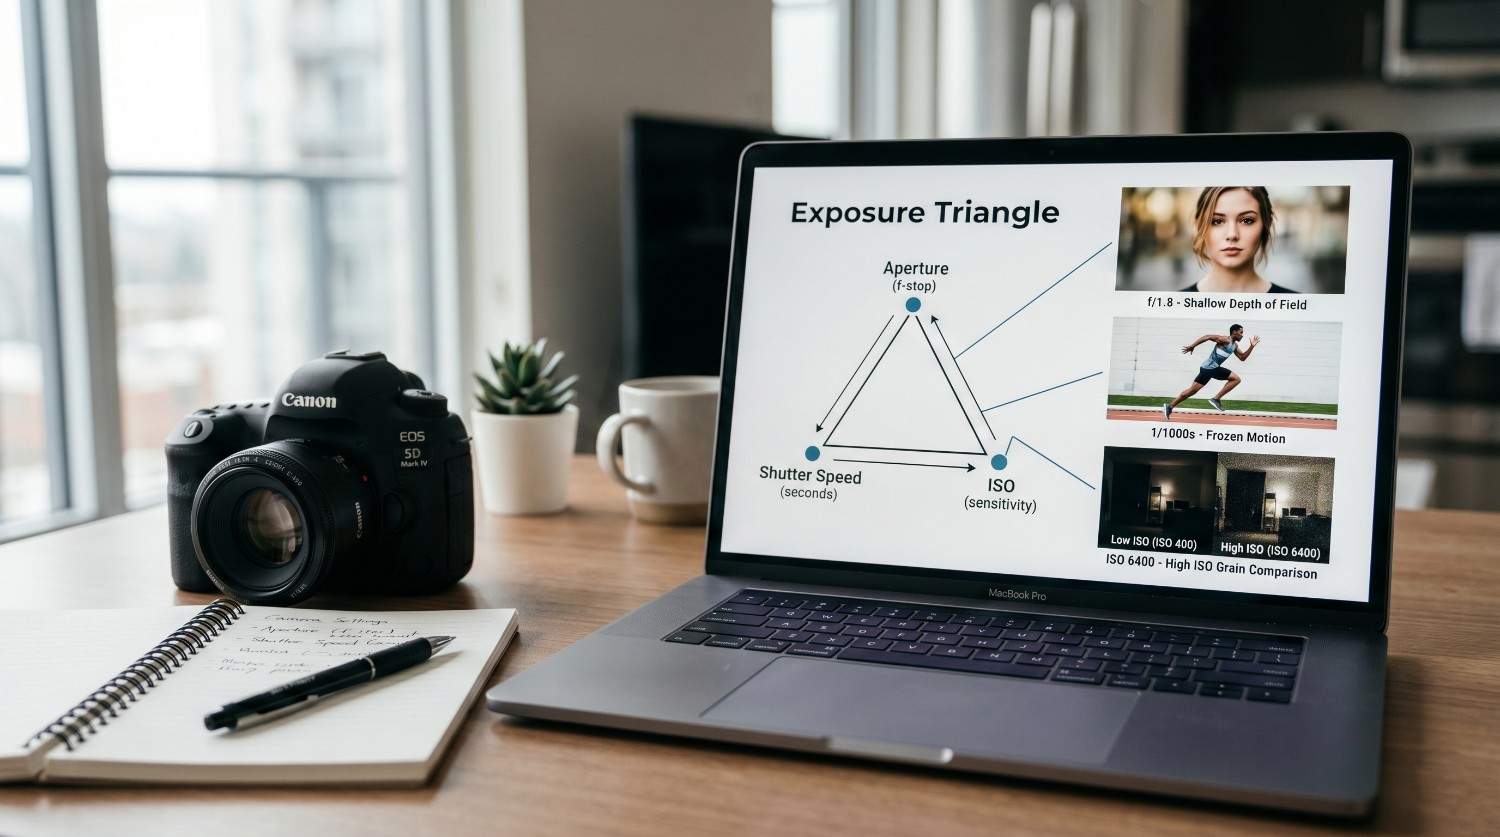
The exposure triangle photography is the relationship between aperture, shutter speed, and ISO in photography. These three settings work together to control how bright or dark your image is. Change one, and you typically need to adjust at least one other to maintain correct exposure. Understanding aperture, shutter speed, and ISO is the single most important technical milestone in learning photography basics for beginners.
Aperture
Aperture is the opening in your lens that controls how much light enters the camera. It’s measured in f-stops. Depth of field explained: a low f-number like f/1.8 means a wide opening (more light, shallow depth of field), while f/11 means a narrow opening (less light, deep depth of field).
- f/1.4–f/2.8: Great for portraits, low light, bokeh backgrounds
- f/5.6–f/8: General purpose, sharpness across the frame
- f/11–f/16: Landscape and architecture, maximum sharpness corner to corner
Shutter Speed for Motion
Shutter speed for motion is one of the most misunderstood aspects of photography for beginners. A fast shutter (1/1000s) freezes motion, perfect for sports or birds in flight. A slow shutter (1/30s or longer) creates motion blur, which can be used creatively for waterfalls or light trails.
ISO in Photography
ISO measures your camera’s sensitivity to light. Keep it as low as possible, ISO 100 or 200 in bright light, and raise it only when necessary. Most modern cameras from Nikon, Canon, and Sony handle ISO 1600–3200 cleanly, but beyond that, noise becomes visible.
How the Exposure Triangle Works Together
Think of it like a triangle: if you change one corner, you must adjust another to keep the image balanced. More aperture = more light; faster shutter = less light; higher ISO = more sensitivity but more noise. Mastering this relationship is the foundation of how to take professional photos.
Step 3 – Understand Lighting in Photography
Light is the single most important element in photography. I’ve seen mediocre compositions look stunning in beautiful light, and I’ve seen technically perfect framing fall flat under harsh midday sun. Natural light photography tips and artificial lighting techniques together make up the most critical skillset for any photographer learning how to improve photography skills.
Types of Light
Light Type | Characteristics | Best For |
Soft Light | Diffused, gentle shadows, flattering | |
Hard Light | Sharp shadows, high contrast, dramatic | Fashion, drama, architecture |
Reflected Light | Bounced off surfaces, fills shadows | Reducing harsh shadows |
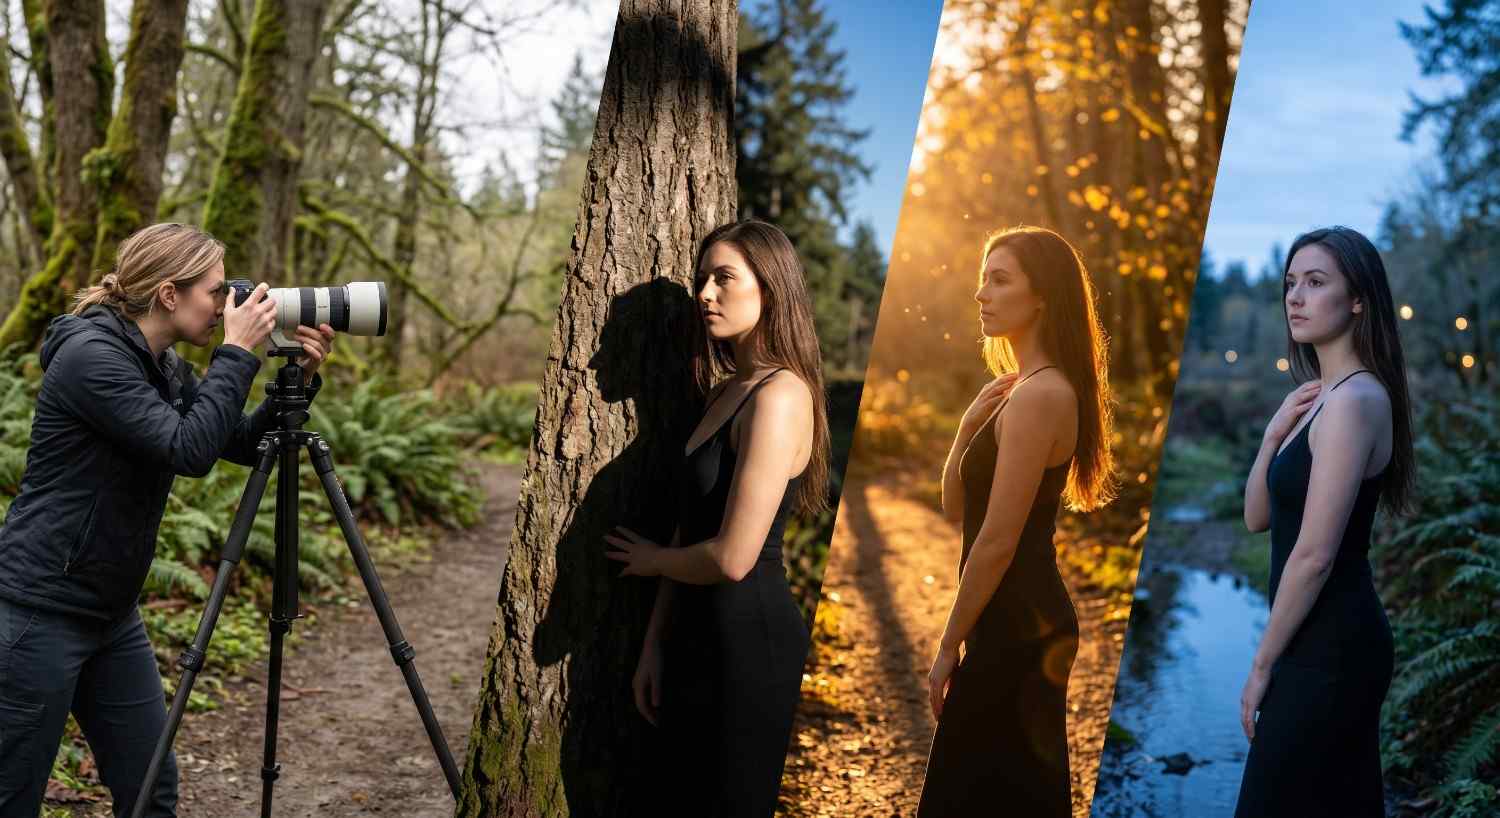
Backlight | The source behind the subject creates silhouettes or rim light | Dramatic portraits, sunsets |
Light Direction Matters
- Front light (behind camera): Even, flat, reduces shadows, good for product shots
- Side light: Creates depth and texture, great for landscapes and environmental portraits
- Backlight: Dramatic and atmospheric requires exposure compensation to avoid a silhouette
Best Times to Shoot Outdoors
- Golden hour photography (30–60 minutes after sunrise or before sunset): Warm, directional, soft light, the favourite of most outdoor photographers
- Blue hour (just before sunrise or after sunset): Cool tones, even light, moody atmosphere
- Overcast days: Nature’s softbox clouds diffuse sunlight beautifully for natural light photography tips
- Midday: Harsh overhead light creates unflattering shadows, the most challenging time to shoot
Step 4 – Learn Composition Rules (Then Break Them Intentionally)
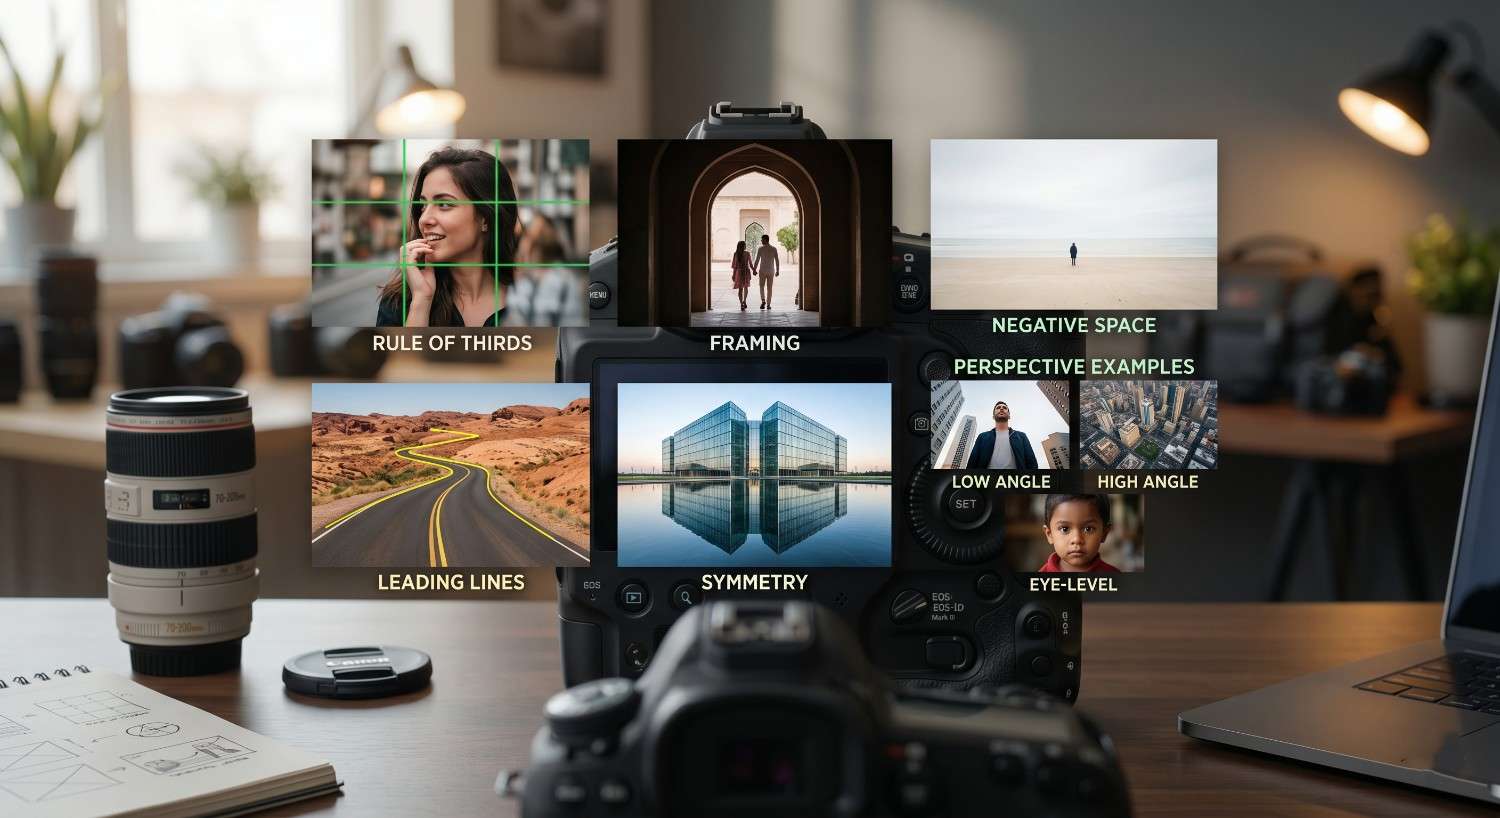
Composition techniques in photography are how you arrange visual elements within your frame. Strong composition directs the viewer’s eye, creates visual balance, and gives images a sense of purpose. These aren’t strict rules; they’re tools. Understanding photography composition ideas is central to how to become a better photographer over time.
Rule of Thirds Photography
Divide your frame into a 3×3 grid. Place your subject or horizon along one of the four grid lines or at an intersection point. The rule of thirds photography creates natural visual tension and balance. Almost every camera and phone has a grid overlay. Turn it on.
Leading Lines Photography
Roads, rivers, fences, and architectural lines naturally guide the viewer’s eye into and through the frame. Leading lines photography is one of the most powerful composition techniques photography has to offer. In practice, I walk around a scene specifically looking for lines before I even raise my camera.
Framing in Photography
Use natural elements doorways, arches, and tree branches to frame your subject. Framing in photography adds depth, context, and directs attention to your main subject.
Symmetry and Patterns
Symmetrical compositions feel balanced and visually satisfying. Patterns create rhythm. Both work particularly well in architectural and street photography a genre Henri Cartier-Bresson helped define.
Negative Space
Empty space around your subject is not wasted space; it creates emphasis, breathing room, and often communicates isolation or scale. Negative space is one of the most underused photography composition ideas among beginners.
Perspective in Photography
- Get low: A ground-level perspective on everyday subjects creates dramatic scale
- Shoot from above: An aerial or high-angle view flattens the scene and creates graphic compositions
- Eye level: The most natural and relatable angle for portrait photography
Step 5 – Practice Photography Every Day
Consistent practice is the most reliable path to improvement for becoming a better photographer. It’s not about shooting thousands of images randomly; it’s about deliberate, focused practice with intention. The photographers I’ve seen improve fastest aren’t necessarily the most talented. They’re the most disciplined.
Daily Practice Ideas
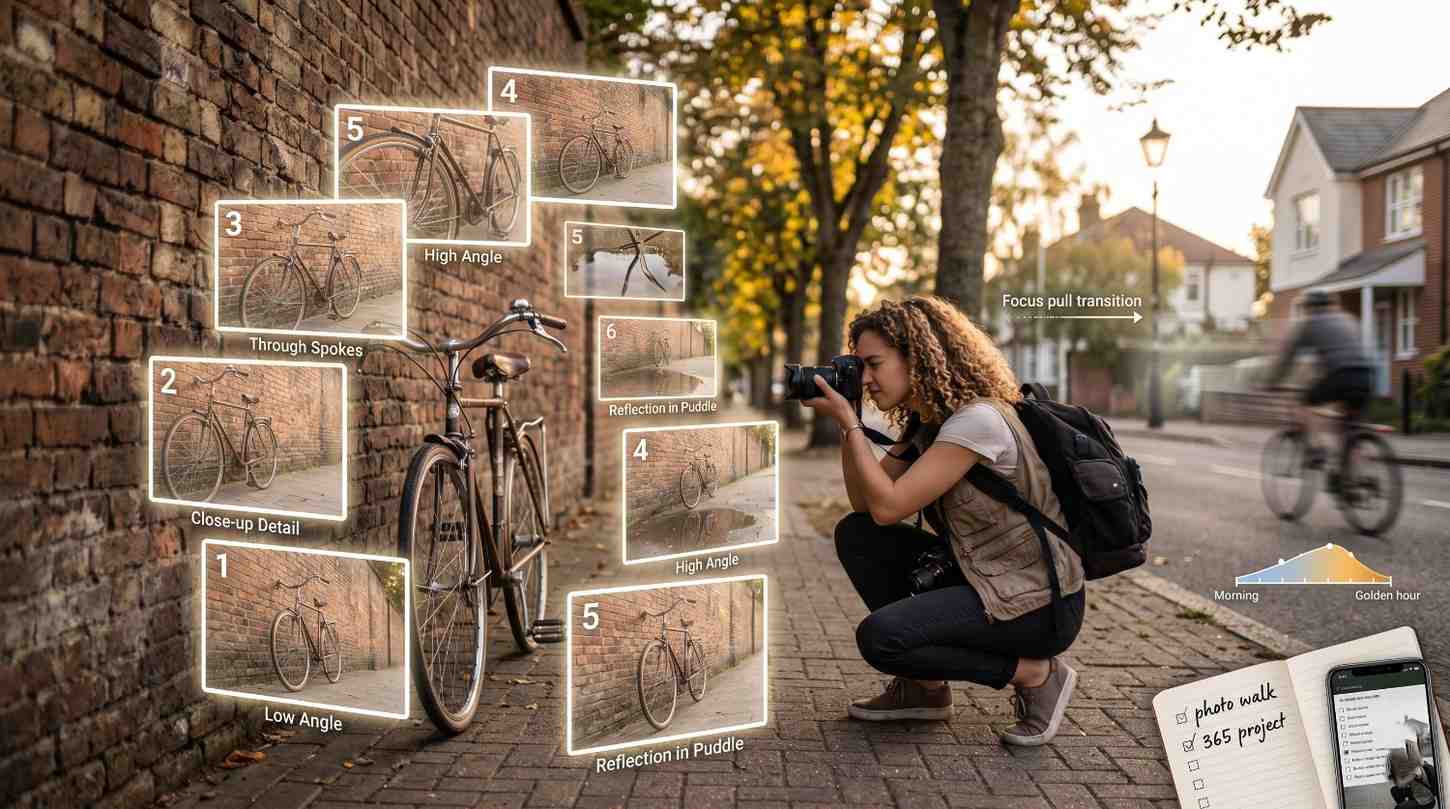
- One subject, ten angles: Pick any object and photograph it ten different ways, changing distance, angle, light, aperture
- One lens challenge: Shoot with a single focal length (50mm is ideal) for an entire month
- Photo walk: Spend 30 minutes walking and photographing your neighbourhood with a specific theme in mind
- Lighting challenge: Shoot the same subject in three different lighting conditions (morning, midday, golden hour photography)
- 365 project: One photograph per day for a year, the commitment itself will transform your eye
Common Beginner Mistakes to Avoid
Mistake | Why It Hurts | The Fix |
Shooting only in Auto mode | You never learn exposure control | Switch to Aperture Priority, then Manual mode photography |
Ignoring light quality | Flat images, regardless of subject | Study natural light photography tips and light direction first |
Overediting images | Unnatural, over-processed look | Edit with subtlety; less is usually more |
Not reviewing your work | Missing patterns in your mistakes | Review images critically after every shoot |
Gear obsession | Delays real skill-building | Commit to your current camera for 6 months |
Step 6 – Learn Photo Editing
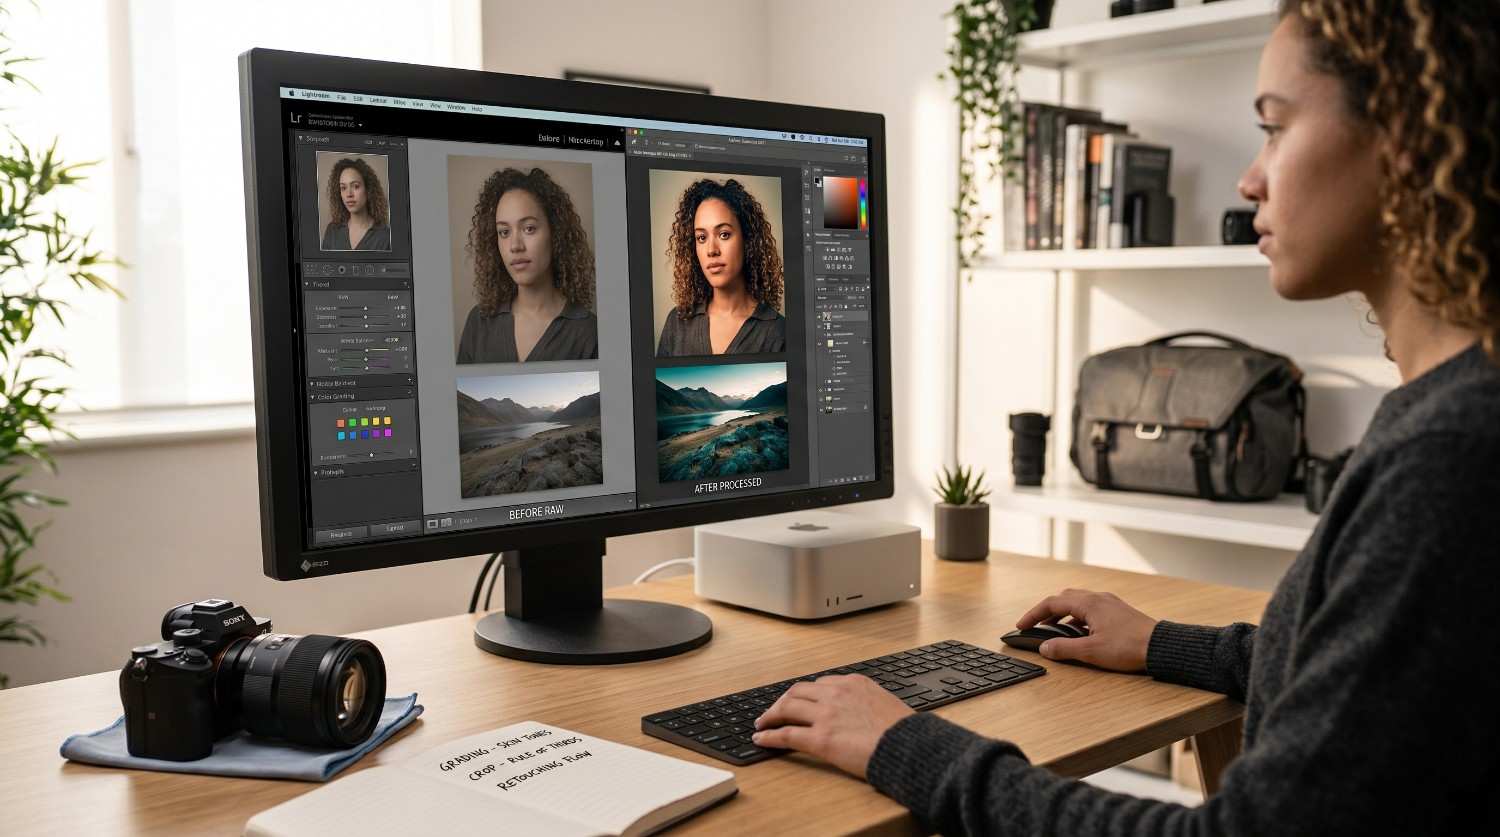
Photo editing for beginners is not cheating; it’s part of the craft. Every professional photographer edits their work. The question isn’t whether to edit, but how much and in what direction. Lightroom editing workflow and tools like Adobe Photoshop give you the control to realize the image you envisioned, not to rescue a badly shot photo.
Why Editing Matters
Even a well-exposed RAW file needs processing. Editing lets you correct white balance, adjust exposure, enhance color, and apply a consistent look across a series of images. Basic photo retouching and color correction are where your photographic vision gets fully realized. RAW vs JPEG photography matters here: RAW files give you the data you need for professional edits, while JPEGs are limited.
Basic Editing Workflow
- Crop and straighten: Fix composition and horizon first
- Exposure and highlights: Correct overall brightness; recover blown highlights
- Shadows and blacks: Lift shadow detail without flattening contrast
- White balance: Make the image feel warm, cool, or neutral as intended
- Clarity and texture: Add subtle definition without over-sharpening
- Color grading: Apply a consistent tonal look using HSL sliders or color curves for color correction in photography
- Sharpen and reduce noise: The last step applies only as much as needed
Recommended Editing Software
Software | Platform | Best For | Cost |
Desktop + Mobile | Professional Lightroom editing workflow, batch editing | Subscription | |
Desktop | Advanced basic photo retouching, compositing | Subscription | |
Snapseed | Mobile (iOS/Android) | Beginners, quick edits on the go | Free |
Lightroom Mobile | Mobile | Full Lightroom on a smartphone | Free (limited) |
I recommend Adobe Lightroom for anyone serious about photography. It’s non-destructive (never overwrites your original file), supports presets for consistent looks, and integrates with Adobe Photoshop for advanced work. For those just starting out, Snapseed is an excellent free alternative for mobile-first photo editing for beginners.
Step 7 – Develop Your Photography Style
Style is not something you design; it’s something you discover. How to develop a photography style is one of the most-asked questions from intermediate photographers. It emerges from shooting what genuinely interests you, editing consistently, and studying photographers whose work you admire. This is where photography becomes deeply personal, and your photography creativity tips start to feel your own.
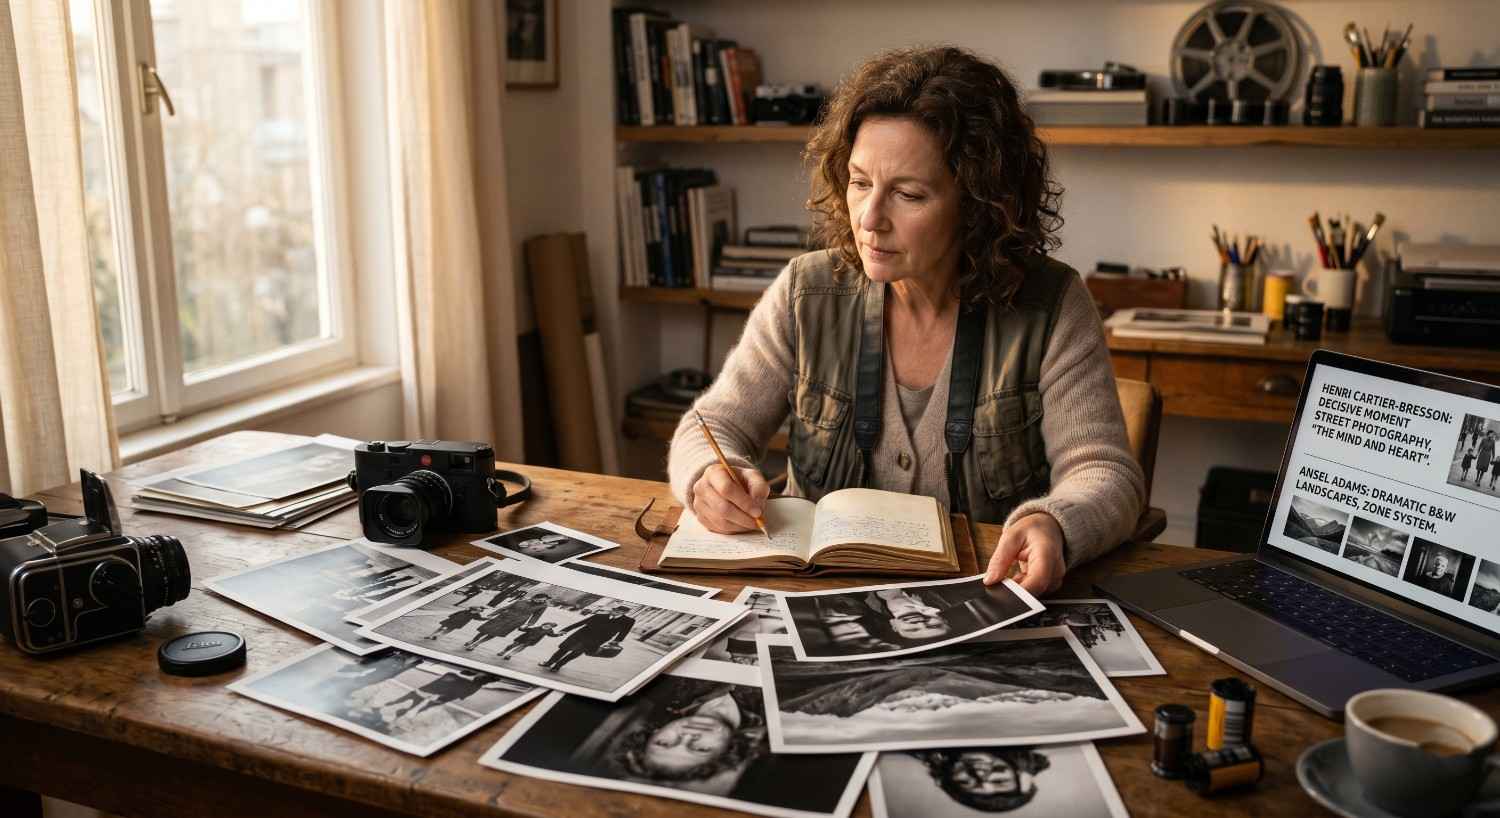
Study Other Photographers
Spend time with the work of photographers like Henri Cartier-Bresson (decisive moment, street photography), Ansel Adams (landscape photography, tonal mastery), and contemporary photographers whose work resonates with you. Henri Cartier-Bresson’s instinctive use of geometry and human emotion, and Ansel Adams’ meticulous approach to exposure in landscape photography, are worth hours of study. Don’t imitate absorb. Then put the camera back in your hands.
Shoot What You Love
Style develops fastest when you shoot subjects that genuinely interest you. Photography creativity tips all point to the same truth: passion produces consistency, and consistency produces style. Visual storytelling photography starts with a personal point of view. If you love architecture, shoot it obsessively. If it’s street life, spend time in places that move you.
Analyze Your Best Images
Every few months, review your favourite images and ask yourself:
- What subjects appear most often?
- What colours and tones draw me naturally?
- What mood or emotion do my best images share?
- What compositional choices appear repeatedly?
These answers will tell you more about your emerging style than any advice I can give. It’s the self-reflection part of how to become a professional photographer that’s most often skipped.
Best Camera Gear for Beginner Photographers
Gear matters less than you think, but it’s not irrelevant. Here’s a practical starting point for how to start photography for beginners:
Gear | Recommendation | Notes |
Camera Body | Canon R50, Nikon Z30, Sony ZV-E10 | Any modern mirrorless entry-level is excellent |
Lens | 50mm f/1.8 (kit lens first) | The 50mm trains your eye; prime lenses build discipline |
Tripod | Any stable travel tripod | Essential for long exposure, landscape, and self-portraits |
Memory Cards | Fast UHS-I or UHS-II card | Speed matters for burst shooting and RAW files |
Editing Software | Adobe Lightroom or Snapseed | Start free, upgrade as your skills grow |
How Long Does It Take to Become a Good Photographer?
Most beginners can build a strong foundation in photography basics within 3 to 12 months with consistent practice, feedback, and editing experience. This assumes you’re shooting regularly at least a few times per week and actively reviewing and learning from your images.
Reaching a professional or advanced level understanding how to become a professional photographer in full typically takes 2 to 5 years, depending on how deeply you practice and how frequently you seek critique. Photography, like any visual skill, rewards volume and reflection in equal measure.
The photographers who improve fastest are not the most naturally gifted — they’re the ones who review their work honestly, seek feedback often, and shoot with intention rather than habit.
Frequently Asked Questions
Can I learn photography from scratch without an expensive camera?
Yes — absolutely. Skill, light awareness, and composition techniques matter far more than the camera body. Many professional-quality images are captured on entry-level Canon, Nikon, or Sony cameras, or even on smartphones. The camera is a tool. Learning to see is the skill.
How many photos should beginners take to improve?
Aim for hundreds of photographs per week rather than dozens. Volume accelerates learning how to improve photography skills, but only when combined with intentional review. Shoot a lot, but also take time to analyse what worked, what didn’t, and why.
Should beginners shoot RAW or JPEG?
RAW vs JPEG photography: RAW is the better choice for anyone interested in editing and improving. RAW files retain significantly more image data, giving you far more control over exposure, white balance, and colour in post-processing. JPEG is processed in-camera and permanently discards data.
Is photography hard to learn?
The core photography basics for beginner camera modes, exposure triangle, rule of thirds photography can be understood within a few weeks of focused learning. Mastery, however, takes consistent practice over months or years. Photography is easy to start and genuinely rewarding to pursue at any level.
Can I learn photography step by step completely by myself?
Yes. Online tutorials, YouTube channels, and structured courses from platforms like Skillshare or Udemy make self-teaching how to learn photography step by step highly effective. Pair self-study with community feedback, photography forums, Instagram critique groups, or local photography clubs to accelerate progress significantly.
What is the most important skill in photography?
Learning to see light is the most important skill. It directly affects every image you make more than any camera setting, gear choice, or editing decision. Natural light photography tips, golden hour photography, and understanding how light direction shapes mood are the foundations of how to take professional photos. Once you develop an eye for light quality, direction, and timing, everything else becomes clearer.
Final Thoughts
Photography is a balance of technical control and artistic vision. Neither alone is enough. The best photographers I’ve encountered understand their cameras instinctively, aperture, shutter speed, ISO, depth of field explained, manual mode photography, and use that freedom to focus entirely on the image: the light, the moment, the story. That’s the essence of visual storytelling photography.
If you’re just starting with photography for beginners, don’t let perfection slow you down. Begin with your current camera, learn one concept at a time, and go out and shoot.
Three practical takeaways to start with today:
- Switch your camera to Aperture Priority mode and spend one week learning how f-stops and depth of field affect your images
- Go on a 30-minute photo walk with a single theme — natural light photography, leading lines photography, or texture — and shoot 50+ images
- Download Adobe Lightroom Mobile (free) or Snapseed and process five of your best recent photos using a basic Lightroom editing workflow
If you have questions about any of these steps, drop them below. How to become a better photographer is a long game; the important thing is to start.